NEXEN ATX All Terrain 10,000 Mile Review

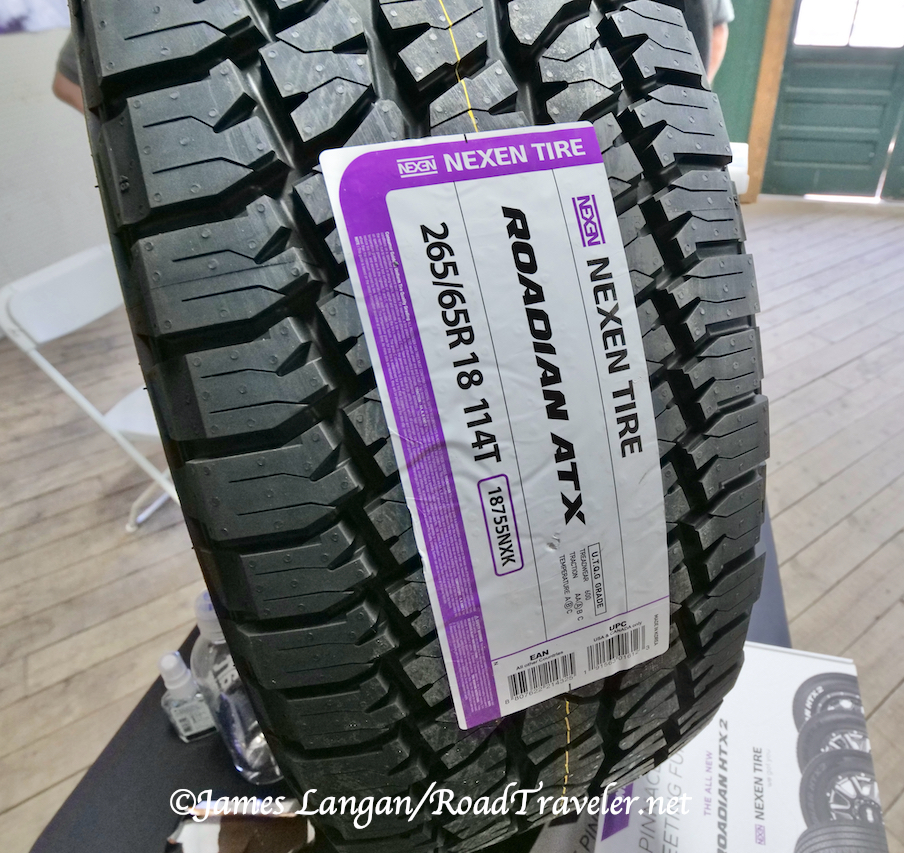
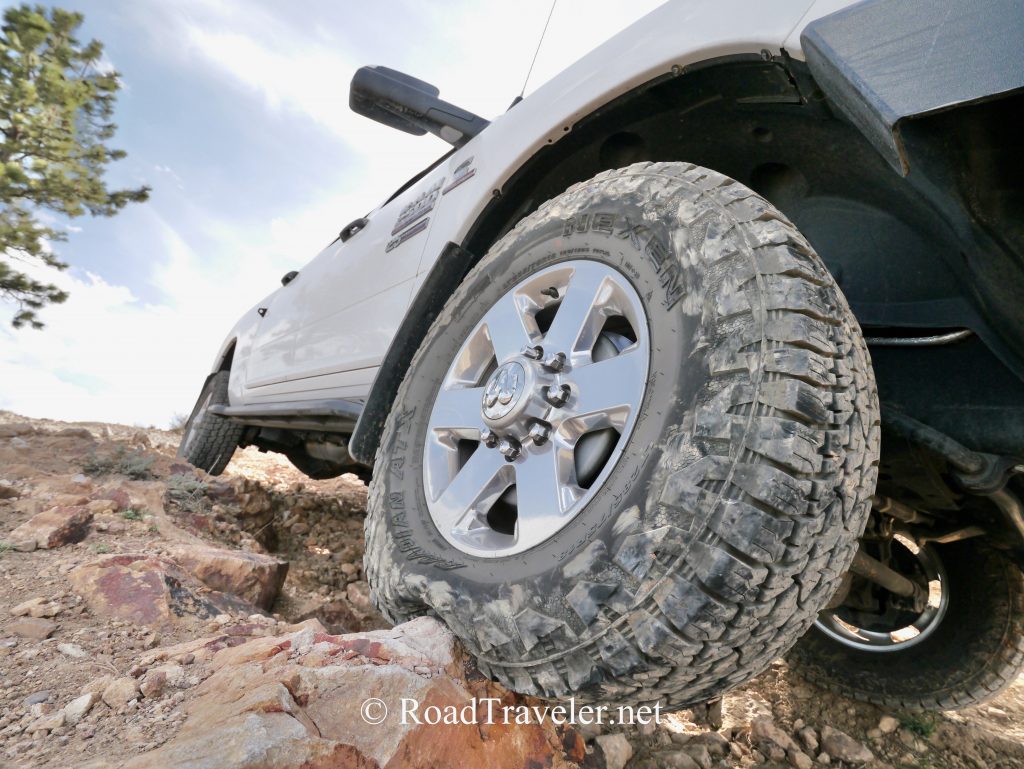
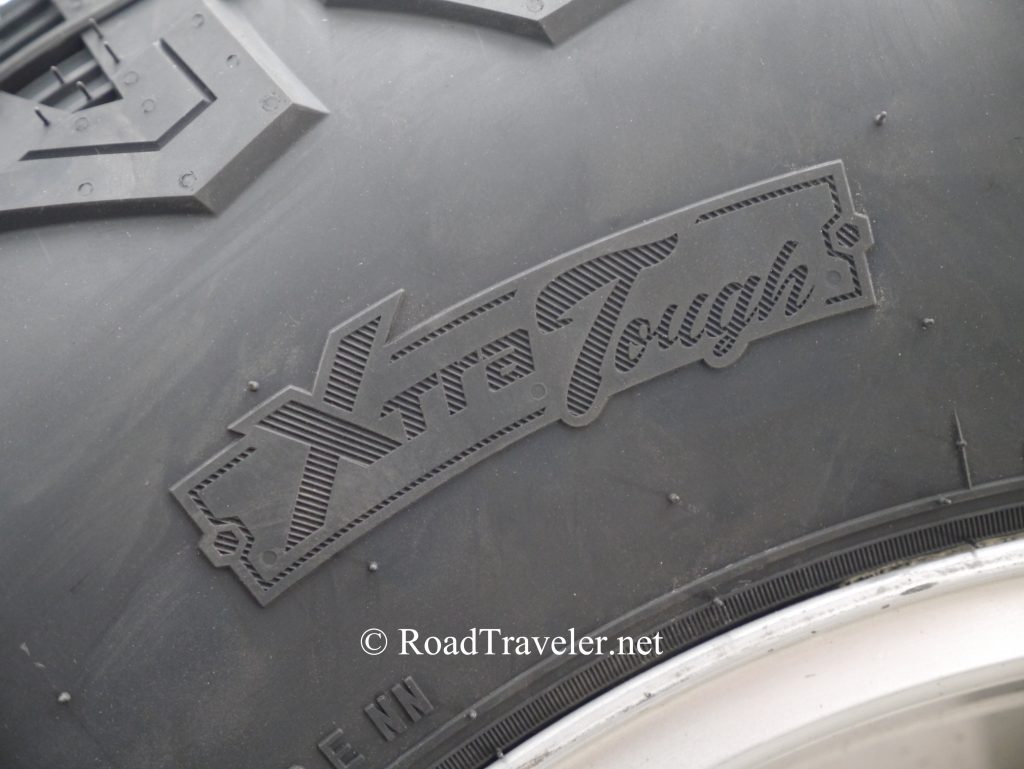
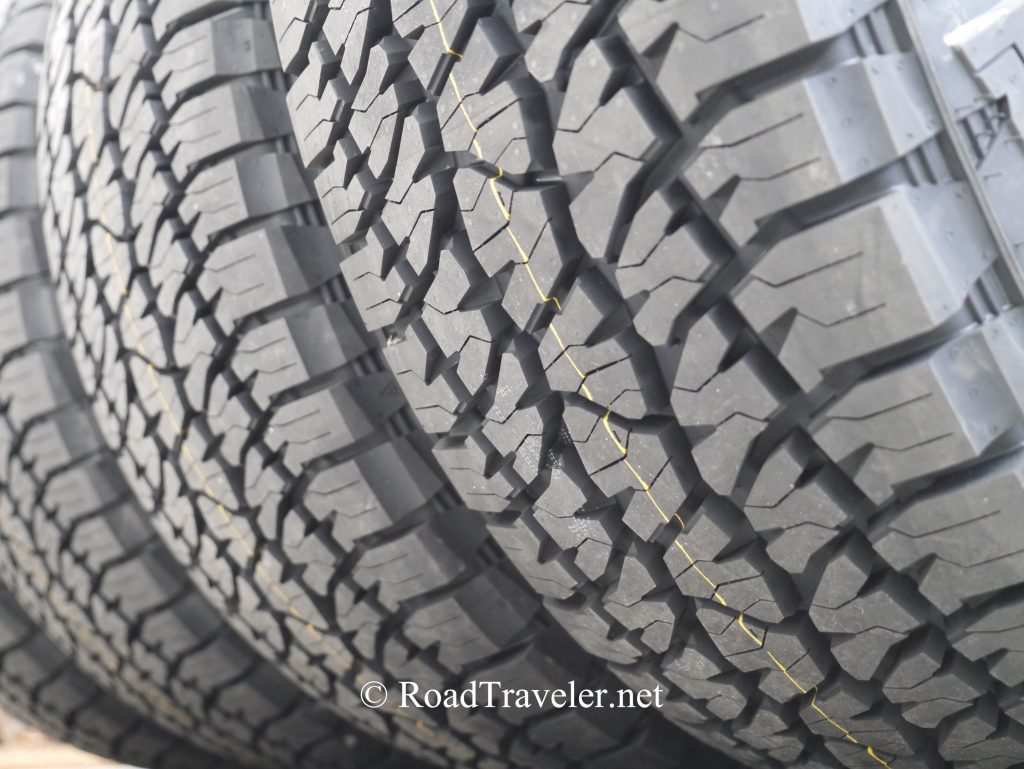
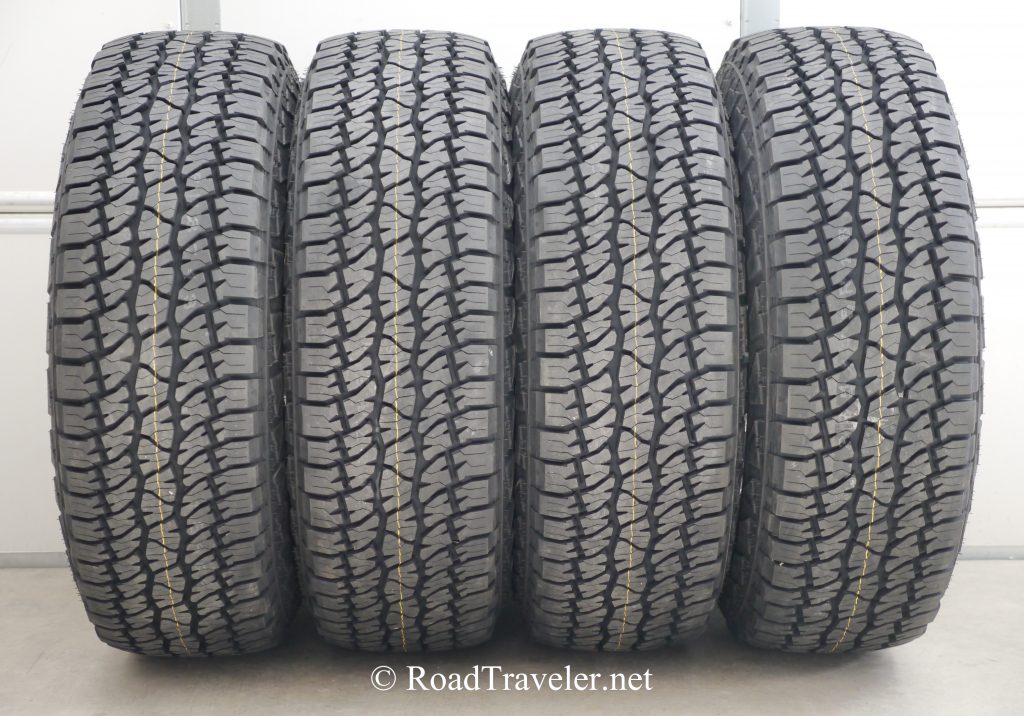
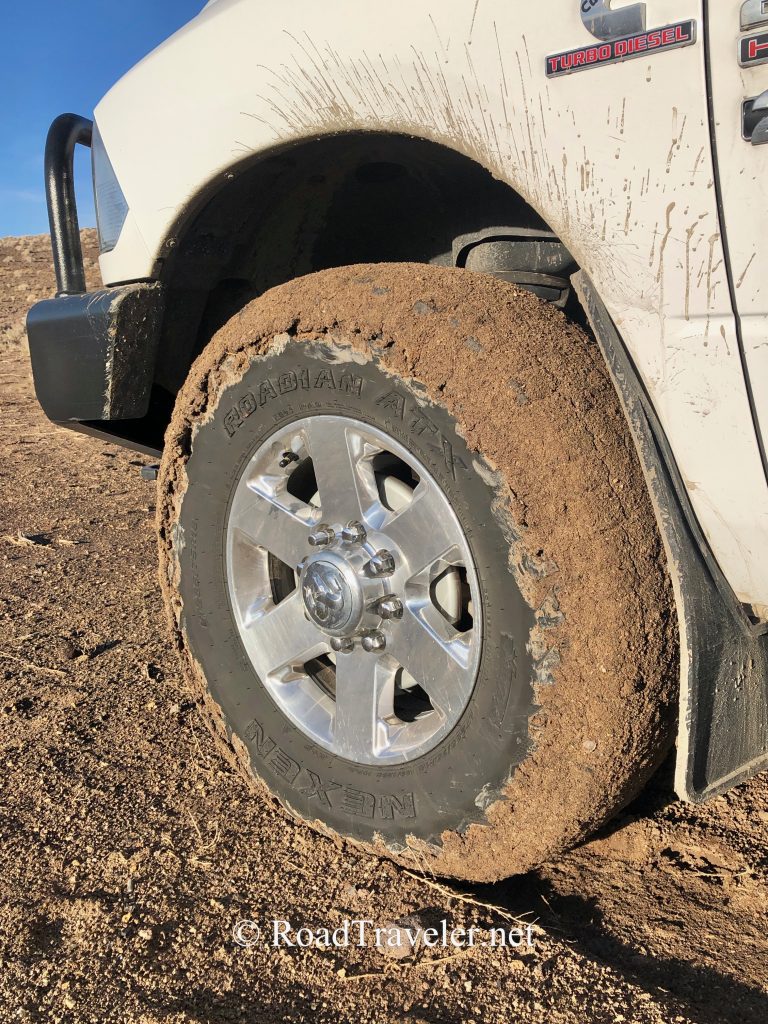
Although I have favorite tire treads and brands, I am always interested in trying something new or different. Nexen’s Roadian ATX all-terrain is a new 5-rib tread designed specifically for light- and heavy-duty pickups and full-size SUV wagons, and available in a whopping 63 sizes. Lugs on the upper sidewall/shoulder offer both traction and protection from damage, while adding a tough and aggressive look. The shoulder lugs are the same on both sides, but one side adds a cobblestone pattern between the lugs and inside the raised black letters. 

Beefy sidewall lugs put to work off-road.

All LT-sizes have 16/32” of tread depth, most have 3-ply sidewalls, as well as being 3-Peak Mountain Snowflake (3PMSF) severe winter rated, with the exception of the larger flotation offerings. Light-truck sizes have a substantial 60,000 miles tread warranty.  

Tread depth is 16/32” on all LT Sizes.

At the 2022 Overland Expo West show in Flagstaff, Arizona, a handful of journalists were treated to a sneak peek briefing introducing the new ATX, as well as the new HTX2 highway-terrain design. The HTX2 is also 3PMSF certified, which is downright impressive! The introductory press release information was embargoed until June, and in July Nexen sent a set for a longterm evaluation in a favorite size, LT285/75R18E.   

3-Ply Construction

Nexen boasts the ATX has an industry-best (for an all-terrain) reinforced 3-ply sidewall, longer tread life, and increased durability to perform well under heavier loads and at higher pressures. The increased rigidity is designed to enhance cornering stability and load support. The sidewall construction increases puncture resistance both on- and off-pavement, and the aggressively angled shoulder lugs improve durability. 

Nexen claims the sidewalls are XTRA Tough, and that’s been my experience thus far.

Siping

All-terrains and all-seasons invariably have more siping than most higher-void designs, and the ATX is no exception with two or three sipes in every tread block. Nexen’s sipe technology is designed to increase tread-to-road contact, and overall handling characteristics as they wear.  Of course the siping helps it earn the 3PMSF severe winter certification. 

5-Rib ATX is a good looking A/T.

Mount And Balance Take One

The 67-pound LT285/75R18 ATX with a load index of 129 (4,080-lb capacity each at 80 psi) were mounted and balanced on forged-aluminum OEM Ram 18-inch wheels at my local Discount Tire. They used my preferred single-plane, static balancing method, which puts less weight on the wheels. An average of only two ounces was needed to balance the set. However, zeroing on a balancing machine is not always the whole story. 

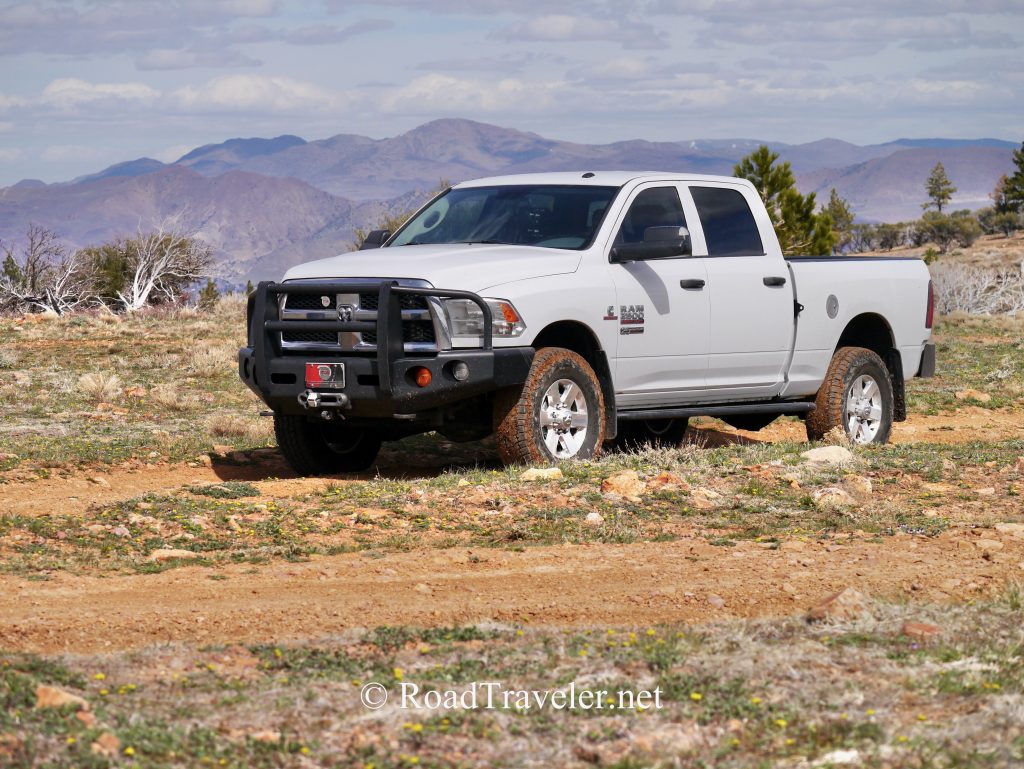
With the ATX on my 2014 crew cab for my initial test drive, even with the additional help from Centramatic Wheel Balancers, there was some roughness that I thought was a possible balance issue. Discount Tire rebalanced them using the dual-plane dynamic method, which did not add substantially more wheel weight, and lowered the perceived imbalance. 

First Rotation Issue

After 2,500 miles I performed the initial reward-cross rotation, but the ATX from the rear axle were not happy up front, with shakes and vibrations that increased with speed. 

To help diagnose the problem the suspect tires were returned to the rear axle. After placing the AAM 11.5 on jack-stands and taking all appropriate safety precautions, I let the drivetrain turn the ATX at low-idle as if on a spin balancer. The offending wiggling and hopping was obvious, shared with my contact at Nexen, and they immediately sent a replacement set. 

The positive response from Nexen was refreshing. No product is perfect and there are occasionally defective or blemished examples that sneak through (I’ve even had a bad tire from highly-respected Toyo), and because of the professional relationship I contacted the manufacturer directly.  

Are Your Wheels The Problem?

It should be noted that the wheels are often the source of balancing issues. In many cases it is the wheels, not the tires, that need most of the weight for the assembly to be balanced. Modern rubber from top manufacturers, even larger light-truck mud-terrains, are quite round and true, usually requiring little weight to roll smoothly. Just a few short decades ago light-truck radials were not nearly as good or capable, and had difficulty handling the loads and power of heavy-duty diesel pickups. 

Wheels have also become larger, so even though most are aluminum they can be much heavier than older, smaller diameter rims. These forged aluminum OEM 18-inch Ram wheels weigh 30-pounds each, where the equivalent 20-inch Ram wheels weigh 40 pounds. In contrast, the forged-aluminum Alcoa-made sixteens on my 1996 F-350 weighed only 16 pounds. 

Confident that my eighteens were not the issue, having continually used them for several sets of  tires, I had an extra set available if necessary for further diagnosis. 

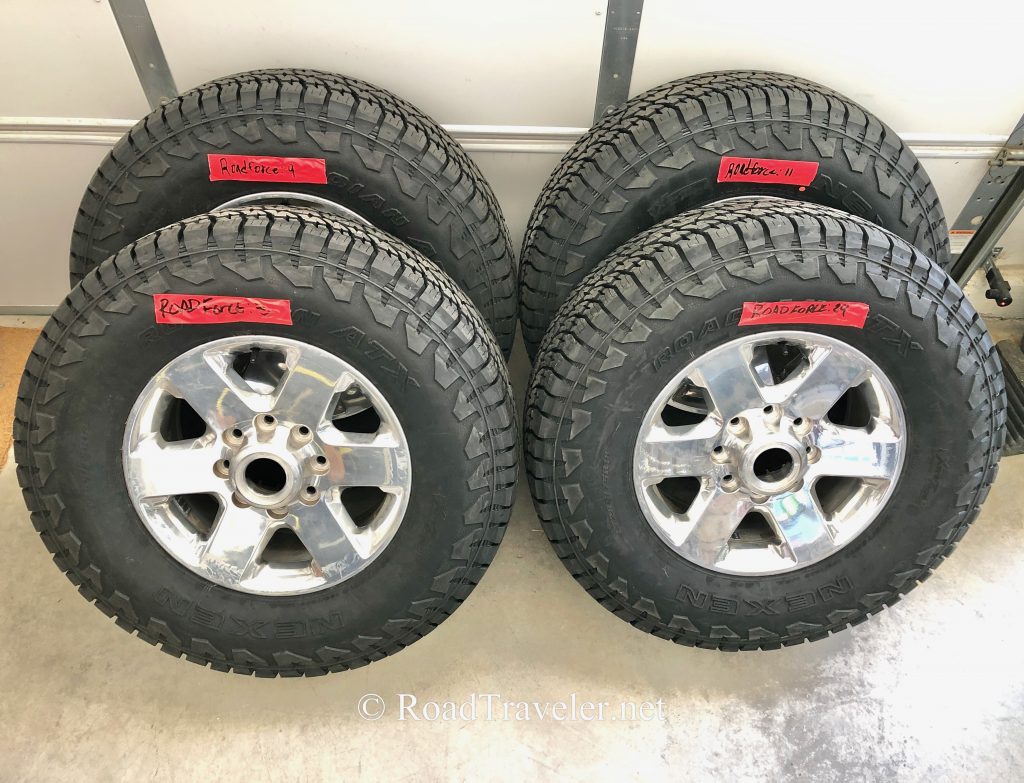
Mount And Balance Take Two 

Discount Tire mounted the replacement set of LT285/75R18 Nexen ATX, and again I requested a static, single-plane balance, plus I asked them to record the road force as measured by the machine during the process (Road force is summarized below.)

As the included chart shows, this set needed little weight to balance, none in the case of tire/wheel combination #2, and the road force measurements were also low. Tire #1 had the most road force at 29, but a typical maximum allowable road force for a P-rated (passenger car) tire is 35, and much higher for a big LT tire. 

Road Force documented during the second set mount and balance.
Tire Weight oz. Road Force Location 
#1 1.25 29 Left-rear
#2 0 11 Right-rear
#3 4.75 9 Left-front
#4  1.75 3 Right-front

Road Force

Road force, or radial force variation, is a tire and wheel condition that can affect steering, traction, braking and load support. High road force will impart ride disturbances to the chassis and ultimately the driver. 

Many modern balancing machines automatically measure the road force as part of the balancing process. A road force load roller simulates the force of the road on the tire and wheel package, and measuring this force provides data on the uniformity of the combined tire and wheel assembly. 

Tires may have an area that is stiffer than the rest, which is called force variation. The combination of imperfect run-out and force variation can lead to bad vibrations. Some inconsistencies in stiffness, weight, and balance are unavoidable, but this additional metric can be quite helpful diagnosing problems or defects. 

Recently I had a set of LT295/65R20 Cooper STT PRO mudders swapped onto a different set of OEM 20-inch wheels, and noticed that the weight placement was odd on one rim. During my requested rebalance, the problem was obvious for anyone paying attention; the road force was 113! Rotating the tire 180° on the wheel corrected the issue, resulting in a road force measurement of only 29. 

Where The Rubber Meets The Road

Conventional wisdom includes putting the best tire and wheel combination (least wheel weight and/or road force) on the front axle, often the left-front position, to avoid poor drivability, handling, or driver complaints. But I am not an employee at a tire shop, I put the mounted rubber onto the axle studs myself in my shop, and am often interested in the rawest, most revealing data possible for my reviews. 

Ran smooth and quiet.

So I will frequently put what is likely the least true assembly on the front. This helps me confirm that they are truly balanced, and will roll smoothly at all speeds, even after a rotation. These Nexen ATX felt fantastically smooth and true, with no bad manners or vibrations up to 100 mph! 

After an initial 50-mile high-speed freeway flogging, I returned my garage and immediately did an X-pattern rotation to get every tire on both the front and rear axles, and both left and right sides of the truck. Another high-speed freeway road test followed, and the Roadian ATX continued to run flawlessly. 

Overall Subjective Observations, Comments & Critiques

Traction

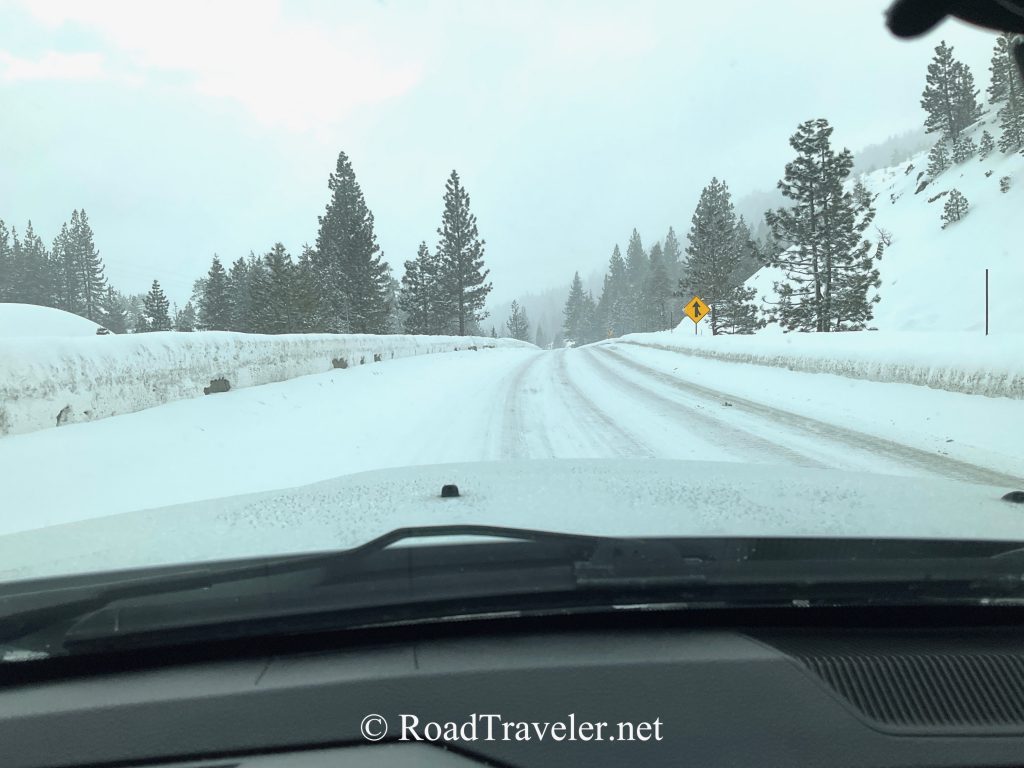
Winter 2022–2023 ended the years-long drought cycle in Northern Nevada and nearby Northern California, producing both abnormal amounts of rain and countless days with several inches of snow. This provided many opportunities to use the Nexen ATX during on-highway 4WD conditions, in both shallow and inches-deep snow, a little ice, and pooling heavy rain that made it wise to use four-wheel-drive. 

Interstate 80 near Donner Pass in Northern California. Snow traction has been good.
Sipes, rubber compound, and snow sticking to snow are big parts of winter traction.

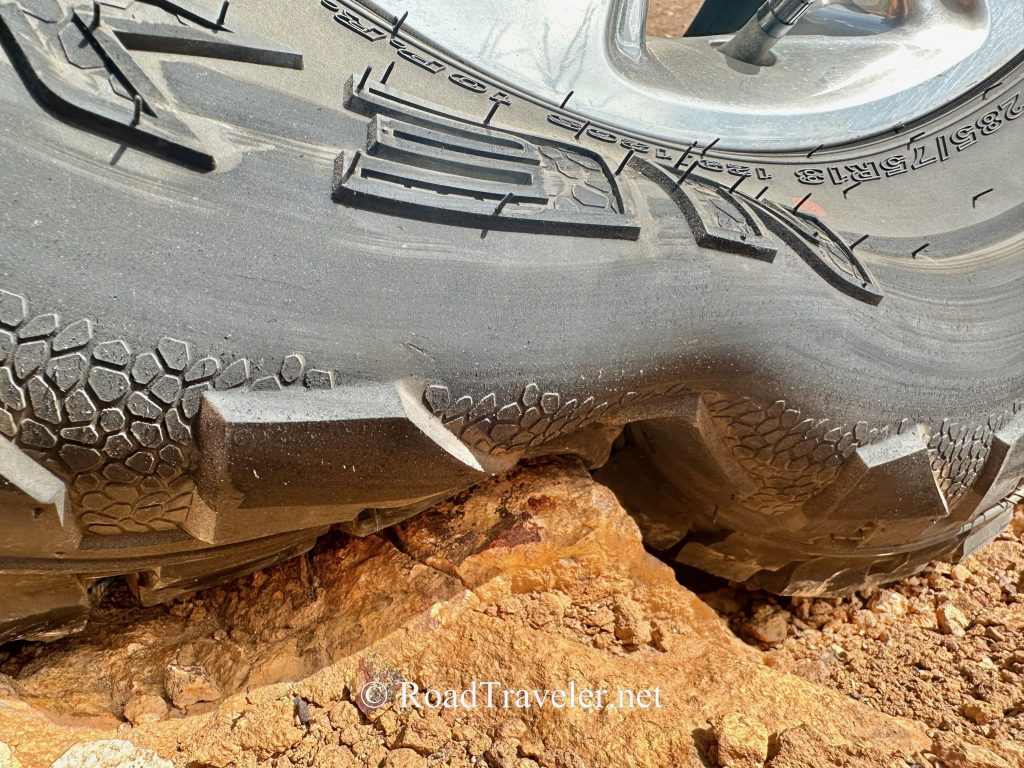
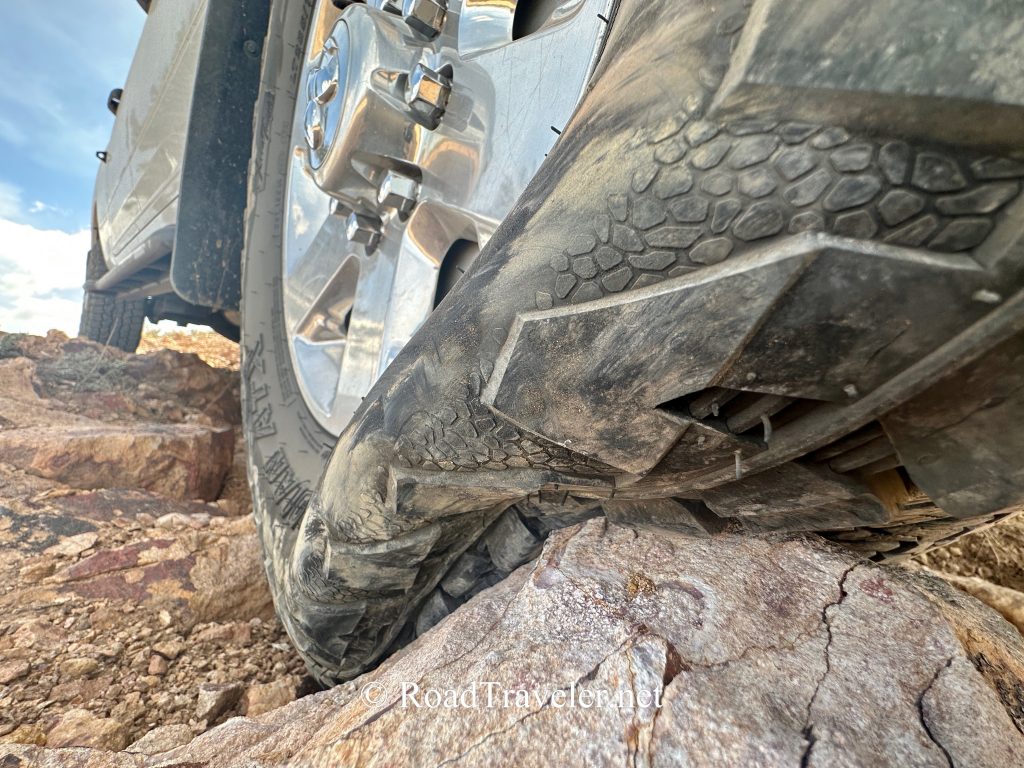
Routine off-pavement driving is a part of my lifestyle, so these ATX have seen hundreds of miles of high- and low-range four-wheel-drive use, usually with the pressures lowered specifically for that purpose (30 psi in front and 20 psi in the rear). Flex, deformation, ride, and traction has been great. Cutting or chipping of the tread appears virtually nonexistent. 

Clearly these are not mud-terrains, however, they have seen shallow mud and squishy terrain several times, and have performed as well or better than any 5-rib A/T I’ve run in similar conditions. 

Rear axle, 20 PSI, flexing on a rock. Even a 5-rib A/T has to endure my low-pressure torture test photo shoot.
Aggressively folding the sidewall and tread with much of the truck’s weight stuffed onto the left-rear.
Caked and packed with wet dirt, but still performing well in challenging conditions for a 5-rib all-terrain.

Noise And Ride Quality

Perception of noise is extremely subjective, has much to do with the specific vehicle and road conditions, as well as one’s tolerance and personal experience baseline. If someone only runs a highway-terrain tread, then anything with more void is going to seem loud. Conversely, those that run a mud-terrain or a hybrid/commercial traction design, will think lower-void tires are nearly silent. With a preference for medium-void commercial traction treads, I find the ATX impressively quiet, but not only because I’m accustomed to louder rubber. When comparing the ATX to my memories of testing the similar 5-rib Cooper AT3 and later AT3 XLT just a few years ago (TDR108), the ATX seem nearly silent. 

Again comparing the ATX to the Cooper AT3 XLT, the Nexen’s 3-ply sidewalls appear to provide a firmer, more supportive and responsive driving experience compared to the 2-ply Coopers. This is a positive for heavy-duty applications because softer tires will not support big loads as well and can flex too much, generating excess heat, which is the nemesis of all tires. Balance and tracking have remained excellent, but treads can exhibit different characteristics on different chassis, and your alignment settings matter too. 

It is critical to remember that regardless of the tire you choose, it is beneficial to run appropriate pressures and avoid unnecessary over (or under) inflation for the best overall performance. An extreme example is running 80 psi on the rear axle of a pickup with zero load in the bed. Sadly, unless you’ve updated/reprogrammed your truck’s computer, Ram has made running appropriate psi problematic on the 2500 series. A cautionary yellow TPMS light will illuminate when running less than the 80 psi on the rear axle, or 60 psi up front. This is simply ridiculous, but I understand folks not wanting to run around with a glowing light on the dash. My trucks have been modified with lowered pressure thresholds to match my uses, and I use appropriate inflation for the load. 

Dirty sidewalls in the Sierra Nevada, what’s not to like?

Baselines

Longevity and wear is impacted by several variables, including: the vehicle on which the rubber is mounted, road conditions, loading (which includes one’s acceleration, braking, and turning habits), temperature, inflation pressures, and the driver. During my freelance journalism career I have tracked the wear of dozens of tires, chiefly but not exclusively on heavy-duty, 4WD diesel pickups with manual transmissions. 

With a manual, every upshift results in a loss of boost and rpm which must be regained before reaching for the next higher gear. This cycle involves the repeated loading of the drivetrain with low-rpm torque which is different than an automatic transmission. Autos will keep the boost and rpm higher when one is accelerating briskly, more horsepower and less low-rpm torque, and these differences should be obvious in the seat-of-the-pants of experienced and attentive enthusiasts. So if all things are equal, which they rarely are, I argue that a manual transmission can wear tires more quickly than an auto. 
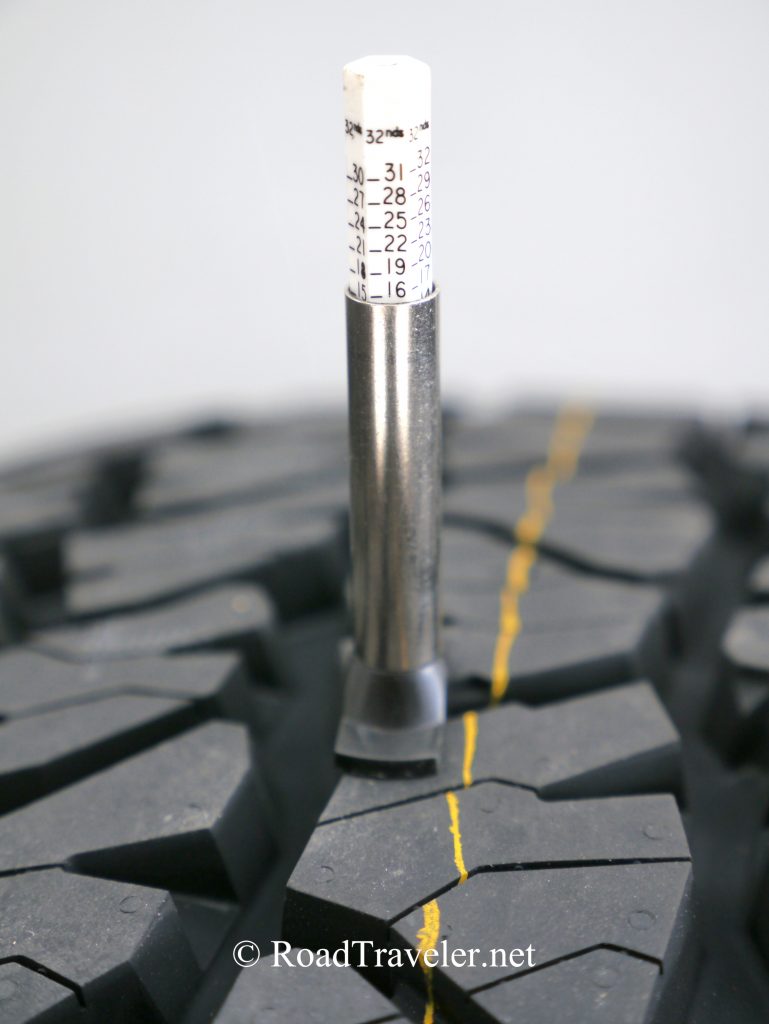
Elsie our Welsh Terrier is my helper during most automotive projects, and a great rodent hunter too!

Wear Data

After 9,600 miles and two rotations, the Nexen Roadian ATX are 4.5/32” shallower than their original 16/32”, which is 2,133 miles per 1/32” of tread depth. This is good and comparable to quality aftermarket rubber from several manufacturers. Considering the test platform, duty-cycle, and other variables, my opinion is that substantially under 2,000 miles per 1/32” is substandard, and over 2,000 miles is good. 

It’s noteworthy that there has not been a substantial rate-of-wear disparity on the front and rear axles. The torque-loading of the drive axle, especially under a diesel, often results in more rapid drive-tire wear. This is not just a truck thing, as I have documented this on two personally-owned manual transmission Volkswagen TDI (diesel) front-wheel-drive cars. Both TDIs wore the fronts much more quickly than the rears due to the low-end torque. Designs that do not show substantially more drive-tire wear between rotations often indicates the potential for superior longevity. 

Really Like ‘Em

While I was skeptical about the Nexen brand before trying the ATX, sometimes it’s good to step out of one’s comfort zone. Even with my bias for medium-void rubber, I have been impressed with the Roadian ATX. Hopefully they make a hybrid/commercial traction design soon, which would fill a gap in their current lineup. I’d be chomping at the bit to try them. 

James Langan

Instagram: @RoadTraveler 

YouTube: RoadTravelerNet

Resource: 

Nexen Tire: nexentireusa.com 


WAGAN TECH DC TO DC BATTERY CHARGER


40A DC TO DC BATTERY CHARGER

Wagan Tech’s 40 Amp DC to DC Charger 

It takes some type of fuel or energy to power things, this includes humans as without food (and other necessities) our systems will shut down. In the case of our beloved Cummins-powered trucks, that energy comes from burning #2 diesel fuel. The primary output of the internal combustion is propulsion of the drivetrain; however, supporting systems give and take from the consumption, including the cooling and electrical charging systems. 

Some readers know that the simple diesels from decades past would essentially run forever once started as long as the fuel flowed. They could be hard to cold-start, but they were also difficult to stop. This is because all diesels are ignited using compression ignition (CI), not a spark-ignition (SI) system like a traditional gasoline motor. Diesels are less complex without spark plugs, a coil, distributor cap and rotor, or wires, and while still fundamentally true there are modern complexities, chiefly the electronic fuel-injection. 

Mandatory Electricity 

Our newer, specialized, computer-controlled diesels need their modules to remain awake for everything to work properly (just like gas-powered trucks). Additionally, late-model vehicles are chock-full of countless electronic gizmos, from computer screens, cameras, seat and steering-wheel heaters, and the list goes on. The constant generation of electrical current from an alternator is no longer optional to keep the oil burning, but absolutely essential, even for daylight driving, because battery storage capacity is finite and amps consumed must be replaced.  

High-output alternators easily handle the load of the Cummins cold-start grid heater, or the glow plugs in other automotive diesels, plus the increasingly popular factory-installed inverters that convert the DC current to 120-volt AC to power tools or other plug-in devices. But what about additional intermittent or constant 12-volt DC electrical loads? 

Remote National Forest camping in Colorado. One only has what they bring with them.

RV Amps  

The TDR readership has always included a large percentage of RVers, and because we love our pickups so much, that means mostly travel trailers, big fifth-wheels, or truck campers instead of motorhomes. Solar panels atop an RV to charge coach batteries have been common for several years, as are backup generators to energize power-hungry AC appliances like microwaves and air-conditioners when shore power isn’t available. The solar panels require sunshine, and internal-combustion generators require fuel, so additional free amperage sources are welcomed. 

When an RV is connected to a truck via the 7-way trailer-towing outlet, typically a small amount of juice is delivered to the RV to help charge the coach batteries, often somewhere around 10-amps. The limitation is not alternator capability, but the size of the factory wiring. This small amount of amperage can help keep charged batteries topped if there are minimal loads; however running high-draw devices can lead to deficits. 

Modern Electric-Only Refrigerators

Like modern trucks full of gadgetry, newer RVs can have unprecedented amperage draws as well. The easiest example comes from the overlanding culture where electric refrigerators pioneered the replacement of traditional RV refrigerators, which principally ran on propane or 120 volts AC when plugged-in. Some older RV refers were theoretically capable of running on 12 V-volts, but they were terribly inefficient and would drain batteries fast.

Instead of using the gas absorption method of cooling with propane, modern 12-volt refrigerators have a compressor, similar to the refrigerators in our homes. These can be built-in units, as in my Hallmark Camper, or a portable chest type refrigerator/freezer. These electric refrigerators are generally more efficient and effective, particularly in hot weather, and do not have to be leveled like a traditional RV refrigerator. 

The benefits are being appreciated by more folks all the time, and in the off-grid and overland camping crowd electric fridge/freezers are seen as more rugged and vastly superior. Even the traditional RV market has noticed. My cousin recently purchased a new fifth-wheel trailer to live in (temporarily) after selling his house, and the refrigerator is 12-volt and 120-volt only, it doesn’t run on propane. There is at least one drawback and that is amperage consumption. 

Large refrigerator and freezer for an 8.5-foot truck camper. Consumes up to 5-amps 12-volt DC when running.

Additional Electrical Loads

The large-for-a-truck-camper NovaKool refrigerator with a separate freezer door in my Hallmark Flatbed consumes up to 5-amps when running, and it runs a lot during the summer months. Five amps per hour adds up quickly, pulling a chunk of the total 200 amp-hour capacity we have from two, 100-amp Battle Born lithium batteries. 

My Hallmark is well sealed, but no RV is or can be impervious to dust, they need to breath like a house. With this in mind, and because I spend much time traveling off-pavement and nearly always camp in the dirt, I run one of my roof vent fans while driving to pressurize the living space. This works impressively well to minimize dust intrusion. There is one more big electrical draw inside my camper every 24 hours. 

Although I do not fit the physical stereotype (I’m tall and slim), I use a CPAP machine to help me breathe and sleep every night. This is another substantial electrical draw, a minimum of 4-amps, even with a dedicated 12-volt cord to avoiding the inefficiencies of an inverter. Multi-day road trips with lots of driving still result in a battery charging deficit because the factory RV 7-way provides minimal amperage. The 340-Watts of solar panels help, but they are insufficient to keep the camper batteries charged due to my consumption. A small 700-Watt 2-stroke generator travels in one of the under-bed toolboxes as an emergency back up. I prefer not to use it, and it produces a mere seven amps. So how can one easily generate more electricity? 

Dead camper batteries should be old news after installing this DC charger from Wagan Tech.

Wagan Tech 40 Amp DC To DC Battery Charger

DC to DC battery chargers have been around a few years. They are popular in places like Australia, where the off-pavement backcountry travel market has historically been more robust and innovative. These devices are exactly what they sound like, taking DC amperage from the battery/alternator charging system under the hood and feeding it directly to auxiliary (RV) batteries through large wires. Sounds simple, and it is. But, they need to be hard-wired. Wagan Tech introduced their new DC to DC Battery Chargers in 2022, both a 25-amp model for $300, the $400 40-amp model that I installed. 

New Hole Required

If the auxiliary battery to be charged is on the same chassis, like inside the same engine bay, the installation is easier. If secondary batteries are in a separate RV, the wiring needs to go from the host chassis into the recipient. If the RV is a trailer that is attached and disconnected regularly, then something like an Anderson plug provides a robust connector (and something I intend to add in the future). 

With my Hallmark flatbed outfit, I directly connected new wires from the Cummins engine to the camper batteries, which required a new hole in my Hallmark. The process was not trouble free. 

Parts and Supplies Matter 

In an effort to avoid drilling a new hole, I attempted to use smaller but adequate 8-gauge gauge wires, running them alongside the existing Hallmark 7-way RV pigtail. The new positive and negative wires added too much girth to get the nut onto the knockout plate. This defeat came after hours spent running the wires from the engine bay, along the chassis, and then stuffing them next to the factory Hallamrk wiring pigtail and into the coach. 

Ran these 8-gauge wires from the engine compartment, along the camper’s 7-way plug, through the existing wiring hole, but had to start over.
There wasn’t room for additional wires, I stuffed them through the knockout plate nut anyway, but couldn’t wiggle the nut up to male end to secure the plate. See the gouged insulation? That’s how tight.

When it was obvious that drilling a new hole was required I decided to use larger 6-gauge wire, good for up to 32-feet. The finished total length was less than 20-feet so the wire will easily handle the amperage. Due to time constraints the wire was purchased from a nearby Home Depot, the trade-off being that it is not as flexible or easy to work with as ever thinker, larger welding cable. 

Home Depot didn’t have red 6-gauge so I had to take green. Shown with two 60A Maxi fuse holders.

Measure Multiple Times And Drill Once — A Nice Idea

The new hole in the driver’s side front wall needed to go below the water heater and above the propane locker, and it needed to be approximately 1-inch diameter. After measuring and making countless trips from the front wall into the camper, I was confident about the placement before drilling the pilot hole. Using my cordless right angle drill, I nailed it, but I assumed the 7/8″ hole saw I had was big enough, and I made a nice, clean hole. However, it was too small for the knockout plate bolt to slide from inside the camper, clamped on the 6-gauge wires, through the wall to the exterior to reach the knockout plate nut.  

New 7/8” hole drilled into the front of my Hallmark Camper. Measuring and drilling went well up to this point.

Back to Home Depot to buy a larger hole saw, something near 1 1/4″. As many do-it-yourself folks know, it is relatively easy to new to drill a clean new hole, but difficult (almost impossible) to cleanly make a hole slightly larger. A few times I slowly and carefully tried to get the larger hole saw started, but, of course, the saw just slid on the fiberglass. When trying gently does not work, what is the typical response? Add force. 

The Neanderthal in me came out, and I leaned on the drill to make the saw bite into the fiberglass where I wanted; this was a bad idea. The saw walked on the slippery fiberglass surface, but with increasing force it eventually dug into the exoskeleton wall, making the scar you see in the photo below. I didn’t swear much, but I was slightly displeased with myself! 

Without the benefit of a centering pilot hole, I attempted to enlarge a perfectly drilled hole and made this mess instead.

Disgusted, angry, and frustrated, there was no going back, and I still needed to enlarge the hole. My solution was what I should have done after discovering the hole was just a bit too small; I ran a half-inch bit around the circumference of the hole until it was big enough. 

Running a 1/2” bit around the circumference of the hole to make it larger should have been my first solution, not the second.

Thirty years ago this would have bothered me for weeks. I like to do clean, high-quality work. It’s covered by a plate and will never be an issue to anyone but me, and I’ve put it behind me. With the challenging part completed, it was time to finish the installation and get the Wagan Tech DC to DC Charger working. 

Pulling And Connecting 

The rest of the installation was straightforward and easy, and there were no more hiccups. I fed  the 6-gauge wire through two rubber firewall boots to provide a weather barrier, one from the camper front and one from the inside, then along the frame and into the engine compartment to the driver’s side battery. 

Had two of these stepped, rubber firewall boots leftover from a prior product (purchased after a prior drilling mistake). Stuffed the new hole with one from inside, and another from the front behind the knockout plate. Should be very weather resistant.
This knockout plate was always on the parts list, but also conceals my drilling snafu. Looks tidy and works too.

This Wagan 40-amp unit requires two 60-amp fuses, one as close to the engine bay battery as practical, and another on the Wagan charger output line near the auxiliary batteries. Bolt-down fuses are recommended because they have lower resistance than blade type, which can have higher resistance and create excessive heat. However, the blade-type Maxi fuses are what I found locally, and I’m confident they’ll be sufficient.  

Blade-style 60A fuse holders are what was available locally.

With the incoming hot and ground wires from the engine connected to the Wagan charger, another small hole was drilled in the Hallmark’s battery box to run a hot lead from the charger to my two 100-amp lithium RV batteries. 

New small hole drilled into the camper’s battery box, with the hot, output line from the Wagan 40A DC to DC Charger to a positive terminal.

With the fuses inserted I had the appropriate blinking lights on the front of the Wagan DC to DC Battery Charger; one light showing it was connected to the alternator, and after changing the battery type to LifePO4, that light was on as well. The unit is capable of working with standard, gel, AGM, and lithium batteries. 

Wagan Tech’s instructions are short, simple, and easy to follow, and folks capable of doing basic wiring will likely have no problems doing this themselves. Because of the largish 6-gauge wire and connectors I used a hydraulic crimping tool, and I covered the ends with heat shrink, routed the wires as cleanly as possible, and protected them with split-loom. 

60A fuse lead connected directly to the driver’s side positive post with copper ring. Heat shrink looks good and adds protection.

Mounting Options 

The Wagan charger is designed for a variety of installation environments, including chassis rail, engine bay, interior cabin, etc. The unit has been designed to work in vibrating, wet, dusty and muddy environments, and can withstand temperatures of up to 176°F, so it can be installed in the engine bay. However, to get better charging efficiency, mounting the charger away from high-temperature parts is preferred. 

I simply stuck it to the bottom galley shelf with mounting tape, between the propane locker and battery box. I may add screws later if this is the charger’s permanent home, but it’s not going anywhere on this flat surface. 

Flashing green lights indicate the Wagan Tech DC Charger is connected to the alternator and is feeding LiFePO4 batteries. Simply stuck to a shelf inside a galley cabinet with mounting tape.

Wagan Tech DC Charger Works  

Using more amperage than is being generated during long road trips should be a thing of the past. We’re unlikely to need a generator unless we want to run our air conditioner, in which case we would tote our larger Honda 2000. 

Pumping a massive 40 amps per hour into the Hallmark’s lithium batteries means it takes little driving to fill them; every time we make camp the batteries will probably be full. Even if the lithiums were completely drained we could replenish all 200 amps in five hours! 

Our initial adventures with Wagan DC to DC 40-amp Charger installed were extremely encouraging, the camper batteries were full whenever we stopped, and the voltage was high, as if we’d been connected to shore-power.

The Cummins is a large and expensive generator, but because we are already traveling, delivering essentially free electricity from our alternator to the camper batteries is a game-changer. Why did we wait so long to add something like Wagan’s 40A DC to DC Battery Charger? 

Drive diesel and tell ‘em you saw it in the TDR! (A version of this article was previously published in the Turbo Diesel Register magazine.) 

Tell ’em you saw it on RoadTraveler.net

Copyright J. Langan/RoadTraveler. All Rights Reserved

www.RoadTraveler.net 

Instagram: @RoadTraveler 

Twitter: @RoadTravelerNet

YouTube: RoadTravelerNet

Resource: 

Wagan Tech: wagan.com 


NEXEN ATX All Terrain Photos

Tell ‘em you saw it on RoadTraveler.net!

©️ James Langan/RoadTraveler. All Rights Reserved

Instagram @RoadTraveler

Resources:

NEXEN Tire USA


NEXEN ATX AT FIRST LOOK, MOUNT, BALANCE, AND ROTATION

Tell ‘em you saw it on RoadTraveler.net!

James Langan

Instagram @RoadTraveler

Resources:

NEXEN Tire USA


NEXEN Roadian ATX

NEXEN Roadain ATX all-terrain.

Nexen, a Korean tire company, hosted a media briefing at Overland Expo West. They gave journalists a sneak peak at their new Roadian ATX all-terrain (official launch was not until June 1, 2022). This tire has a 3-ply sidewall, 60,000 mile treadwear warranty for LT sizes, and the 3-peak mountain snowflake/severe winter rating (except flotation sizes).

While I have noticed Nexen at the SEMA Show I had never investigated the brand or their offerings. My general preference is for higher-void, all-terrain or commercial traction designs, however I’m not against running a lower-void, 5-rib all-terrain or all-season, particularly one that has a robust sidewall deign and is 3-peak/mountain snowflake rated. (Nexen also makes a couple good looking, knobby mud-terrain treads.)

There are 63 sizes, including one of my current favorites, the LT285/75R18. Timing matters, and currently I have an extra set of 18″ OEM aluminum wheels sitting in my shop, and an opening in my editorial schedule. If Nexen will supply a set for evaluation, I’ll start a long-term review.

Tell ‘em you read it on RoadTraveler.net!

James Langan

Instagram/TruthSocial @RoadTraveler

Resources:

NEXEN Tire USA


Tuffy Security Lids and Safes


Tuffy Security Products

Tuffy Security Products’ teenaged founder Shawn Gregory parked his Jeep at a mountain bike trailhead in 1989, and when he returned he found his Jeep burglarized and all his gear stolen. Gregory replaced the plastic center console with a stout, locking wooden box, which he was soon duplicating for friends. Steel replaced wood as the construction material, and another American entrepreneurial success story began. In 2008, Tuffy’s Jeep-centric product line was expanded to include options for the broader recreational market, as well as law enforcement vehicles. 

If my trucks were not both Tradesmans, there is a center console safe I would have chosen to install, but it doesn’t fit my models. However, Tuffy does make other application-specific, and universal boxes and safes that do work with my Fourth Generation, 2500 Rams. 

One is the heavy-duty, locking, under-floor Storage Security Lids constructed with 16 gauge and 1/8” thick welded steel ($89 each). These replace the factory plastic covers atop the backseat floor. The lids include Tuffy’s Pry-Guard locking system, a continuous steel hinge, and a 10-tumbler, double-bitted security key lock with built-in weather seals. (These do not fit the Mega Cab trucks.) The no-drill installation uses the factory holes and captive nuts, and are simple and easy to mount. However, I still have a few observations and tips on how-to do the job a bit better, with my typical attention-to-details. 

In-floor Security Lid placed before the actual installation.

Ram In-Floor Storage Security Lids Installation 

Removing my rubber floor mat, opening the factory lids, lifting out the OEM plastic liners, then pulling the four T-30 Torx screws was all that was required to prepare to mount the Security Lids. After the OE parts were removed I noticed that there were five holes through the body, not just the four from the removed screws. 

Hole near the bottom/right of image is filled by the stud on the OE plastic lid.

That fifth hole is for a stud on the bottom of the plastic factory lid, which has a rubber gasket at the top, obviously intended to create a seal and keep debris out, as shown in the photograph below. (This indexing hole for the factory plastic cover is at the outer/rear on the driver’s side, and at the front outer edge on the passenger side.) 

Factory indexing stud, with seal, bottom of the OE plastic cover.

Although unlikely in the short term, grit, moisture, and debris could reach this 1/4” hole on the bottom of the body over time or in certain circumstances. If one was to drive through, or get stuck in deep water or mud, intrusion could immediate. Anybody that drives in adverse conditions, including heavy rain, snow, slush, or dust knows that grime gets flung everywhere under the chassis, and leaving holes open to the inside is a bad idea. My solution? Spare plastic clips/plugs, like those used for securing trim pieces and such, slathered with outdoor silicone and stuffed into the holes. 

Viewed from under the truck, the larger of these two holes is not filled by one of the four mounting screws.
Plastic plug slathered with silicone to prevent moisture and debris intrusion.

The OEM plastic liners that nest inside the below-floor storage cavity can be reused, though one won’t be able to simply pull them out for cleaning like the OE setup, because they need to go under the mounting base of the Tuffy lids. As noted in the instructions, leaving the liners out is an option, which also maximizes storage space. Choosing to eliminate the liners increased the volume so that the set of spare Mopar fuel filters from Geno’s Garage I always carry in one of these bins, which always needed to be encouraged to fit inline across the bottom, now fit easily. 

Everything I had in this bin fits just a bit better with the OEM plastic liner removed.

The factory lid screws had some type of sealant on the threads, so I added Permatex white goo Thread Sealant with PTFE to the 6 mm flat head screws provided (turned with a 4 mm hex bit). The Security Lids look great and fit impressively flush with the baseline floor height, allowing my big, one-piece Husky Floor Liner to lay as it did before. These in-floor lids are slick and beefy, and I was immediately happy I installed them. 

Thread sealant on the new screws.
Made-In-USA Thumbwheel ratchet from SK is handy and helps prevent over-tightening.

There is a similar product that interested me, the Ram Underseat Locking Lid ($119), but I chose not to install it is because it’s only available for the driver’s side, not both sides under the rear bench seat. 

Tactical Lock-Box

In addition to the locking lids, Tuffy also provided a Tactical Lockbox, and large and small Portable Safes for my use and evaluation; I’ll detail the Lockbox first. There are several variations in Tuffy’s Tactical Lockbox lineup, the one I ordered is 35” wide, by 12” long, by 5” high, (# 327–350120050–067–100–01), and retails for $469. 

Their line of lockboxes were originally designed for the US government, for both high-security and portability of firearms and other valuable equipment. A patented, anti-twist, push button lock mechanism features a 10-tumbler, double-bitted security key with built-in weather seals. A user-changeable, combination push-button lock enables keyless entry. The box is designed to be secured with a padlock, and/or cable. 

Key and combination locks on this sturdy Tactical Lockbox.

Because I rarely carry passengers, the backseat and floor of my crew cab are used for general cargo, mostly lighter items that don’t need to be secured (UFOs—unsecured flying objects—are dangerous during collisions). The black box sitting on a black floor mat, covered by the black windbreaker I always have at hand, concealed by tinted windows, makes it essentially invisible unless someone has already made entry with evil intent, at which time they’d need to contend with the locks. 

Does this box make my seat look smaller?

 My intended use for this Tactical Lockbox is as one might expect, for larger weapons and tools while out in the field, when they’re not actively being carried. Of course the box can also prevent theft of expensive photography equipment and other valuables as needed when adventuring away from my vehicular base. 

Portable Safes

The final items are smaller and handy, two Universal Portable Safes, one that is marketed for full-size pistols ($99), and another for compact pistols ($79). Occasionally I will use these for firearms, however other small and slim valuables like wallets, passports and such can also be stowed inside. 

Keyless entry is provided by a three-digit, user-set combination lock. A 2-foot long, 2000-pound-tested (and coated) steel cable secures the safe to any sturdy mounting surface (bolted seat leg in my case). The inside is lined with low-density foam to protect the contents, while compression bumpers keep the lid vibration free when closed. 

Universal Pistol Safe for Full-Size on left, and Universal Pistol Safe for Compacts on the right.

The larger safe has been riding under my driver’s seat, completely out of sight, and rarely rattles, moves, or is irritating. These handy little boxes could be used other places too… like inside an RV, garage, or even inside a house, all one needs to do is tether the cable to something difficult to move. 

For years I’ve known about Tuffy Security Products, but failed to look closely at what they might have to fit my vehicles. Even though I’m late to the party, I’m glad I made the trip. 

Tell ‘em you read it on RoadTraveler.net! 

James Langan

Instagram/TruthSocial @RoadTraveler 

Resources: 

Tuffy Security Products: tuffyproducts.com, 800-348-8339 


Mickey Thompson Baja Boss A/T second rotation

Tell ’em you saw it on RoadTraveler.net

James Langan/RoadTraveler
January 2022

Copyright James Langan/RoadTraveler. All Rights Reserved

Resource:

Mickey Thompson Tires & Wheels