How To Buy A New Car Or Truck

This article was published in my Turbo Diesel Register column, Still Plays With Trucks, last quarter of 2017. Dodge/Ram pickups were used for the examples, but the fundamentals are the same, regardless of the car or light-truck brand.

2017 Ram/Cummins purchased new, well below invoice, minus rebates, for my Hallmark Nevada flatbed project.

Sticker Shock?

Editor Patton shared that there is occasional, maybe even constant, grumbling from some readers about the cost of new trucks. Of course finances are a private matter, and certain folks have more money and/or better credit opportunities than others, but my perspective is that of a working-man. For 37 years I’ve held blue-collar, tradesman, or professional jobs, and my current vocation, journalism, is judged as a meager living for most if it’s their sole source of income.

One popular (and likely true) statement is that new trucks cost as much than some folk’s first houses. There are possible retorts: bet their current house is valued much higher than their first; the first home had fewer appliances and gadgets; new(er) trucks have more stuff than older luxury cars.

Even in 1996, I would rather drive my new F-350 on long trips than the 1979 Mercedes-Benz 300SD we also owned, my wife’s daily driver at the time. Time marches on, whether we like it or not, newer machines are often nicer.

It’s not news that fancy trims and optional features cost money, both in houses and vehicles; if we want extra gadgets and bling we will have to pay for them. That said, is a new Ram Tradesman really out of the question? Should we reconsider what we require and value?

Doesn’t get much newer than this.

Consider a Tradesman

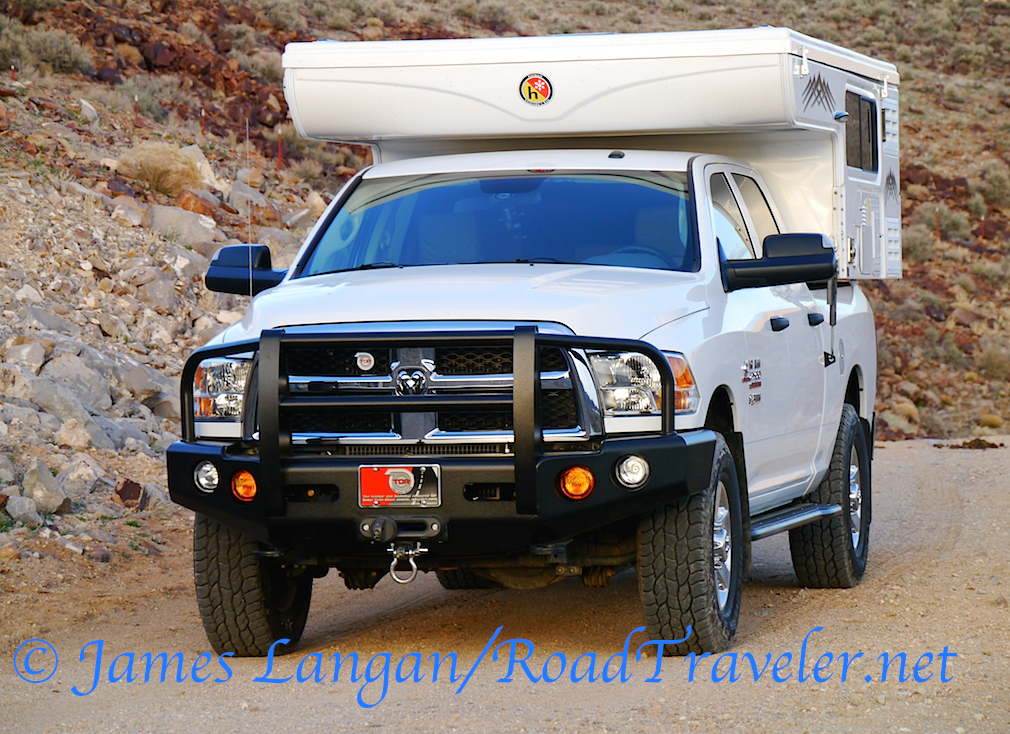
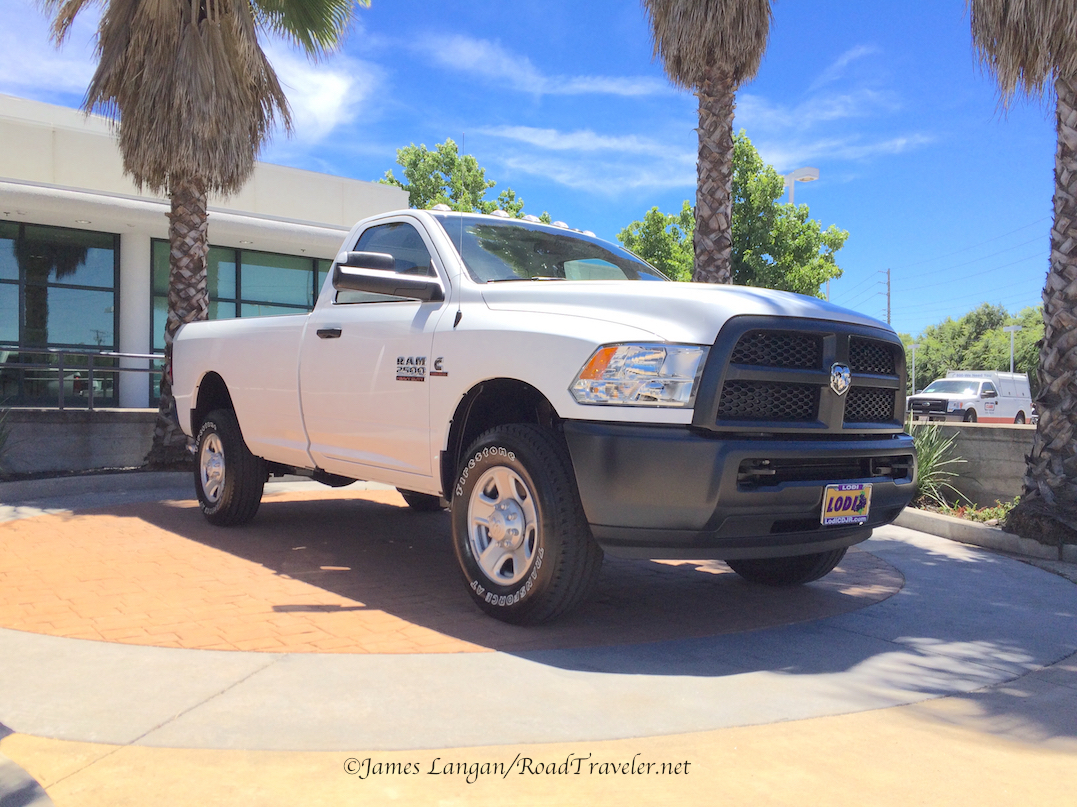
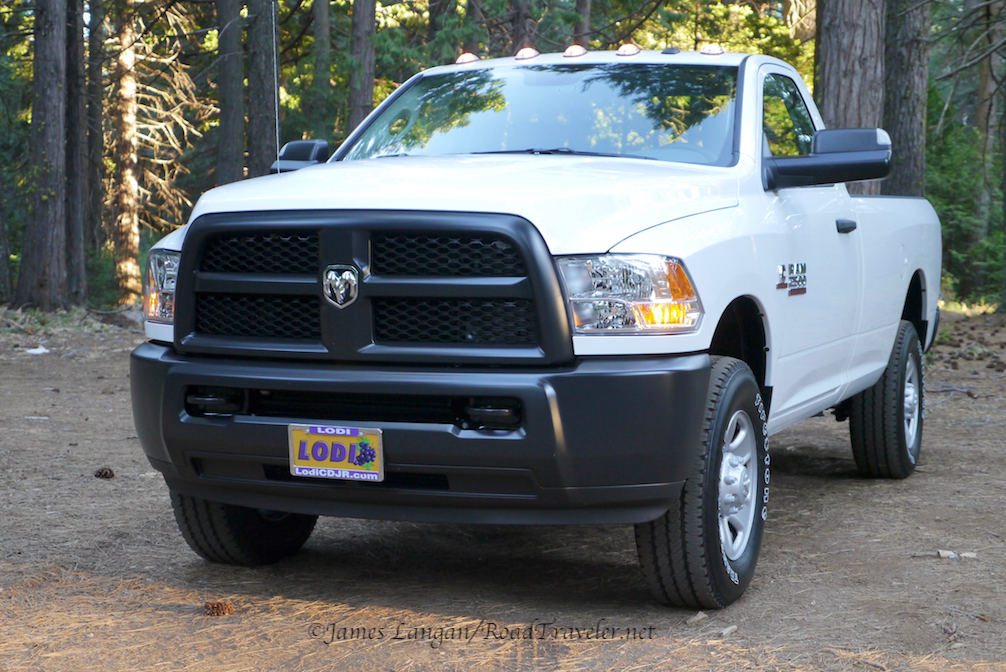
Since rejoining the TDR staff three years ago, I’ve shared that my 2014 Crew Cab Tradesman is impressively nice, not stripped in any historical sense of the word, and I like it just as much now after logging 50,000 miles. Top-of-the-line options two decades ago are standard on modern platforms. Need a specific example?

My 1996 Ford F-350 crew cab, with a 7.3L diesel, was an XLT, the highest trim offered by Ford at the time (brand doesn’t matter, they are comparable and competitive, then and now). It had power windows and locks, A/C, cruise control, cloth seats, carpeting, AM/FM cassette stereo, plus a couple of uncommon commercial features I ordered. The only notable items that F-350 was missing were keyless remote and an automatic transmission.

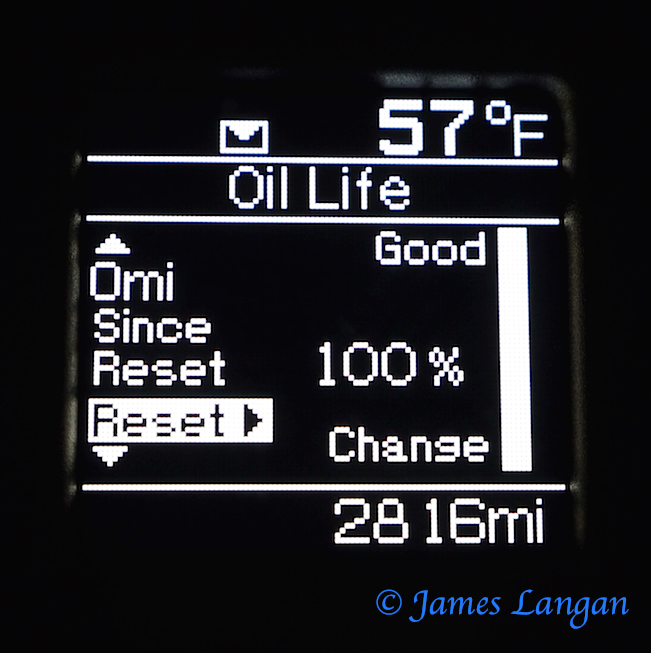
My 2014 Ram Tradesman has everything the ’96 Ford had (except the cassette player) plus satellite radio, an informative/interactive EVIC display, abundant torque and horsepower, an exhaust brake, stability and safety systems, higher GVWR/GCWR, rides better empty and loaded, is quieter inside and out, more comfortable, has much longer service intervals, etc. The F-350 cost me $30,000, which was $500 over dealer invoice, not including taxes or registration.

Using a consumer price index (CPI) calculator to adjust for inflation, $30k in May 1996 is equivalent to $45,600 in June 2014 and $46,900 in June 2017, months when I bought new Rams. Interestingly, I didn’t have to pay that much for either of them. I actually paid thousands less for both. Want to know how I did it? First let’s compare apples and pears.

Tires and wheels are an easy upgrade, and something many owners do regardless of the trim they purchase.

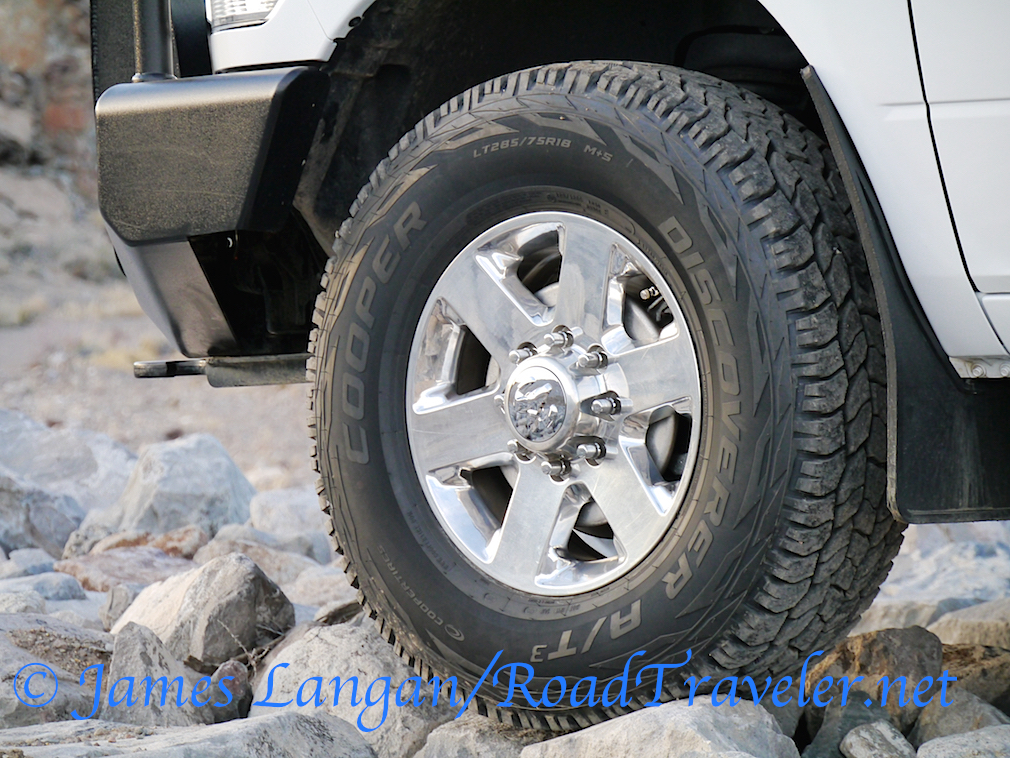
2017 Ram Cummins 2500 4×4 6.4’ Box

Regardless of the moniker on the side, a Tradesman drives as well as a Laramie, the chassis is the same. Seating, a few ergonomics, and other high-end features may differ, and everyone must decide for themselves if they want, need, or require those extras and are willing to pay for them. Some things, like seats, can be upgraded after a purchase. It’s easy to say fancy trucks are expensive, but how big are the steps between models?

There is nothing like a graph or table to drive-home a point. In August 2017, using my local Nevada zip code and NADAGuides.com, I researched the base Invoice and MSRP prices for six 2017 Ram 2500s. All were 4WD crew cabs with a 6.4-foot box. To show the raw difference between trims, only one option was added to each truck, the expensive 6.7L Cummins engine that TDR readers care about. According to NADA, a manual transmission is still standard up through a Laramie, but good luck finding one on a dealer’s lot if that’s what you prefer. Longhorns and Limiteds are only made with the 68RFE tranny. (Ram no longer offers a manual transmission heavy-duty truck.) All figures include the $1,395 destination fee that FCA charges for delivery. If you start banging on a calculator, it’s interesting to see how much extra the luxury cost. From a Tradesman to a Laramie there is an MSRP jump of $11,800, then another $10,430 for a Limited. Is a Limited $22,000 nicer than a Tradesman? For some folks the answer is a resounding yes. Others may decide they’d rather spend that $22k on other toys or upgrades, or maybe not at all.

Table One

’17 Ram 2500 CC 4×4 6.4’ Invoice MSRP
Tradesman $46,069 $49,140
SLT $50,633 $54,240
Bighorn $52,297 $56,120
Laramie $56,622 $60,940
Longhorn $62,647 $67,670
Limited $65,922 $71,370

Learn How To Buy A New Vehicle

Obviously a Tradesman costs much less than a Limited, but you can purchase almost any new car or truck for much less than MSRP. It’s not easy to put decades of experience into an article, and some things are difficult to teach from afar, but this is my crash course. The goal is to buy a new vehicle for a low price, quickly, and with limited hassles. It helps if you have experience and confidence, but there is only one way to get those, you have to earn them.

Supply And Demand & Other Fundamentals

The economic laws of supply and demand are real. Some stores may be willing to sell a particular machine for much less than a similar one for a variety of reasons, including the time they have been making payments on it (flooring), the model, and how hard it might be to procure a replacement. Generally, it’s much easier to negotiate a low price for a new rig because the dealer’s invoice, essentially their cost (read on), is readily available. Negotiating for used cars is trickier because the investment is not published, and they are not going to share that information to make your job easier.

Unless you are paying cash, or bringing a check from your bank or credit union, financing options and/or trade-ins may complicate and affect any negotiation. People who think they are going to buy a new vehicle for an extremely low number, while also getting top dollar for a trade-in, are only fooling themselves. It ain’t goin’ to happen. If you insist on a high trade-in value (dealers will rarely pay more than wholesale book) those monies will be made up elsewhere, likely in the price of the new machine. That is why knowing in advance how you are going to pay for your new ride, and whether or not you have a trade, is important to all involved, before getting down to the nitty gritty.

Invoice Not MSRP

Many people negotiate from MSRP down. That is wrong. You should work from invoice, up or down. Invoice prices are online, you just need to insure you have every order code selected, or deleted, so you are comparing the same exact model with the same options. When you feel conformable you can ask for the invoice, politely and with confidence. People do it everyday.

Cost not payments. You should focus on the cost instead of your payment. The payments will always be lower for a given term and interest rate if you finance less. That math can and should be done, but talking about payments is the wrong way to negotiate, similar to working down from MSRP. If you have money and/or excellent credit, you are in the driver’s seat. Once you realize that and learn how to navigate the waters of car buying, it will become fun or at least less hassle.

Long distance helps. Do your negotiations over the telephone or by email when possible. Knowing the vehicle you might want, when, and how you are going to pay for it, puts you in a strong position, and should greatly simplify and accelerate the processes. I’ve located my last four new 4WDs online, either using the manufacturer’s or dealership’s online search engine. Other sites work well too. Once located, I call (or email), speak with a manger who has authority to set a price (sometimes you must talk with a salesperson), introduce myself, state where I’m calling from, the exact vehicle I’m considering (stock number or VIN), and discuss the terms of the possible sale. For the inexperienced, $500 over invoice is often a good place to start. With experience this can take just a few minutes.

17 Ram 2500 window sticker copy


Negotiating over the telephone (or email) can help many make better decisions. Not being on a car lot can prevent impulsive action. Be an intelligent, calculating shopper, not an emotional one. You can be thrilled or excited, but this is a business transaction. Save the happy dance for later. A few dealerships won’t discuss pricing over the telephone. That’s fine, others will, don’t waste your time.Willingness to travel increases the opportunities to negotiate and the selection of rigs that might fit your criteria.

It’s very simple to make a deal slightly above or below invoice, not including any rebates, if you remove the complexity of a trade-in. Manufacturer rebates are yours to apply to the transaction, and it’s helpful to remember the obvious, that they come from the manufacturer not the seller. Negotiate your price without them, they will come off the bottom line, later, after an agreement is reached.

When it gets close to the end, and you have most of the figures compiled, be sure to inquire about the document fee (doc fee). One might argue that this is an example of the seller charging you for their cost of doing business, and in a sense that’s true. However, doc fees are not going away, and some are reasonable, like under $100. Others are hundreds and seem ridiculous. Many states regulate the maximum fee for this service. If the doc fee is too high, you don’t have to trade with that store, but remember to step back and view the big picture. A high doc fee may be acceptable because of the price you negotiated.

Beauty is subjective, but I like the Tradesman trucks.

Dealer Holdback, Profit, And Commissions

Dealer holdback, or just holdback, is essentially a rebate for the franchise from the manufacturer that is built into the pricing. Depending on the brand it may be a percentage of the MSRP or invoice price or even a flat dollar amount. You will not see it listed on NADA or Kelly Blue Book, but it’s in there. If you are allowed to see or are given a copy of the actual document during your negotiations, and know where to look, you may see the number or be able to calculate the figure. The intent of holdback is to inflate the apparent dealership cost, help offset sales commissions, and increase profits overall.

Holdback is considered off limits during most negotiations, but again supply and demand are factors, as is your car-buying expertise. Understanding holdback helps explain how stores can sell cars at, or below invoice, and still turn a small profit to stay in business. When you find a truck advertised for an extremely low price, the dealership may need to move that specific vehicle and are willing to dig into or go below their holdback.

Typically automotive salespersons are paid a commission, often 25–30% of the profit, which is generally defined as the difference between dealer invoice and the selling price above invoice. If you are able to buy a new truck for $500 over (aka a nickel over), the salesman’s 25% commission is $125. That’s not much for the amount of time and effort involved, and sometimes days pass without a single sale. Of course, if you pay MSRP (or more) for a Limited, the commission may be over $1,300. One way to compensate for smaller commissions is with higher sales volume, and this is actually the business model for certain franchises.

There are many variables, and some sales are very profitable, but several dealerships operate on lower profit margins these days. For an example of a low profit sale, let’s use the SLT listed in Table One. One-percent above the $50,633 invoice number is a mere $506. That’s a fantastic price for a buyer but not much for the seller or salesman. There may be other dealership incentives and promotions from the manufacturer, like monthly, quarterly, and yearly sales competitions, but those extras don’t always materialize and can’t be counted on to sustain the business.

How the 2017 Ram 2500 in this article looks today.

Extended Warranties and Service Contracts

Warranty and service contracts are typically sold by the finance and insurance (F&I) department; they are also subject to negotiation. The problem is, like with used cars, you don’t know the cost, and generally there is a fair amount of profit in these contracts. Even when folks negotiate a good deal on a new rig, they may be worn down by the time they get to the F&I office where the actual purchase paperwork is completed. If you say no thanks, similar contracts may be offered later.

These are reasonable and desirable services for many, as they don’t want to maintain or repair their own vehicles. If anything fails, they want to take it to their local store and want it covered. Cool, but read the fine print, there are always a few (or several) exclusions, less with the more expensive policies. If you prefer to work only with a dealership, and many do, then buying a manufacturer-supported contract may be for you. If not, credit unions sell similar products, typically at much lower prices.

Want my take? I never purchase these services, but I also do most of my own work, make modifications that could cause a warranty claim to be rejected, and generally have vehicles paid-off before the standard warranty expires. I have a friend that has bought a few nice used cars, always gets an extended warranty through his credit union and has needed them for major things, including a transmission. There are two sides to every coin, and it’s your call.

Additional Sense About Dollars

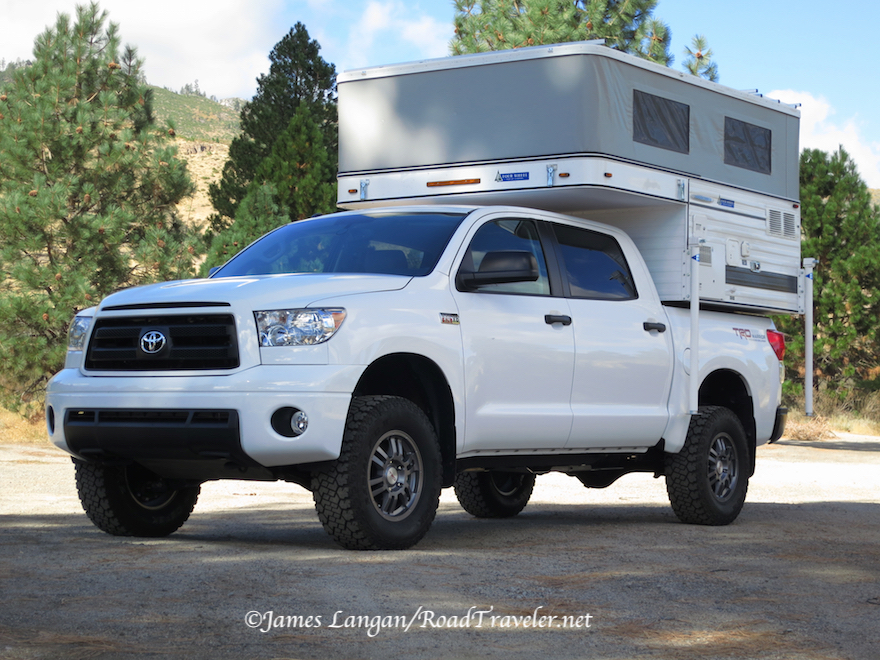
Since 2006, I’ve bought four new 4WDs, two Toyotas and two Rams. The 2011 Tundra cost me $800 over invoice, because of less supply and more demand. Eight-hundred over is not a bad price, and many would do well to make a similar deal, particularly if negotiated quickly and easily over the telephone. The $3,000 in manufacturer rebates came off the bottom line, essentially covering the sales tax. The other three were between $500 and thousands under invoice, supply and demand mattered. You must put in the legwork; there are bargains to be had, and rebate incentives can be generous. Consider a Tradesman; if you want a fancier truck, you might be able to get one for much less than you thought, maybe just slightly above invoice. Good luck and enjoy your new ride.

James Langan

Copyright James Langan/RoadTraveler/Turbo Diesel Register. All Rights Reserved.

 A version of this article was also published in the Turbo Diesel Register magazine. 


Hallmark Milner Truck Camper Part 1

First generation ’93 Dodge/Cummins flatbed with 1963 Bell camper. Silly looking, poor photo, but fond memories.

Heavy Loads Coming Soon

My initial Still Plays With Trucks (SPWT) column in TDR Issue 86 detailed how my Ram 2500 picked me as much as I chose it, summer of 2014. This was largely due to the ridiculously low one-at-this-price online special, plus rebates, offered by Dave Smith Motors in Kellogg, Idaho. Kind of like an old world mail order bride and a new world groom that fall deeply in-love once wed, fate.

Had I special-ordered a new truck like my prior three diesel pickups (two Rams, one Ford), I would have selected a 3500 because they are the stoutest pickups available, not that much more money, and I generally prefer extra capacity. (The 4500 and 5500 series are not pickups, despite the bodies, but Class 4–5 medium-dutys.) In 1995 I was forced to order a second generation 2500 because Chrysler temporarily eliminated the single-rear-wheel (SRW) 3500s, otherwise I’ve been a “one-ton” guy for decades.

A 3500 Ram would have rear leaf springs instead of coils. As opinionated as I am about most things automotive, I have no strong bias for either suspension. Both designs have good and bad characteristics, and I’ve praised the positives and cursed the negatives of each. Leaf springs are more proven in pickups, simple, and spring oscillation damping is less critical. Conventional wisdom is that leaf springs are better for maximum loads, but there are many variables and contrary arguments. The OE rear coils on my ’14 2500 handle maximum loads better than the soft leaf springs on my 1995 Turbo Diesel, when Dodge overcompensated for the overly-stiff first generation suspensions. Coils are not automatically softer, weaker, or incapable—the Mercedes Unimog singlehandedly squashes such claims for trucks—spring rate and the overall design is what matters. One major advantage to rear coils is their inherent resistance to axle-wrap or wheel hop. (If you need schooling on axle-wrap, read Scott Dalgleish’s Back In The Saddle column, Turbo Diesel Register Issue 88, pages 72–73.)

Coincidentally, during the first 11,000 miles, this coil-sprung 2500 has spent an impressive 42-percent of its miles loaded to GVWR. None of my prior outfits had such a high percentage of hauling miles so early, but they also saw more daily driving, a chore my current Ram does not have to endure unless I choose. (Jan 2018 update: with 42,000 miles logged, the current number is over 75% loaded to GVWR or above.) Loaded to the GVWR with what you may be thinking….

Purchased a used ’07 Four Wheel Campers Hawk to try on my 2011 Tundra.

Truck Campers

When I write camper that is exactly what I mean, a slide-in truck camper, not a travel trailer or 5th-wheel, which are often called campers but are not the same thing. Over the past few years I’ve become a fan of the smaller and nimble slide-in pop-ups. Properly outfitted they can provide luxury accommodation in some very beautiful and remote country.

Our first RV ever was a relatively primitive, 30-year-old 1963 Bell camper that we mounted atop a custom Lodi Equipment flatbed on our ’93 Dodge W350. We were cash poor in those days, and barely scraped together the “$300 firm” asking price, paying the last $20 in coins. The Bell didn’t stay around long; within a year we sold it and bought a 1978 Avion travel trailer, which we still own. We used the trailer more initially, but our trailering slowed to a trickle as RVing competed with other hobbies and responsibilities.

For twenty years my wife Beth and I had occasionally considered a slide-in pop-up, but we never bought, partially because it would add another toy to the barn, but with no extra time. Plus, over the past decade I’ve preferred private, remote, and backcountry camping to regular campgrounds. A rooftop tent, two off-road camping trailers, and eventually two Four Wheel Campers (FWC) facilitated this type of recreation. Slide-in units are not one-size-fits-all, so buying my new Ram pushed me to sell my 2012 FWC and shop for something that fits the 2500.

We liked camper travel enough in the new millennium to buy a better-fitting ’12 FWC Raven for the Tundra.

Hallmark Campers History

At the end of WWII, Hallmark owner Bill Ward’s father, Hubert Monroe Ward, started making hard-sided, pop-up trailers out of surplus aircraft aluminum in Corpus Christi, Texas. Literally a garage business in the beginning, later Hubert began making pop-up campers and moved his family to Colorado. With the explosion of the RV industry in the 1960s and 70s, the Ward family and partners owned and produced a few brands, founding Hallmark Luxury Campers in 1969. Eventually the businesses were consolidated into the one brand.

Based in Fort Lupton, Hallmark has always specialized in pop-ups designed to be comfortable in the rugged extremes of Colorado’s fabulous and famous backcountry, or worldwide. They were a high-volume producer in the past, but the pace wasn’t enjoyable. More recently the focus has been on lower volume and often slightly customized or tailored units that are built-to-order. Customization takes both time and money, but I’m selfishly happy they moved in this direction. One challenge to accommodating some special requests and features is the lack of standardization. Assembly line consistency allows for better and easier quality control, but customization requires special procedures to insure details aren’t missed.

Hallmark Campers have unique construction and quality options.

Colorado Factory Visit and Ordering

Inspecting Hallmark’s campers for the first time a few years ago at the Overland Expo West event near Flagstaff, I initially dismissed their products thinking the available amenities indicated they were not rugged outfits. I unfairly put their campers in the same class as many poorly designed and constructed RVs; I could not have been more incorrect. Researching the brand online I learned they have an enviable reputation for making stout, top-quality campers, with some unique construction features specific to their brand.

Before making such a large purchase we wanted to see more, meet the owners, and tour the factory. Fort Lupton is about 1,000 miles distant from our home in Nevada, but we had a Southwestern Colorado vacation planned for autumn 2014. After a week in the majestic San Juans, we drove north to meet the Ward family and tour their facility.

The last camper we ordered had three upholstery color options, but Hallmark offers dozens of interior fabric choices. It was invaluable to have my wife quickly and expertly narrow them to just a few, which we then discussed and agreed upon (you know who did the agreeing…). We both like earth tones and neutral colors, but admittedly I was most interested in the technical details and construction choices. The Milner model was chosen because its short length provides the most clearance in technical terrain, but Hallmark makes several models to fit different needs.

Several new campers being built during our factory visit.

Fiberglass Exoskeleton

Most RVs with fiberglass sides have a separate exterior wall that is bonded to an internal wood or aluminum frame. These panels can separate from the internal structure, which is typically caused by moisture ingress that compromises the glue, extreme heat, inappropriate adhesives, or vibration and flexing. This will never be a problem with a Hallmark; their floating exterior panels are one-piece molded fiberglass, so there is nothing to delaminate. The panels are the structural exterior and interior walls and the exoskeleton frame around which the campers are built.

Specifically, the gel-coated composite wall panels consist of a fiberglass sandwich with a structural end-grain balsa core, the same material and technique used on some yachts and military aircraft. End-grain balsa is a renewable resource that imparts remarkable strength and stiffness to the sandwich panel. The end-grain configuration of balsa provides high resistance to crushing, and it is difficult to tear. These panels handle high dynamic loads and resist fatigue.

Exoskeleton molded exterior frame and fiberglass wall offers superior durability.

One-Piece Fiberglass Roof

Water damage concerns have been the nemesis of traditionally constructed RVs for decades. To have water damage there must be a leak, which generally comes from above. To reduce the possibility of leaks, Hallmark has used a one-piece molded fiberglass-composite roof since 2010. The cap-shaped roof covers the unit with no seams or transitions to fail or maintain. Roof loads are of little concern, aside from their impact on the center-of-gravity. Walking or sitting on the roof is permitted, which is great for photography.

Hallmark offers three roof-lift systems. The standard mechanical crank-up lift is designed to raise only the roof. Both the electric and super manual systems are rated to support and raise an additional 400 pounds, should someone need to carry that much weight atop. I chose the low-geared super manual, which raises the roof in 37-seconds when using a cordless drill (the primary method) or after five minutes of hand cranking (the backup).

Setting-up or striking camp is extremely fast and simple with this lift system, better than any camping outfit I’ve used. Unbuckling the four roof latches, stepping inside, and raising the roof can be accomplished in about one minute. We love this, particularly during inclement weather, or after driving late and simply wanting to sleep.

One-piece composite roof under construction.
The roof and lift system will handle 400 lb. Insulated soft walls help maintain 70℉ in -20℉ weather.

Wood, Aluminum, or Coosa Interior Framing

Wood, Coosa composite, or aluminum internal cabinetry framing is offered depending on customer needs and preferences. Prior to spec’ing this Milner I thought surely I’d choose the newest and exotic composite material. However, Coosa saves little weight over wood, the cost is high, and wood holds a screw best and is the most repairable material should serious (collision) damage occur. With the molded fiberglass design protecting the internals, and living in dry-air Nevada, we chose wood for the interior framing. One-inch foam block insulation is standard.

Aluminum, wood, or Coosa composite interior cabinetry framing options.
An owner HIT his camper hard to cause this damage. This sight helped us chose wood for the repairability.

All Weather Comfort Soft Wall Design

Above I shared that Hallmark designs their campers to be comfortable regardless of the temperatures. Winter camping capabilities are import to me and where many RVs fail. Hallmark is proud of their cold weather performance, stating their pop-ups will hold 70-degrees inside when it’s minus 20-degrees Fahrenheit outside. Of course this includes using the furnace, but -20 is pretty cold.

The standard two-layer polyester-reinforced marine-awning-material soft walls contain a third layer of 1/4–inch closed-cell foam insulation. These thick soft walls feel substantial, and our Milner has an optional fourth-layer of Mylar reflective insulation in the walls. All our windows and vents have snap-on insulated and upholstered covers. A recent photograph on Hallmark’s website shows Canadian customers Mike and Kim Baird’s 2001 Cummins Turbo Diesel with their new 2015 K2 camper. The outfit is covered in several inches of snow in Estes Park, Colorado, and the caption says: “Any Season. Anywhere. Anytime.” I say, ’nuff said.

2015 Hallmark Milner tease… much more about this unit in part two!

Sources: 

Hallmark Campers link

Copyright James Langan/RoadTraveler. All Rights Reserved.

A version of this article was also published in the Turbo Diesel Register magazine.

No Spill Systems Oil Drain Plug

Screwing the tube on opens the O-ring-sealed plunger allowing the oil to drain.

No-Spill Systems

Nearly two decades ago I learned about the No-Spill™ Systems oil-drain plugs from Geno’s Garage and have been a fan since. I love their quality and how they function. No-Spill’s housing and working parts are made with high-quality brass instead of steel. Some competitors use brass dust caps on steel plugs, and when the metals expand and contract at different rates the caps can fall off. No-Spill uses all brass construction, so the dust cap is more likely to get tighter as the parts heat-up, not looser. The brass construction is also intentionally sacrificial. Brass is softer than the steel of most oil pans, and if over tightened the plug will break or the threads may strip before those inside the pan. This is extremely important on large equipment and aircraft, where oil pans can cost thousands of dollars, plus the labor to remove and replace them.

In applications where a new washer/gasket is supplied, they are made from solid copper, not hollow core (fiber-filled) copper, and the spring inside the plug is stainless steel. The No-Spill was formerly manufactured in the Netherlands, but they now source all their metals from the United States with the final machining and assembly done in Canada.

Quality is the name of the game here, and often you get what you pay for. As a fan of top quality parts, I would rather buy the best, most-functional accessories whenever possible. All No-Spill Systems come with a lifetime warranty on all parts and workmanship.

The compact system on my 1996 7.3L Power Stroke F-350 sold to a buddy in 2014, was in-use for 18 years. Our Toyotas also sport No-Spills; one is a nine-year-old compact and the other a right-angle design. Using these has been a pleasure, and I can’t abide returning to a standard, messy oil changing process.

No-Spill Systems engine oil changing kit.

Magnetic 

For our 2014 Ram/Cummins 2500 I chose a 10-18150-06, a standard design (not compact) with a magnet in the center. There are those that might argue that a magnetic plug is unnecessary with modern filtration, and if needed, Ram or Cummins would include one. Maybe so, and countless Cummins Turbo Diesels survive without one, but pulling the copy of Robert Sikorsky’s Drive It Forever from our bookcase, and reading his recommendations encouraging using one, the wisdom of my decision was supported by a higher authority.

A magnet and a real copper gasket were noticeably missing on the factory stopper I removed. Maybe the thin rubber film on the OE plug base would seal for many changes, but it appears cheap. Kudos to Ram/Cummins for only requiring a simple 3/8-inch ratchet for removal and for the low profile, high-clearance design.

I was being careful and trying to avoid a mess, but pulling the OE plug from the pan was not a splash free affair. Never again with the No-Spill.

This No-Spill extends 1.2-inches below the bottom of the pan, not much, but being accustomed to the shorter compact design, it looks substantially lower. As a frequent backcountry traveler, I may change to a Compact, particularly if I don’t fashion a skid plate to protect the oil pan. It would take a large rock tumbling under the front axle to hit and damage this plug, but plenty of rocks have rolled under the soft white underbelly of my rigs during technical sections of trail. The consequences could be severe.

Installing the magnetic No-Spill was easy; with the one exception being it’s so large. Only because I’d recently purchased a 3/4-inch-drive socket set did I have the 1 3/16” socket I needed. Without a 3/4- to 1/2-inch reducer in my toolbox I couldn’t torque the plug to specification, instead I had to use old-fashion feel. After buying an adapter I confirmed it had at least 30 lb-ft of force applied. Subsequent changes will be a pleasure, devoid of splashing when three gallons of hot oil all fight to exit the pan at the same instant.

A large, 1 3/16″ socket was needed for the installation and torquing of the No-Spill plug.
Torque to spec, don’t over tighten, you may break the plug. I’ve done it before.

Oil Change Number One

This was the first new vehicle in decades that I avoided doing an extremely early, precautionary oil change, usually around 1,000 miles. When essentially new lubricant is drained from the latest generation Cummins ISB engines designed to travel up to 15,000 miles on fresh lube, it’s almost unused.

Modern engines are made to tighter tolerances, and there is less physical wear-in than in the distant past, but there is still some. The Ram owner’s manual speaks to this, saying “engine run-in is enhanced by loaded operating conditions which allow the engine parts to achieve final finish and fit during the first 6,000 miles.” Note the word loaded. Don’t be afraid to work a new engine. Use the whole rpm range and all the gears, plus transfer case (off-pavement) if you have one… stuff needs a “final finish”. Does this mean the oil should be changed before the EVIC says to do so, probably not? But learning that our maintenance regime might be overkill is a good, first-world-problem to have.

Doing early oil changes has not always been about dumping the factory fill for more of the same, but often to insert a preferred synthetic at what was traditionally considered very low mileage. Confident my engines have received a good and varied initial break-in during the first 1,000 miles, my anecdotal evidence has been zero consumption, leakage, nor any oil-related problems from modern cars and trucks after adding synthetic after few miles. At 1,000 miles the wear-in process has just begun on heavy-duty diesels, and towing and hauling use ensues. However, early use of synthetic oil in new Ram/Cummins ISB engines is not a concern, they are delivered with 5W-40 synthetic in the pans.

Three-Pronged Oil-Change Goal

Changing the engine lube in the new 2014 truck at 2,800-miles was about a few things, none of which were related to serious concerns about it being worn-out. The goals were: installing the No-Spill, using my chosen product, doing a baseline used-oil-analysis, and practicing the procedure once while the truck was new, clean, and before it needed a service. The first three are simple, but there are tips and a story surrounding the last.

Much oil life remains after a mere 2,800 miles in a late model Cummins 6.7L ISB that uses DEF.

Changing engine oil is a simple task, but every vehicle is slightly different, and familiarity makes it easier and faster each time. Inline-six engines were historically straightforward to work on, our beloved Cummins ISB included, though like all modern vehicles there is increasingly little space under the hood and access is limited. Reading fourth-generation changing tips in both the TDR magazine and the Turbo Diesel Register online forums, I knew to remove the intake duct or use the passenger-side fender liner/wheel-well opening for filter access.

This 6-speed manual truck lacks the obstructive automatic transmission cooling lines near the wheel-well port. Access and leverage to remove the notoriously tight factory filter was much better through the wheel well, and there is no chance of debris falling into an open and exposed intake system. The fender-liner opening appeared faster and better.

Current G56 manual transmission Ram/Cummins trucks offer good oil filter access through the provided opening in the fender liner. Removing the right front wheel provides room to work.

To make the job easier I removed the right front tire, a quick task because I frequently test different sets of tires and wheels and have-it-down. Lifting the front axle with a floor jack, lowering it onto a six-ton stand, removing the wheel nuts with a cordless impact gun, and pulling the tire took less than five minutes.

With the tire removed reaching the filter was easy, but a minor modification improved access. The block-heater cord was on the forward side of the battery ground cable to the block. It might have limited lowering a full filter, or caught my fingers, encouraging a fumble. Unclipping the cord from the ground cable and unscrewing it from the heater element allowed repositioning it to the rear of the battery cable. The reusable OE clip was attached, and I was ready to proceed.

Block heater cord was moved aft for more clearance.
Simply unscrewing the the block heater cord from the heating element allowed easy rerouting for better access.
Ready to remove the factory Mopar filter.

The metal band wrench purchased in 1993 for our first-generation Dodge Cummins Turbo Diesel still works perfectly. The filter was tight, I almost needed two hands, but I was able to loosen it without resorting to a cheater bar. After loosening, as a precaution, I used the gallon plastic bag trick. I’d read that the level would drop over time, and I’d eaten lunch between pulling the plug and returning to change the filter. Unsealing the filter resulted in zero spillage. Lowering the it into the space between the frame and engine, and then angling it toward me, I could see the oil level was about 1.5-inches below the top, and sealing the zip-lock bag was unnecessary. Pulling the filter through the liner opening allowed a few ounces to spill into the bag as I reached the maximum angle. The plastic bag technique provided a welcome safety net.

As many DIY guys note, the original filter was tight, but nothing more than a good tool and arm strength were needed.
Using the old gallon freezer bag trick to prevent spillage.

Filling new filters before installation has proponents and detractors. I’ve mostly been a filler, but the two Toyota V8s and VW TDI in our garage don’t allow pre-filling, so only the old ’96 Ford 7.3L (with superior access under the truck) has received this treatment in recent years. The Cummins Filtration Fleetguard LF16035 (purchased from Geno’s Garage) has pictures on the side suggesting filling before installation; I didn’t. Removing the risk of spillage or possible contamination, I was ready to add oil to the crankcase. It may sound like a small detail, but I appreciate the 12-quart capacity. Our ’96 F-350 7.3L needed 14 quarts, and it’s nice to just pour-in three gallons.

Aside from minor splashing after removing the factory drain plug, this was an extremely uneventful oil change with zero mess or spills—until I started pouring the last gallon into a funnel while looking through my camera viewfinder.

Fleetguard’s LF16035 StrataPore filter.

Oil Religion Conversion and Chevron Delo 400 5W-40

In recent years my preferences for some brands and products has evolved. I’ve read the Turbo Diesel Register articles about oils that “meet the specification”, and the difference or lack thereof between brands. I was a never an only this brand guy, but still I won’t buy the cheapest stuff I can find. Reputations matter, and I enjoy consistency. The Cummins ISB is tough, and I’m more concerned about the lubrication of other drivetrain components than the engine. There are many satisfactory lubricants; using one oil for a few applications simplifies things.

Several gallons of Delo 400 5W-40 already sat on shelves in my shop intended for other rigs when the new Ram joined the fleet. This Delo meets the specification, is readily available for a low price in my part of Nevada, and will suffice for all temperatures the truck will experience. This lube should work as well as any that meets the spec, and for fun and edification I send samples to be analyzed so we can see how the performance compares to the EVIC oil-change indicator. Using the 15W-40 suggested for temps over zero Fahrenheit is an option, but the truck will see its coldest temperatures in the backcountry, with no power for the block heater. So for now I like 5W-40.

Delo 400 5W-40 has been my chosen diesel lube for the past several years.
With the dust cap on and ready for travel.

Future Change Intervals

The massive increase in oil-change intervals (OCI) on the 2013-up consumer pickups is due to the introduction of SCR/urea injection and the lack of oil dilution. I prefer a longer OCI when possible, and would not be wild about the shorter OCI on the earlier fourth-generation pickups. TDR editor Patton has confidence in Ram’s algorithm to determine OCI, and my EVIC numbers and percentages seem to support driving almost 15,000 miles before a change would be required.

After logging 2,816 miles on the engine the EVIC indicated the oil life was 82-percent of new. Simple math tells me that service life was reduced 1-percent every 156 miles. If that duty-cycle continued, I could have traveled 15,600 miles before needing a change. Impressive! This rig had yet to haul heavy loads or pull trailers, and doing so can reduce the oil’s longevity. Interestingly, the fuel-filter life was almost the same, with 81-percent remaining. The EVIC logs the engine miles and hours, and used oil analysis will likely backup the EVIC data. But what about a time-based OCI?

Resetting the EVIC oil monitor completes the process.

The 2014 Ram owner’s manual diesel supplement says, in bold, “replace the engine oil and oil filter every 15,000 miles (24 000 km) or six months, or sooner if prompted by the oil change indicator system. Under no circumstances should oil change intervals exceed 15,000 miles (24 000 km) or six months, whichever comes first.”

The six-month interval is ridiculously short. I’m calling bull on Ram and Cummins here. My truck was more than six month old when purchased. The lubricant was not changed before it was sent to me, the factory filter was still in-place, and the drain plug had not been touched. Was Dave Smith Motors in violation and my warranty in jeopardy because the engine lube was not changed? Did they sell me a truck that had not been maintained properly? Do the rules apply to me but not them? Balderdash. I’m confident the information obtained from oil analysis will show that about once a year will be often enough for a time-based interval. Avoiding draining three gallons of serviceable oil every six months will more than cover the cost of the oil analysis. We shall see.

Resources:

Geno’s Garage: genosgarage.com, 800-755-1715 

No-Spill Systems: nospillsystems.com, 866-466-7745  

© James Langan/RoadTraveler.net  All rights reserved.

A version of this article was previously published in Issue 87 of the Turbo Diesel Register (TDR) magazine.

Still Plays With Trucks, TDR Issue 86

Readers,

I rearranged my pages and needed to move this article into a new post to fix links. Largely a biographical piece, it documents my enthusiastic return to the Cummins/Ram world and was my initial Still Plays With Trucks column, originally published here on July 18, 2016.

This was the first of several articles culled from recent work for the Turbo Diesel Register (TDR) magazine, a publication I’ve been associated since its inception in 1993.

James

Still Plays With Trucks #1 TDR 86 COPYRIGHT 2014


© 2016 James Langan/RoadTraveler.net

Cooper Discoverer A/T3

crop-tdr93_spwt003

Testing & Talkin’ Tires

October 6, 2016

Even casual readers of this site will notice that I’m a light-truck tire aficionado; there are many posts about rubber for light-trucks. My personal obsession aside, there are powerful reasons tires are such a popular topic for both writers and enthusiasts nearly everywhere we gather. Mounting new meats is one of the easiest and most dramatic performance and/or appearance modifications owners can make to their trucks. Replacing worn rubber with new, even the same pattern, can greatly improve safety and traction. If you have any doubts, watch this Tire Rack video regarding tread depth and stopping distances on wet roads: tirerack.com/videos/index.jsp?video=5&tab=tires

Looking through a historical lens, modern tires are generally excellent, with unsurpassed designs and sizing options, and they are a good value. Yet value doesn’t mean inexpensive, and depending on the size and performance category, a new set of shoes for your truck can easily top $1000. This substantial outlay leads to questions and much research for many buyers.

Still Plays With TIRES means frequent trips to tire stores with a few shoes and insoles. This is a moderate load, sometimes I need a bigger trailer.

Journalism’s Dirty Tire Secret

If you read truck tire reviews critically, you may realize that many involve very few miles of use before the evaluation is penned, often as little as a few hundred miles. Reasons for this include the long lead-time for print periodicals, editors’ desire to publish something as quickly as possible, and sometimes a little pressure from the manufacturer or advertising agency folks. Writers sometimes mount new tread and take them on a little excursion, writing much about the adventure and some about the tires, then use this one experience as the appetizer, main course, and dessert. Meh.

Another favorite is the manufacturer’s initial ride-and-drive test at a testing facility or track. When possible I happily attend and enjoy such events, but they are mostly a good introduction. If they’re not followed with a longer, personal-use test, they often don’t tell the complete story.

When one brand redesigned their super-popular all-terrain pattern two years ago, they hosted journalists in Baja where the test vehicles were race buggies and Ford Raptors. I have no doubt that the conditions and obstacles were gnarly, and I’m not saying the product isn’t good. But how does one test a tire’s performance on an unfamiliar chassis, particularly on a race buggy or (factory) desert-prerunner truck? Where is the baseline? Are the tires being tested, or is the complete chassis? Would these highly-capable vehicles perform impressively if another tire brand or design was mounted? Surely.

Hopefully readers can benefit from my continuous evaluations. Instead of buying a new set every few years like many consumers, some running the same or similar treads repeatedly, I typically test a few sets each year. My personal experience and database over the past two decades is quite large, and includes aggressive mud tires, tame all-terrains, and many in-between. Although I swap tread often, I dismount them from wheels infrequently. At any given time I have several sets of tires on OE wheels, currently six that fit my 2014 Ram 2500, and keep notes on the dates, miles, performance, and wear. Some I buy, and some are supplied by manufacturers for review. Just this week I sold two older sets, one Ram and one Toyota, and bought a new set for my 2500. Some get more miles than others, depending on my needs and preferences, the physical size or fit, and how well they mesh with current objectives, but all receive thousands not hundreds of miles. Several years ago a teasing friend dubbed me “the Imelda Marcos of tires.” What can I say, if the shoe fits….

Starting lineup. There are few truck parts (any?) I like more than a fresh set of rubber.
There are few truck parts (any?) I like more than a fresh set of rubber.

Cooper Discoverer A/T3

Over the past several years Cooper Tire and Rubber—which is still a U.S.-based company and manufacturer—revamped their light-truck line. The 5-rib all-terrain Cooper Discover A/T3 is a natural choice for someone wanting better traction in more varied conditions than a highway tire (HT) offers, but something quieter, smoother and softer than a commercial traction pattern like Cooper’s S/T MAXX (which I’ve run on my 4Runner for a few years). The performance improvement over an HT can be substantial in inclement weather, including something as common as a hard rain, but the differences can be even more dramatic with a little snow, slush, or ice covering the roadway.

p1080973

Because the A/T3 is their flagship all-terrain tire there are an impressive 56 sizes. The outer rib’s open lugs allow liquid and debris to escape better than highway designs, as do the circumferential voids in the center. The silica-based compound improves wet traction and on-highway handling, provides cut and chip resistance on rough terrain, and reduces rolling resistance. Lateral groove protectors reduce stone retention and drilling, and the broken center rib is designed to improve soft surface traction. It is M+S rated, and has a 55,000 mile tread wear warranty.

There will always be a place in my heart and space in my garage for high-void traction tires, though maturing has made me increasingly less fond of louder designs when they are not necessary. The A/T3 is pleasant, barely audible to my ears, and notably quieter than the similar but slightly higher-void 5-rib Toyo A/T II tested on my Ram for 8,000 miles. (The Toyos averaged 1/32 of wear for every 2,100 miles, with frequent rotations, and were removed to mount the A/T3s.)

Comparing Cooper’s high-void, 295/70R18E STT PRO mudder to the the 285/75R18E A/T3. Both sizes support 4,080# each at 80 psi.

Again I chose the fantastic, niche, LT285/75R18 size. Cooper is one of a handful of companies making this approximately 35×11.50 inch size, tall but not overly wide. These Coopers are 34.84-inches tall, with 17/32 of tread depth measuring 8.9-inches wide, and weighing 58.4-pounds solo and 90 when mated to Ram Big Horn WBJ forged aluminum wheels. They fit perfectly on the stock 8-inch wheels, and like any pattern in this size, will support a massive 4,080 pounds at 80 psi. Loaded to the Ram’s GVWR, with 60 psi in front and 80 psi in back, the rear differential ground clearance is 8 3/4 inches.

Balancing Act 

Using my favorite local Discount Tire store the Coopers were dynamically (dual-plane) balanced. As always Centramatics balancers work in the background, adjusting to any irregularities on-the-fly. The A/T3s took very little wheel weight to balance, and they have remained smooth at all speeds, legal and above.

Inside              Outside

#1 3.00            0.25

#2 1.75            1.75

#3 1.50            3.00

#4 1.25             3.00

The LT285/75R18E Discoverer A/T3 starts with 17/32” of tread.
The LT285/75R18E Discoverer A/T3 starts with 17/32 of tread.

Ride quality is smooth and compliant; the traditional construction 2-ply sidewall is not stiff, and helps absorb impacts, even at full pressure under a maximum load. The generous and squiggly shape of the siping helps grip, and is surely behind some of the excellent winter traction endorsements I’ve read on snow plowing sites (my A/T3s have not seen much wet yet). Straight-line tracking is good as one would expect from a 5-rib all-terrain/all-season design, as is steering response. When conditions are right my truck will drive straight for 10 seconds or more with no input. It’s too early to report on wear, but after the first 2,500 miles, it looks mileage will be similar to the Toyo A/T II tires mentioned above.

The A/T3 doesn’t feature or need sidewall tread for its target market.

Supporting Documentation

Confidence in my prose is important, but I enjoy sharing others’ views when it helps make a point. Before accepting the Senior Editor post at OutdoorX4 magazine, I was a technical editor at Overland Journal (OJ) for a few years. For the Summer 2014 issue, OJ conducted a comprehensive, seven tread, all-terrain comparison which was later published online, and can be read at: expeditionportal.com/where-the-rubber-meets-the-road. The article is a good read for traction tire enthusiasts. The short version is that the Cooper Discoverer A/T3 won both prizes after all the tests were completed: the “Value Award” and “Editor’s Choice”.

For a less analytical but impressive amateur review, this YouTube link gives a snapshot of the A/T3’s winter performance potential. A competitor’s design with plenty of tread remaining cannot start up a snowy incline in 2WD, but with Cooper A/T3s mounted, the truck moves forward.

youtube.com/watch?v=m2OHErN5ZOI&app=desktop

If you are in the market for a traditional 5-rib all-terrain, but with an updated design and reputation for superior traction, consider the Cooper Discoverer A/T3.

Sources:

Cooper Tires: coopertire.com, 800-854-6288

A version of this article was published in Issue 93 of the Turbo Diesel Register magazinein my Still Plays With Trucks column.

Copyright James Langan/RoadTraveler.net