Mickey Thompson Baja Boss A/T LT255/85R17

Mickey Thompson Baja Boss A/T LT255/85R17

The Baja Boss A/T was introduced to automotive journalists during the virtual 2020 SEMA Show with a press embargo date of April 5, 2021. After the embargo Mickey Thompson sent me a set for a long-term evaluation, which was published in the Turbo Diesel Register magazine. For my initial review I chose a popular 18-inch size aiming for the broadest appeal for those with newer trucks. In that piece I shared that Mickey Thompson introduced a new niche size, the LT255/85R17, that I also wanted to evaluate. 
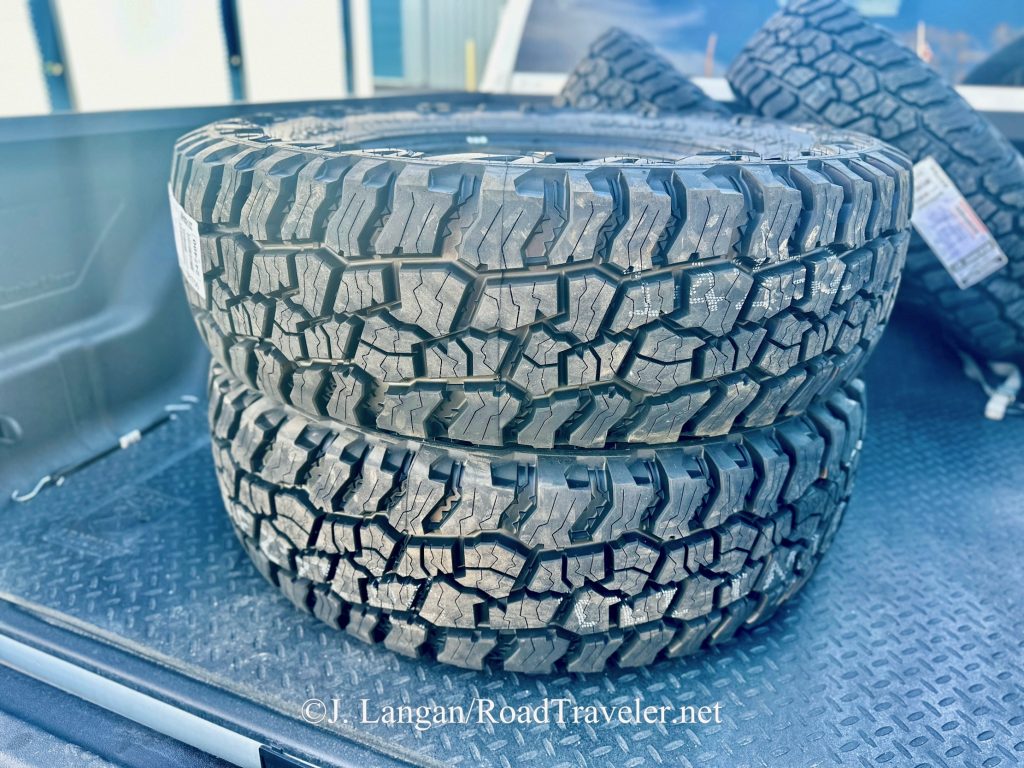
LT255/85R17E is a cool, new, niche size.

Overview

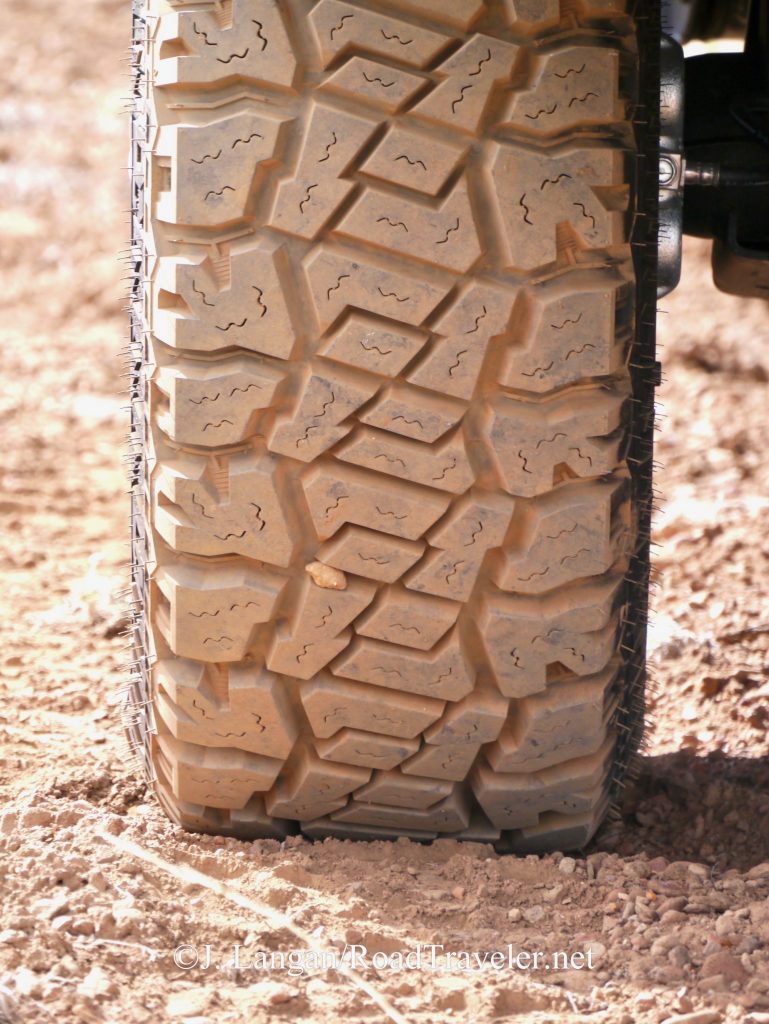
The Baja Boss A/T is a fairly high-void, four-rib tread design that Mickey Thompson calls a hybrid, AKA a commercial traction or an aggressive all-terrain. Absorbed by sister brand Mickey Thompson a few years ago, the legendary but now defunct Dick Cepek company arguably invented the first hybrid tread in 1978, when Mr. Dick Cepek introduced the first Fun Country. This was long before anyone used the word hybrid to describe tires, and before several other manufacturers started emulating these versatile and multifaceted designs. 
2014 version of the Dick Cepek Fun Country.

When compared to a more conservative all-terrain or all-season, the deeper and higher-void tread offers better resistance to hydroplaning and superior grip on deeper snow and moderate mud. These attributes are often combined with rugged carcass construction, and if the right special sauce is used for the tread compound sometimes they also offer superior longevity. 

Continually reducing road noise while improving other benefits of traction designs is a challenge for engineers. Historically there’s been no easy solution, because better traction in sloppy conditions requires bigger blocks and voids, which increases road noise. The Baja Boss A/T is quieter than it looks. 
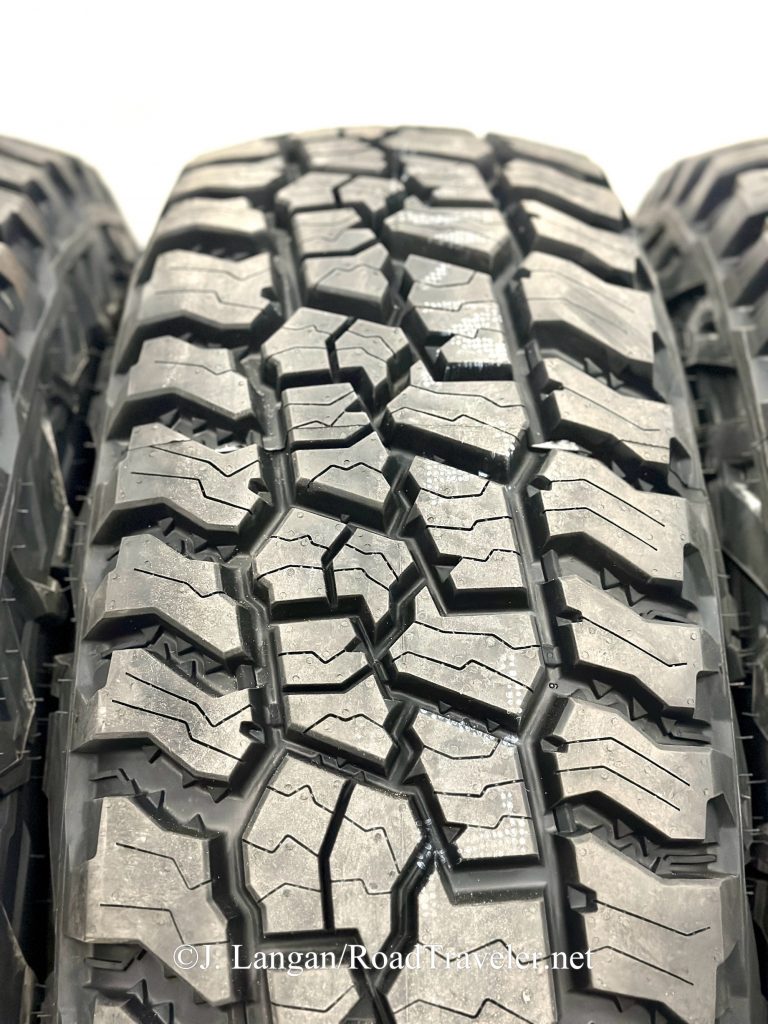
Mickey Thompson’s Baja Boss A/T has been a favorite since its 2021 introduction.

According To Mickey Thompson

Mickey Thompson says the Baja Boss A/T blends Extreme Sidebiters® for a bold look and serious grip with an all-new silica-reinforced compound providing long-wear, all-weather performance and cut/chip resistance.

Design highlights include:

  • Large surface-area tread elements for a greater contact area
  • Shoulder scallops for an additional biting edge
  • Sound-deadening ribs for stability and a quiet ride
  • Enhanced stone ejectors to reduce debris retention
  • PowerPly XD™ with 50 percent heavier denier cord on the biased-angled third ply for protection, handling and stability
  • Rim flange protector for added wheel protection
  • 3 Peak Mountain Snowflake (3PMS) symbol certifies that all sizes 12.50 (315mm) and narrower are Severe Snow Service rated
  • 50,000-mile treadwear warranty
  • Increased-load LT-Metric sizing for heavy-duty applications
  • Lower-load floatation sizing for half-ton, lighter trucks and SUVs  
  • A 35-inch tire approved for 17×6.5 dually wheels 

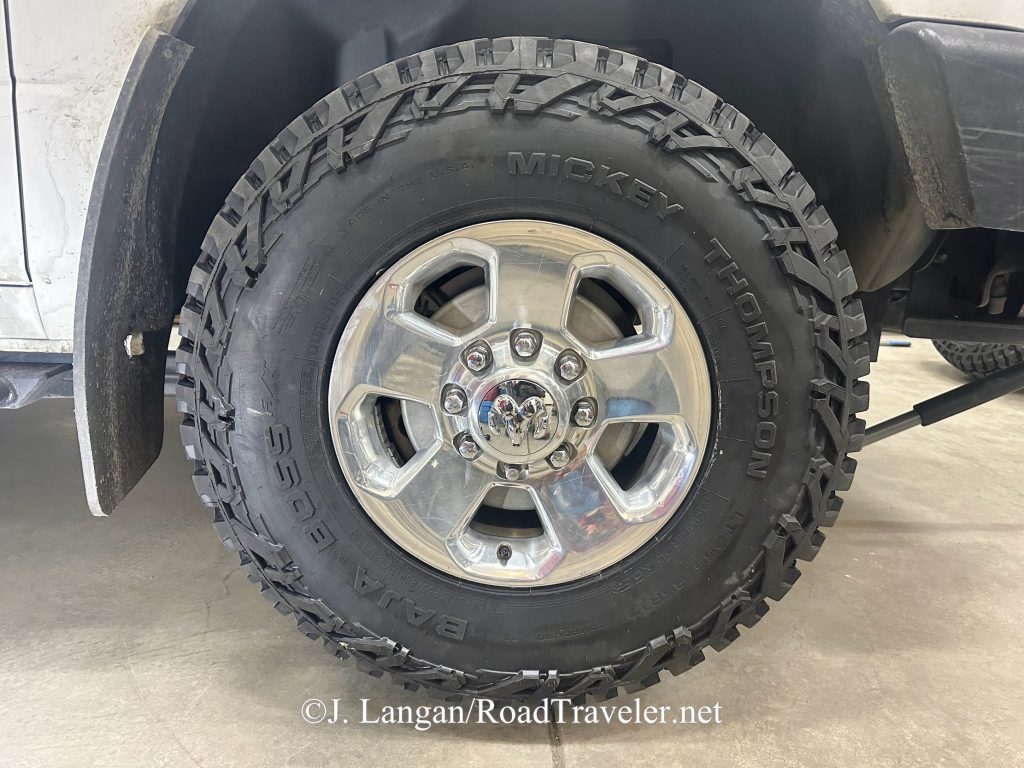
That last bullet point is the specific size this review is about, the LT255/85R17 Baja Boss A/T (also know as the 35×10.00R17LT). The substantial siping helps achieve the severe winter rating and increases overall grip, and measures a whopping 17/32” of the total 18.5/32” depth. Calling the sidewall rubber Extreme Sidebiters® is not an exaggeration, as they are up to 14/32” thick!
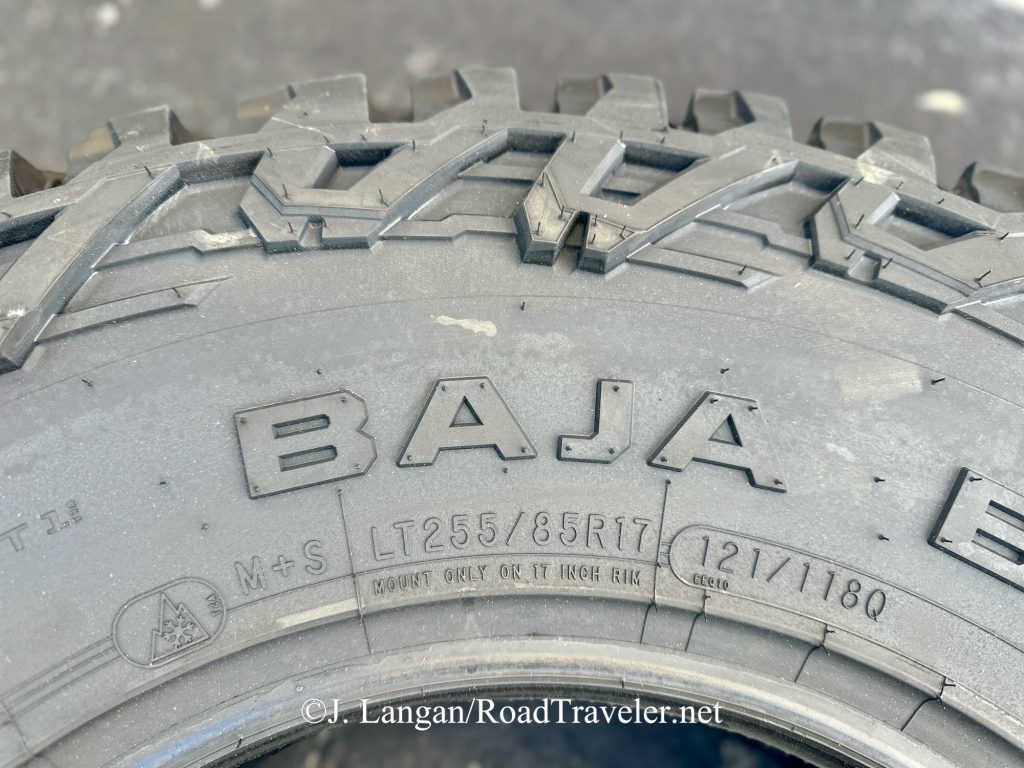
Extreme Sidebiters® on the LT255/85R17.

LT255/85R17 For Duallys

Dual Rear Wheel (DRW) pickups have an import role in the heavy-duty market, above the more common and very capable single rear wheel (SRW) HD trucks, but a notch below what are really medium-dutys, the 4500 and 5500 chassis. But the rear duals greatly restrict aftermarket tire options due to the spacing needed between sidewalls. 

Unless someone wants to have their outside tires protruding well beyond the fenders (some do, and they think it looks cool), the DRW crowd has few choices for taller rubber that will fit otherwise stock or lightly-modified trucks. Mickey Thompson invented the new LT255/85R17 size to fill this niche. It is 35-inch-tall (34.6”), and was purposely designed to fit narrow 6.5-inch dually wheels, though it works well on wheels up to eight inches wide for SRW pickups. 

When inflated to 80 psi, the 121 load-index supports 3,195 pounds each in SRW applications, or 2,910 pounds for duals. The tread has one nylon, two steel, and three polyester plies, the sidewall construction has three polyester plies, and they are made in the U.S.A. 

Single Rear Wheel Use

Narrower tires will almost always clear more easily with fewer and sometimes zero modifications than a wider tire of the same height. What is also routinely overlooked because many are focused on looks, and wider is perceived as tougher and better, is that a narrower footprint usually rolls down the road more consistently, catching fewer edges, rain grooves, or semi-truck ruts. There are some people that still prefer the appearance and performance of moderate width tires (few modern LT tires are actually narrow or small), and avoid negative-offset wheels or grossly wide rubber sticking well beyond the fenders, which sling rain, snow, mud and other debris. 

So it was not surprising to hear Senior Project Manager, Light Truck Division at Mickey Thompson, Ben Anderson, say that the Baja Boss A/T in LT255/85R17 has become popular with the Jeep and Toyota crowd, and others wanting taller but not needlessly wide off-road meats for their four-wheel-drives. I’m also one of those folks. 
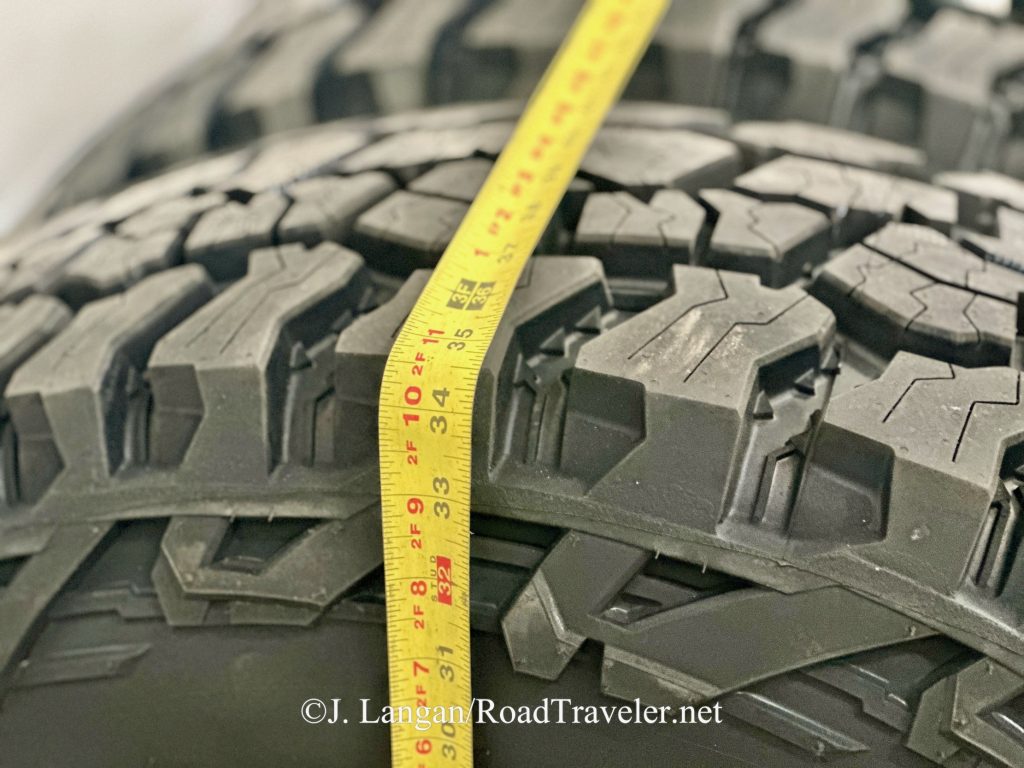
Confirming Mickey Thompson’s stated height of 34.6”. Tires are measured when mounted on a specific rim width, but not on a vehicle. Those complaining that tires are shorter than advertised when loaded by a chassis are uninformed.
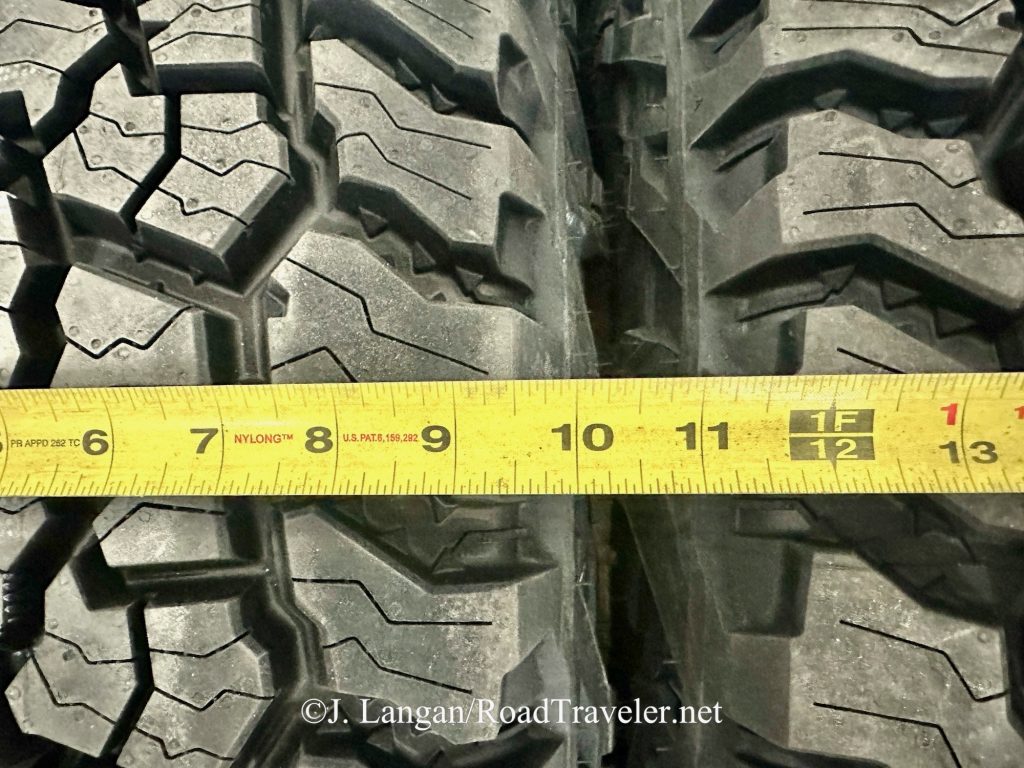
LT255/85R17E section width is 9.8”. 

Sidebar

17-inch Tires Limited to 3,195 Pounds

Why are most heavy-duty seventeens rated to support much less weight than a similar 18-inch, or even less than the same 17-inch size was in the past? Nearly all new 17-inch light-truck tires are limited to a maximum capacity of 3,195 pounds regardless of their size, psi, or theoretical capabilities.

It appears that several years ago the Tire and Rim Association (TRA) decided to lower the maximum load index for seventeens. Or maybe there was a government regulation necessitating the change? Whatever the reason, it is difficult to find high-capacity 17-inch rubber. 

The official TRA load inflation charts indicate that something doesn’t compute. For example, the LT295/70R17E has 3,195 pounds of capacity when inflated to 65 psi. However, increasing the pressure to the maximum allowable 80 psi offers no increase in capacity. My basic understanding of math and science tells me that this is not how pressure and volume works inside a tire. Plus there are exceptions to the 3,195 limit. 

3,970 Pound 17-Inch Anomaly

I think that if a specific tire design and/or size existed before the change, that manufacturers were grandfathered. Specific examples can be seen online, including from Toyo in their Open Country M/T line. Still using LT295/70R17E, the Toyo M/T has a load index of 128, and is rated to support 3,970 pounds at 80 psi, which makes much more sense. That is a whopping 775 pounds more than 3,195, and 1,550 pounds or 3/4-ton per axle! 

For a given diameter, smaller wheels yield taller sidewalls, generally flex more, and may generate extra heat. Excessive heat is the archenemy of tires, so I theorize that this was one reason to push folks to bigger rims. 

Yet there are big 16-inch sizes rated above the 17-inch, 3,195 maximum. The LT305/75R16 is rated for 3,640 pounds at only 65 psi. What gives? Are you a tire engineer reading this article? If so and you want to share some industry knowledge and history, I’d love to hear from you. 

Possible Solutions

Many newer pickups come with 18-inch or larger wheels and there are many sizes that offer excellent carrying capacity. However, there are plenty of older trucks still running around on their original 17-inch rims, and they might need more capacity when hauling big loads. Proceed at your own risk, you are your own warranty station, nobody is responsible but you, etc. Depending on the specific tire, size, and manufacturer, and how one applies the science, it is possible that you may already have, or could source a 17-inch tire with more capacity than 3,195 pounds.

Mount And Balance 

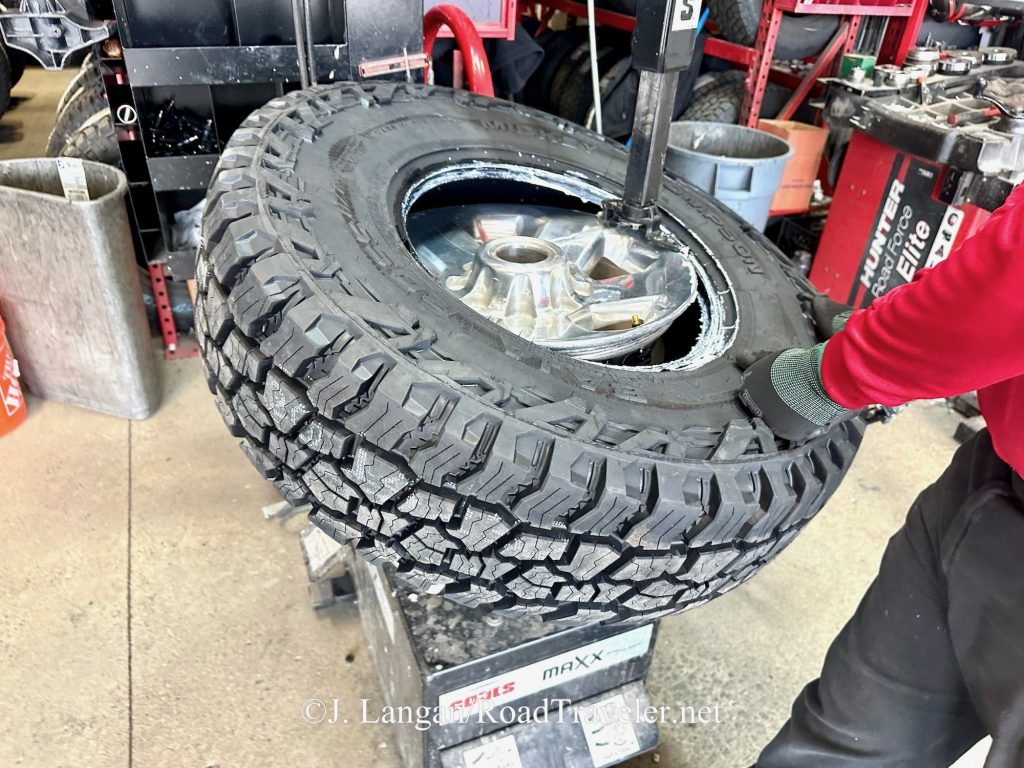
The Baja Boss A/T tread is asymmetric and there is a dedicated inside and outside sidewall, so they should be mounted correctly. It is possible to have a tire and wheel that is balanced according to the machine, but drives poorly. One reason can be attaching excessive weight to achieve the balance, and road force is another. As discussed in a previous article, excessive road force, or radial force variation, is a condition that can affect steering, traction, braking and load support. High road force will impart ride disturbances to the chassis and ultimately the driver. 
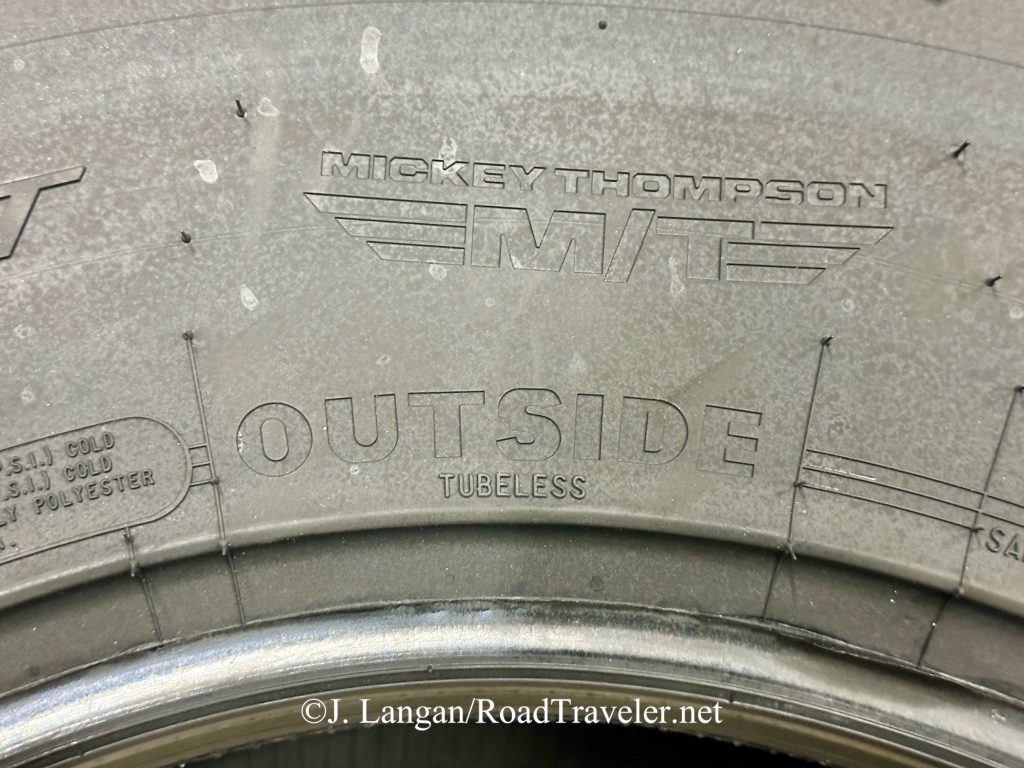
Baja Boss A/T is an asymmetric design, with dedicated outside and inside sidewalls.
Discount Tire was hired to do the mounting and balancing.

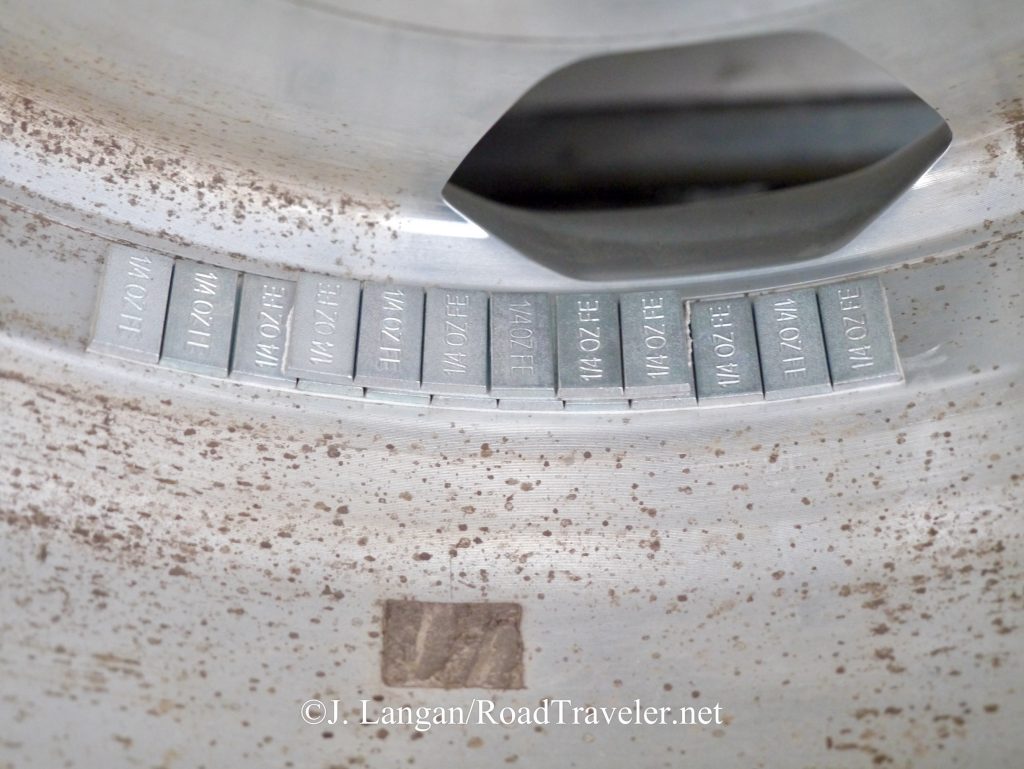
Both the wheel weight required and the road force measurements were extremely low for this set of Mickey Thompsons. An acceptable maximum road force measurement for passenger car tires is 35 pounds, but all of these Baja Boss A/Ts were in the teens, which is phenomenal for a stout light-truck tire weighing 64 pounds. They were mounted on 28-pound OEM Fourth Generation 17-inch Power Wagon wheels, and the average weight needed to balance the resulting 93-pounds was only 3.9-ounces! 

#1- 4.5 oz., road force 17-lb 

#2- 3.75 oz., road force 11-lb 

#3- 4.00 oz., road force 14-lb 

#4- 3.25 oz, road force 16-lb 

Data is nice, but like with many things these days we must ensure that the machines are accurate and confirm for ourselves that everything is truly working well. 
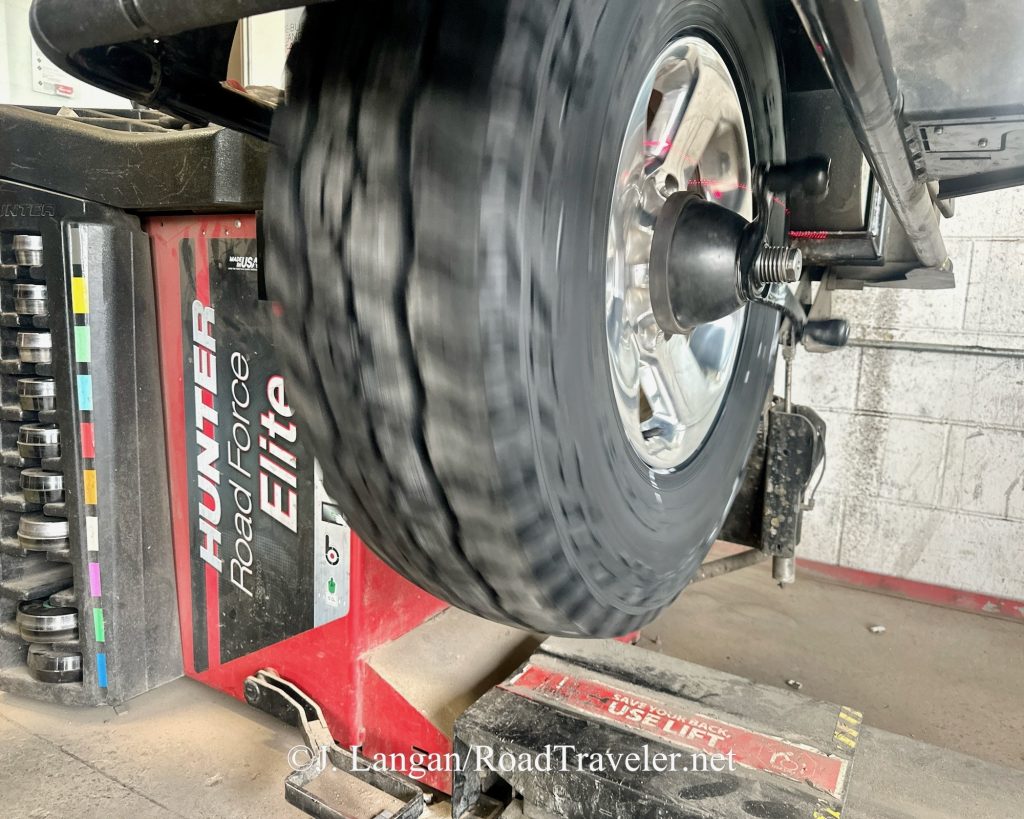
Got road force? Hopefully not too much. These were perfect.
93 pounds for a modern wheel and aftermarket tire is in the normal range, but the size of the wheel and tire matters. I have a set of 20 inch tires and wheels that weigh 111 pounds, 20% more!
Wheel and tire #1 needed the most wheel weight, but that was still only 4.5 ounces.

Take It To The Limit, One More Time

My initial seat-of-the-pants freeway evaluation confirmed that Discount Tire’s balance machine was calibrated. These 255/85R17 Baja Boss A/T were fantastically smooth all the way up to 100 miles per hours and straight line tracking was excellent. I was running 58 psi in the fronts, and 40 psi in the rears, plenty for my 2500’s everyday unloaded wet weight. 

The Toyo C/T is a similar heavy-duty commercial traction design and one of my all-time favorites, and a set was removed to mount the Mickey Thompsons. While the C/T are not loud for their capabilities, the Baja Boss A/T are noticeably quieter.  
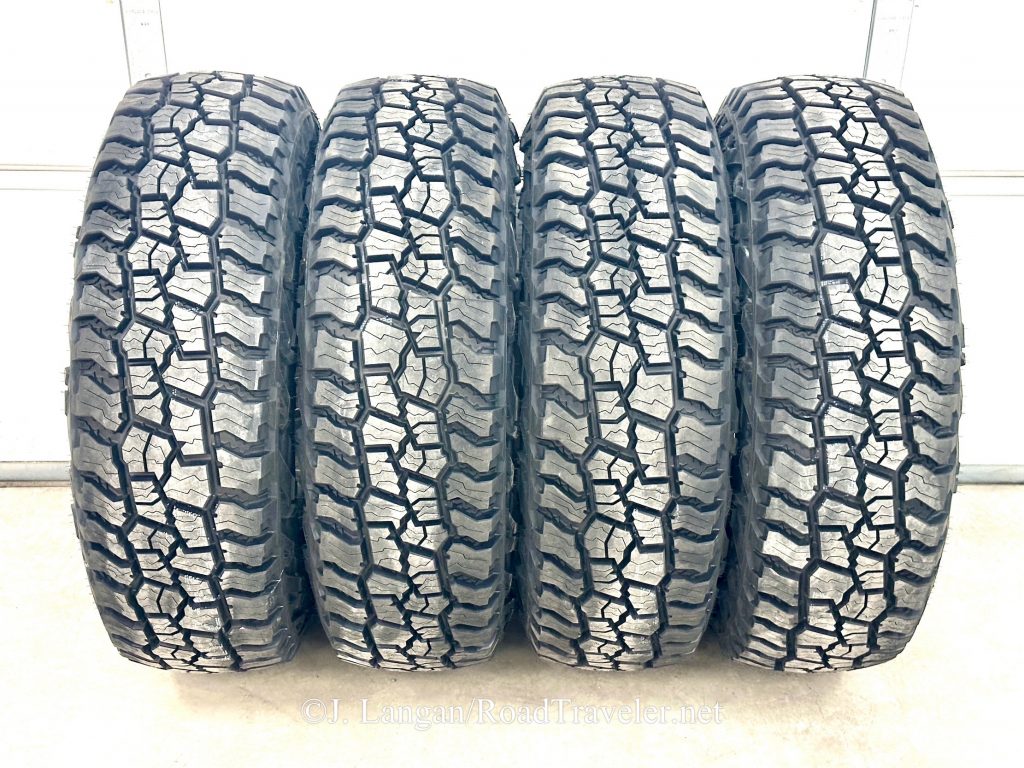
With low road force and minimal wheel weight, it wasn’t surprising that these LT255/85R17 Mickey Thompsons remained smooth at all speeds.
Baja Boss A/T were mounted on a set of used, scratched, but still true Power Wagon wheels. The same rims traveled up to the frozen Arctic Ocean at Tuktoyaktuk, Northwest Territories, Canada, in 2017.

Not Loud

The lack of noise from the Baja Boss A/T for the amount of void and traction impressed me back in 2021. There are similar, older treads that I still like and have run extensively in multiple sizes on several four-wheel-drives, and the Cooper Discover S/T MAXX is a great example. The S/T MAXX is a little louder when new, but once they are worn the volume increases substantially, sometimes becoming nearly as loud as a mud-terrain. The Baja Boss A/T starts and remains quieter than others, and the engineers really deserve credit. Are they as quiet as a five-rib A/T or highway tread? Of course not. As with all tires, to help reduce noise and keep your rubber wearing evenly, frequent and consistent rotations are necessary. 

Ride Quality

What constitutes a good or poor ride characteristic depends on one’s performance perspective. Some prefer a softer and more compliant on-road ride, while others want or need firmer and ostensibly stronger options. Even within the LT tire category there can be huge differences between tread designs and carcass construction, even when the load index and other ratings are identical. The Mickey Thompson Baja Boss A/T is sturdy, which I prefer when using my pickup for hauling, towing, and rugged off-pavement use. The PowerPly XD™ with its 50% heavier denier cord and biased-angle third sidewall ply can be felt, but that’s to be expected and is appropriate for the intended applications.  

I do prefer a somewhat softer ride during normal daily driving, but this is easily accomplished with the following two practices. I don’t combine super tall wheels with short and silly thin sidewalls (which also reduces carrying capacity), and I run close to the minimum pressure required for the weight on each axle. This means I know what my vehicle weighs, find the appropriate psi using an inflation chart, and am diligent about adding air when the load is substantially increased. 

How Low Can You Go?

When unloaded I routinely run my rears between 35 and 40 psi for comfort, traction, and overall performance. The fairly soft riding 2014-and-newer Ram 2500s are not nearly as rough as the older and stiffer suspensions, but it’s still suboptimal to have overinflated tires. The ride quality difference between 80 and 40 psi with no load on the rear axle is dramatic. Over-inflation hurts grip and uneven wear is also possible. 

Depending on the exact size, load index 121 tires will have a capacity of about 1,950 pounds each, or 3,900 pounds per axle at 35 psi, more than many think. One can always increase pressure to tune for their speed, ride, and overall preferences. Tires get hotter in warm weather and at higher speeds, and overheated tires can and do separate. Increasing psi for certain conditions might be desirable, but that doesn’t mean jumping from 35 psi to 80 when there is only 3,500 pounds on the axle. 

In the front I typically run between 50 and 60 psi depending on the ratings and weight. The Cummins Turbo Diesel is heavy, but front axle loads are less variable so pressure adjustments are rarely needed. 
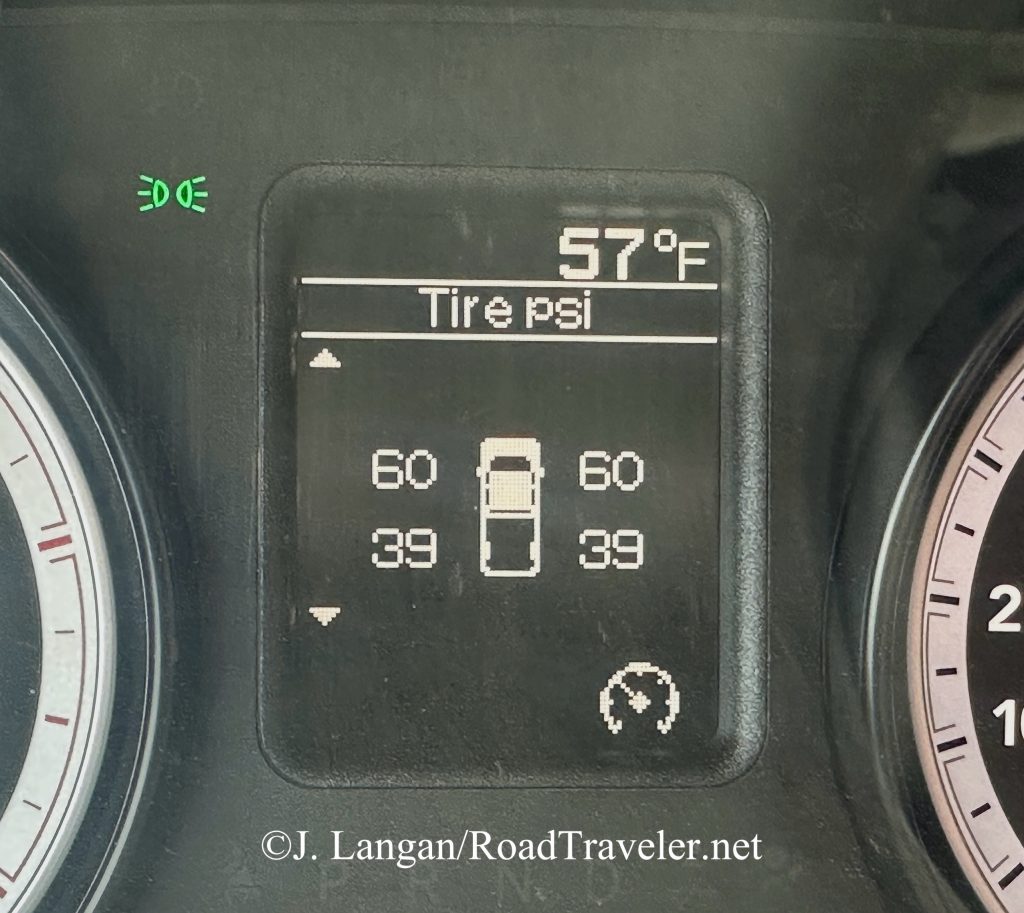
60 psi up front and 39 psi on the rear axle is plenty for my truck based on the Tire and Rim Association load information charts. Your circumstances may be different.
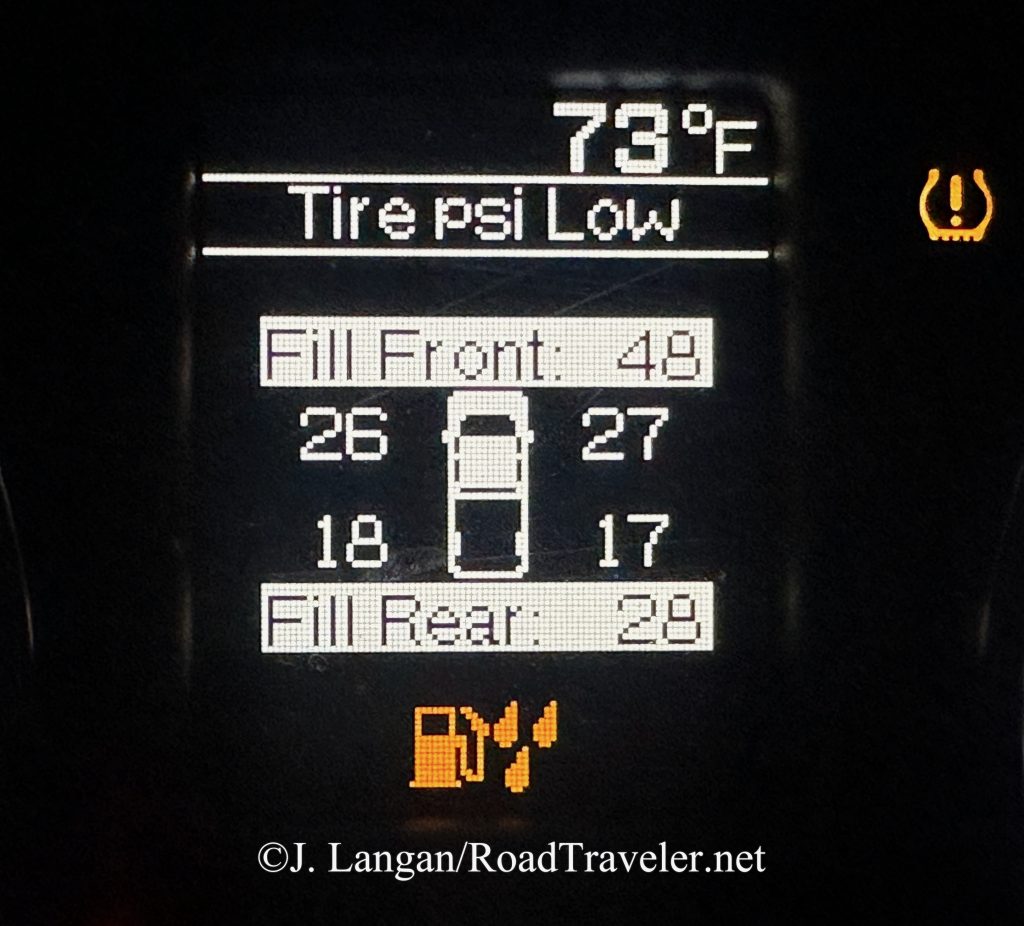
Off-pavement crawling pressures, and much too low for regular driving. Note my minimum psi thresholds, 48 in front and 28 in the rear. These lower thresholds keep the TPMS light off unless there’s a leak and pressures are dangerously low, which is my preference. (Water-in-fuel light was triggered by a car wash.)

Light Load TPMS Light

The federally mandated Tire Pressure Monitoring System (TPMS) is an outgrowth of the Ford Explorer/Firestone debacle in the 1990s. It’s also symbolic of a larger problem, which is the unwillingness of the average driver to take responsibility for their machinery, including failing to check something as fundamentally important as tire pressure. Even with TPMS on my pickups, I regularly check and adjust pressures with a handheld gauge. 

Having psi information available on the dash is great, but it’s unfortunate that Ram eliminated the light-load option around 2012, and require all 2500 owners to run pressures for maximum loads or accept a warning light on the dash. The 3500 Rams have a different system, the Tire Pressure Information System (TPIS), because their GVWR is over 10,000 pounds. TPIS provides information but does not force a warning light for running less than a predetermined and maximum pressure. 

I permanently eliminated the TPMS irritant with a professional Autel MaxiSys MS906 tablet scan tool. One could argue that this was a $1,000 sledgehammer solution to dispatch an ant. True, but I purchased the Autel one year before the AlphaOBD diagnostic software was available, which reportedly works well for adjusting the pressure thresholds. 

A professional automotive tablet is a super powerful diagnostic tool, and I have only used a small fraction of its capabilities. But the scanner has come in handy a few times by allowing me to discover the source of unusual problems or clear codes that were too much for my Edge CTS2. 

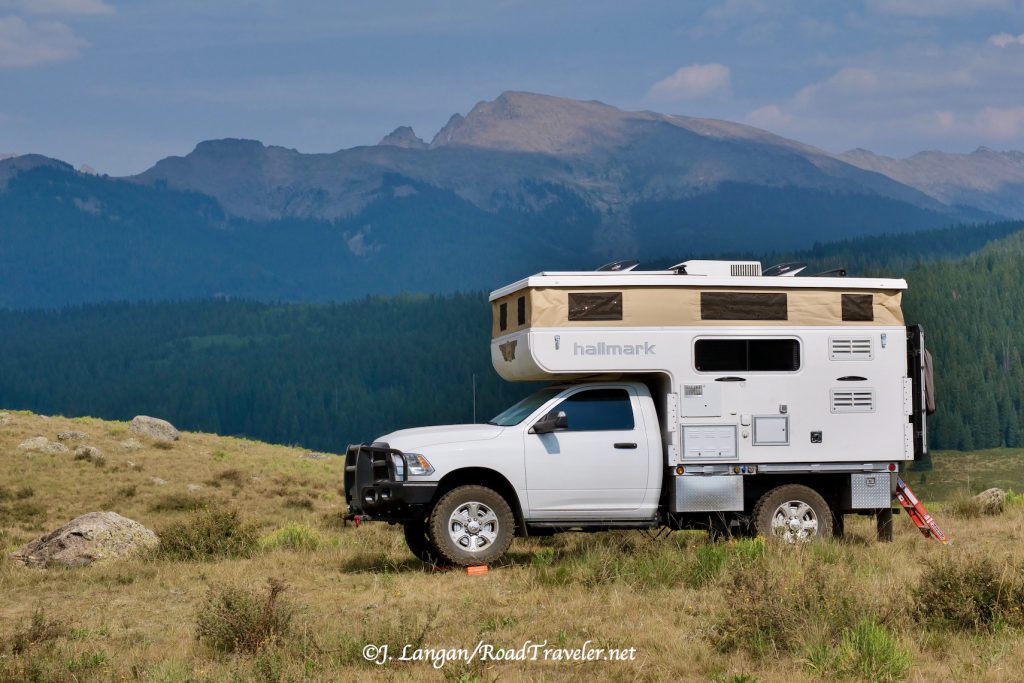
Regardless of the tool being used, I absolutely love being able to adjust the minimum psi thresholds for both the front and rear axles to my liking, depending on the load index of the tires and my needs. My 2017 regular cab has a heavy Hallmark flatbed camper mounted full-time and the rear axle threshold’s are set higher, usually around 70 or 80 psi. 
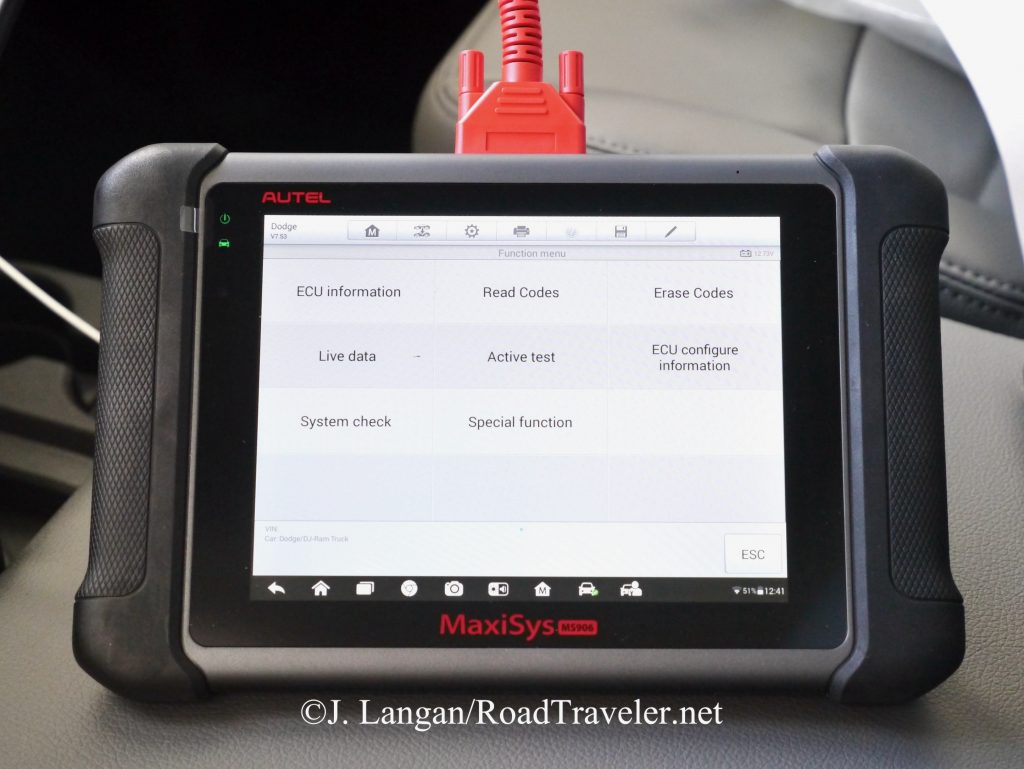
Autel tablet allows adjustment of the TPMS sensor thresholds and so much more.

Need Traction?

Traction, handling, and overall performance from the Baja Boss A/T has been impressive in all conditions and on every surface, which has included considerable dirt, gravel, rock, rain, and snow. For those wanting hybrid or commercial traction rubber I don’t envision many people wanting more grip over varied terrain than these Mickey Thompsons provide. My first set of Baja Boss A/T saw less snow than I would have preferred, not taking advantage of the three peak mountain snowflake (3PMS) rating because our local Sierra Nevada winter storms and my travels rarely overlapped in 2021. The story is dramatically different with the second set. 

Got Snow and Rain? Lots Of It?

The day after mounting these LT255/85R17 on my 2014 crew cab, I made a 500 mile weekend round trip that included two crossings of the Sierra Nevada’s infamous Donner Pass. There were several inches of wet snow for dozens of miles that required four-wheel-drive. Followed by 100 miles of epic rainfall. The kind of rain that even with the windshield wipers bouncing at full speed I could barely see the roadway, similar to dangerous fog conditions, and using four-wheel-drive was beneficial because of water on the road. Throughout the remainder of winter and spring 2024, the Baja Boss A/T performed perfectly during every winter storm. 

Similar to mud, the types of snow and the related driving conditions can vary greatly by region or microclimate, and opinions regarding what is good performance in certain conditions are highly subjective. For my uses I have found that the Mickey Thompson Baja Boss A/T are an excellent winter and wet weather performer under my Ram 2500. 
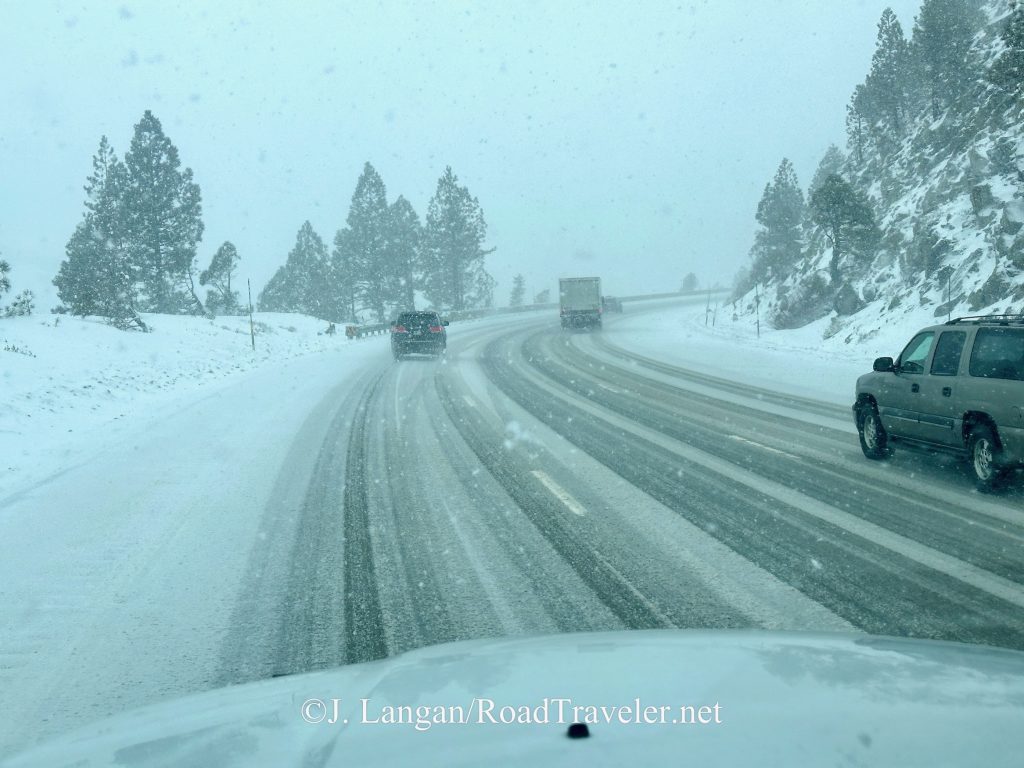
These Baja Boss A/T have seen much snow and performed flawlessly.
Higher-void and deeper treads can perform well in heavy rain because the water can escape instead of being trapped under the tire.

Sidebiters®

Sidewall tread has become popular in recent years, even on tires that are really not intended to be used in harsh off-pavement conditions because it looks cool. However, the Baja Boss A/T Extreme Sidebiters® are legit, and are super thick and beefy. I certainly like how they look, but also put them to work for their intended purpose. If you never leave the pavement, the Sidebiters® aren’t going to complain if you drag them along curbs.  
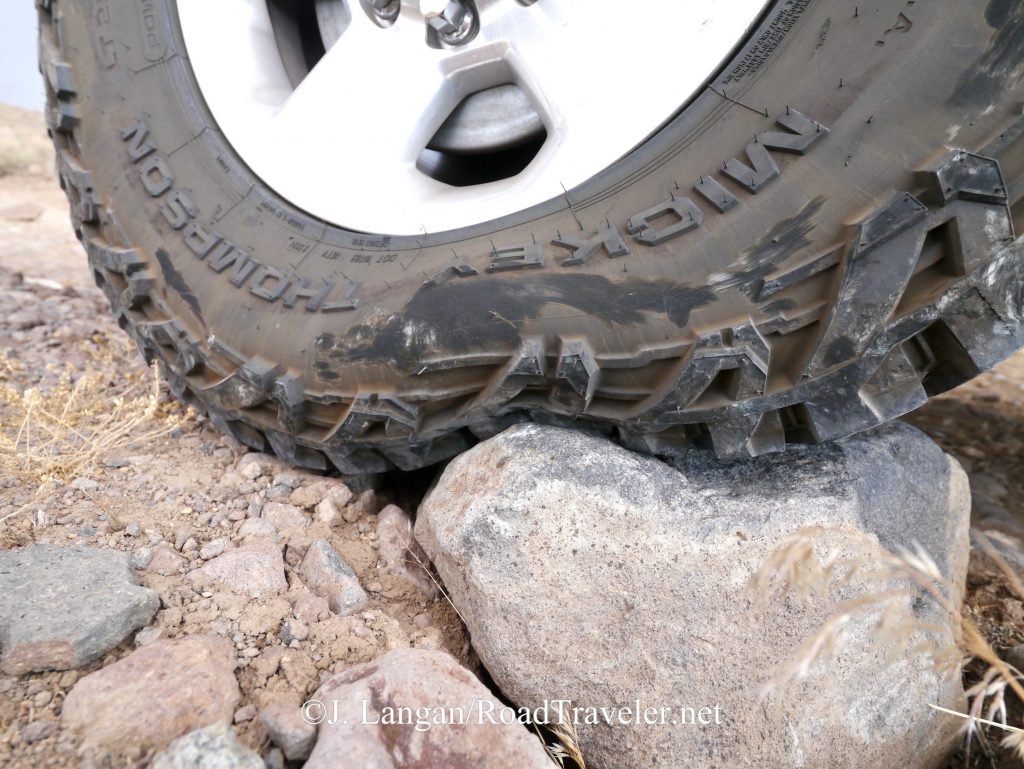
Using the Sidebiters® for their intended purpose. Low psi deformation allows a tire to conform to obstacles and improves traction.

Estimated Longevity Baselines

Wear and longevity for a given tire can be highly variable depending on the vehicle, duty-cycle, and driver. One could argue that all three of these metrics (and others) are important, however, the person behind the wheel has a disproportionate effect, and will invariably influence results dramatically compared to the others. 

If we were to take two identical pickups (model, gearing, transmission, tires, etc.), load them the same, and run them over a route with different drivers, it would not be surprising to see measurably different fuel economy. Covering longer distances and varied terrain would make the differences more obvious. More or less mpg is a direct result of how one operates the accelerator and brakes. 

Tires and brakes are consumed more slowly than fuel, but over time the driver who gets fewer mpg and exercises less finesse and vehicle sympathy will likely also get fewer miles out of their rubber and brakes. The differences can be dramatic. 

Same Guy Driving The Same Truck

No one’s truck, conditions, or driving style are identical, however, if the driver is not one of the variables the data can be more comparable. The treadwear information I’ve gathered from several four-wheel-drives over decades, particularly during the last 10 years driving the same 2014 Ram 2500 crew cab with a G56 6-speed manual transmission, provides relatively consistent and relevant information. 

Wear Data

These LT255/85R17 Baja Boss A/T were mounted February 2024, have been rotated twice, and have logged 6,300 miles. Approximately 10% of those were off-pavement, including dozens at low trail pressures to improve ride, traction, and prevent damage. There is zero visible cutting, chipping or lug tearing of the tread, which is impressive considering the amount of off-highway use my truck sees. (Again, driving habits matter, and I keep tire slip and spinning to a minimum, particularly in the dirt.) 

While I am smooth and conservative off-pavement, on the blacktop I routinely use all of the torque, horsepower, and rpm that my G56 version of the Cummins 6.7L has to offer with assertive application of the skinny pedal. Just like hard braking and turning fast can disproportionately wear the fronts, the massive twist of modern diesel engines can be hard on the rear drivers. Yet, that is not what I’ve experienced, there has been no penalty for my lead foot. 

All Baja Boss A/T come with 18.5/32” of tread, and this set currently has about 15.5/32”, so they have given 2,100 miles per 1/32”. Those 2,100 miles compare well with other quality aftermarket traction designs, on the same truck, driven by me. 
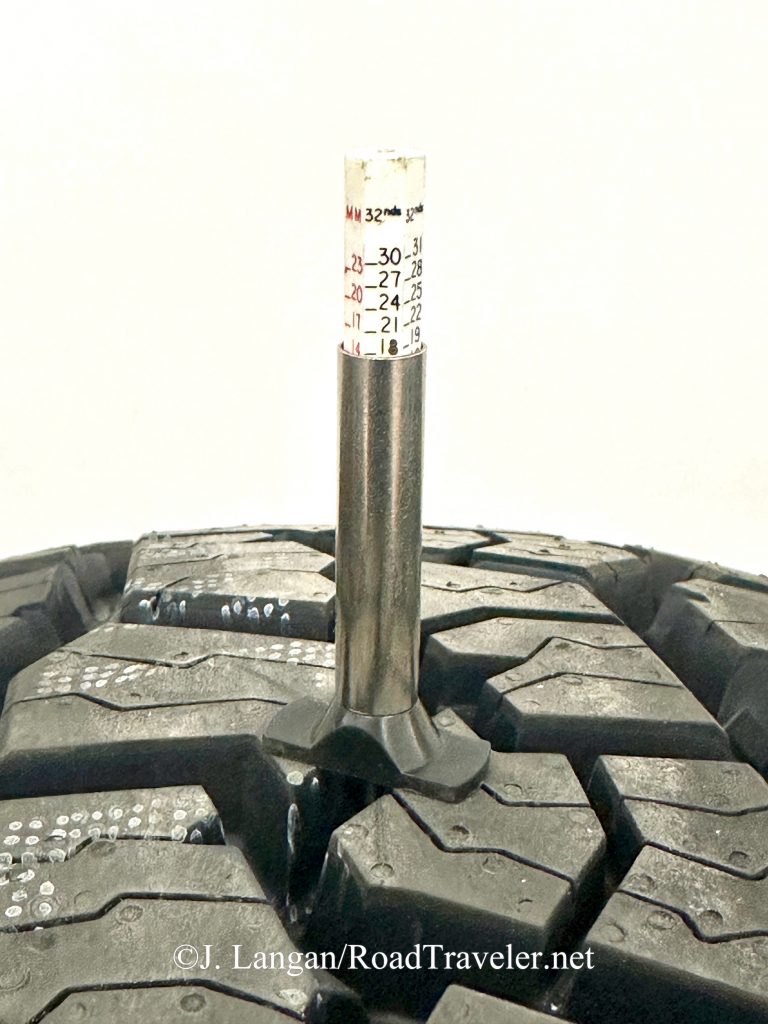
Deeper tread generally helps with traction and increases longevity. All Baja Boss A/T sizes have 18.5/32”.

For comparison, my previous set of Baja Boss A/T in 295/70R18 were run for 15,000 miles and delivered 2,300 miles for each thirty-second before they started living on a friend’s 1991 W250 Turbo Diesel. If 2,100 miles per 1/32” remains constant, these 255/85R17 Baja Boss will last 36,800 miles before reaching the minimum legal depth of 2/32”. 
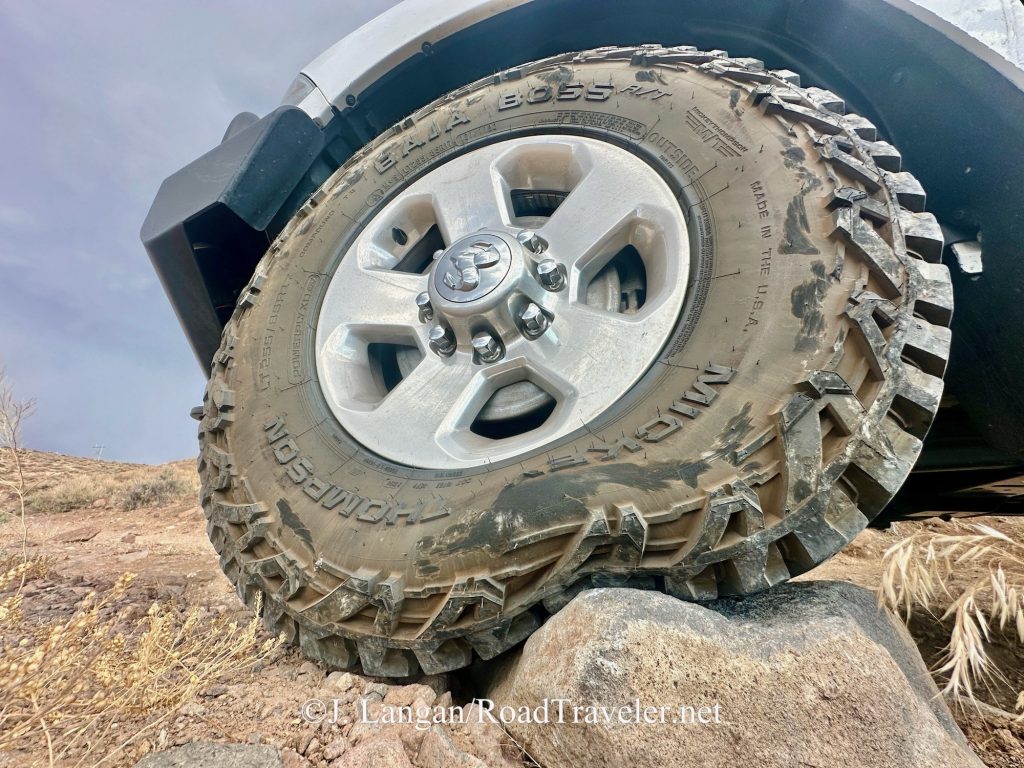
Baja Boss A/T is a quiet traction tire that looks good and performs extremely well, both on and off-road.

Still Love Them

After running two sets of Baja Boss A/T over the past few years I’m still enamored with this design from Mickey Thompson, and it might become my favorite hybrid all-terrain. They wear well, provide excellent traction and performance in all conditions, and are extremely rugged while still being quieter than competitors. Currently they are available in 74 sizes, for wheels from 15 to 24 inches. If you are in the market for a new set of tires you owe it to yourself to consider the Baja Boss A/T from Mickey Thompson. 
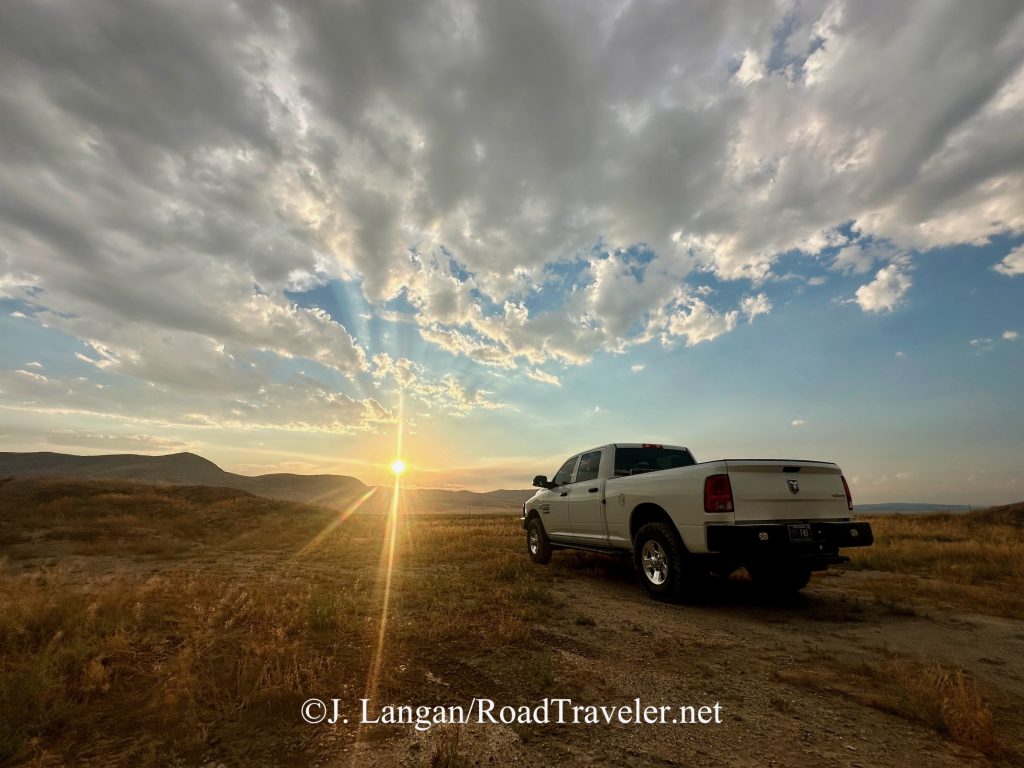
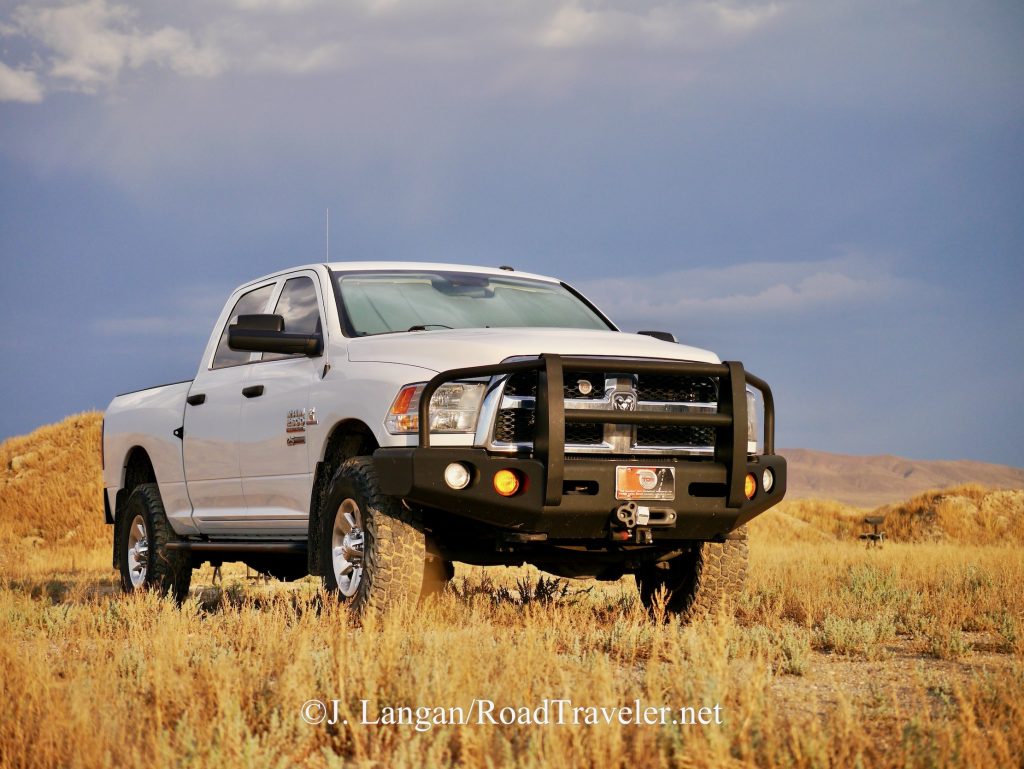
Riding off into the sunset in my 2014 Cummins Turbo Diesel.

Tell ‘em you saw it on RoadTraveler.net!

Copyright J. Langan/RoadTraveler. All Rights Reserved

Resource: 

Mickey Thompson Tires: mickeythompsontires.com 
 

WAGAN TECH DC TO DC BATTERY CHARGER


40A DC TO DC BATTERY CHARGER

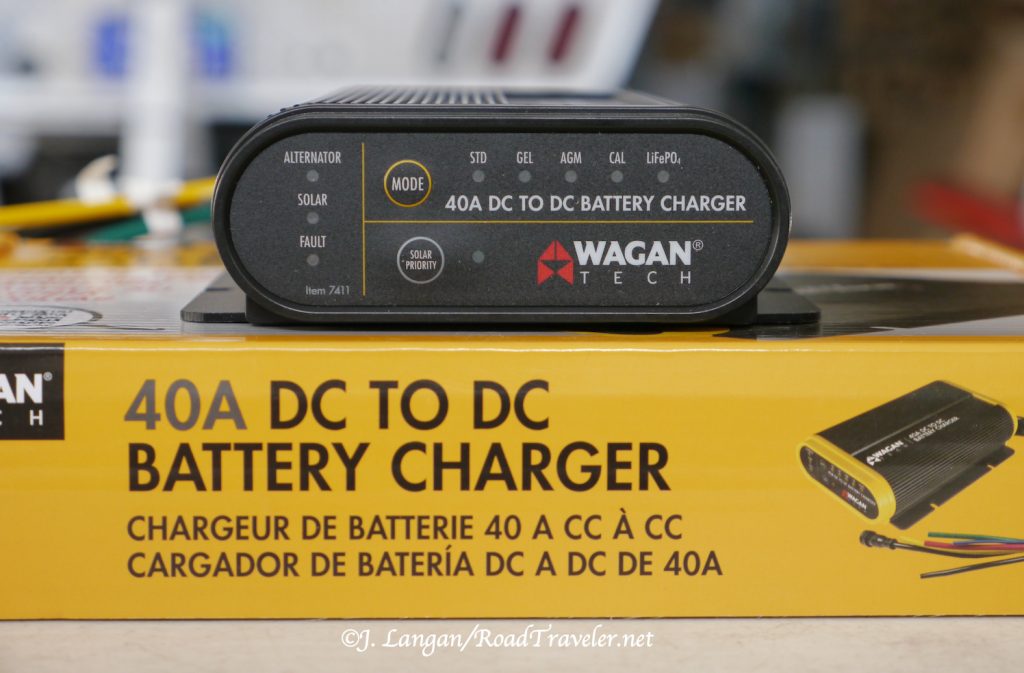
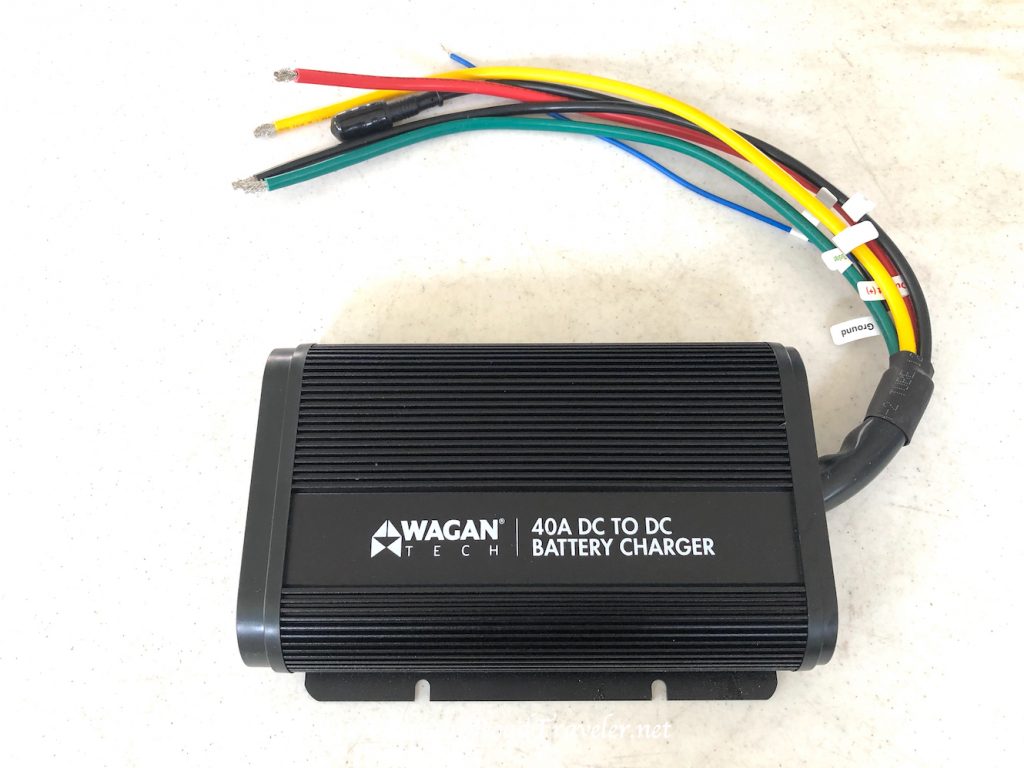
Wagan Tech’s 40 Amp DC to DC Charger 

It takes some type of fuel or energy to power things, this includes humans as without food (and other necessities) our systems will shut down. In the case of our beloved Cummins-powered trucks, that energy comes from burning #2 diesel fuel. The primary output of the internal combustion is propulsion of the drivetrain; however, supporting systems give and take from the consumption, including the cooling and electrical charging systems. 

Some readers know that the simple diesels from decades past would essentially run forever once started as long as the fuel flowed. They could be hard to cold-start, but they were also difficult to stop. This is because all diesels are ignited using compression ignition (CI), not a spark-ignition (SI) system like a traditional gasoline motor. Diesels are less complex without spark plugs, a coil, distributor cap and rotor, or wires, and while still fundamentally true there are modern complexities, chiefly the electronic fuel-injection. 

Mandatory Electricity 

Our newer, specialized, computer-controlled diesels need their modules to remain awake for everything to work properly (just like gas-powered trucks). Additionally, late-model vehicles are chock-full of countless electronic gizmos, from computer screens, cameras, seat and steering-wheel heaters, and the list goes on. The constant generation of electrical current from an alternator is no longer optional to keep the oil burning, but absolutely essential, even for daylight driving, because battery storage capacity is finite and amps consumed must be replaced.  

High-output alternators easily handle the load of the Cummins cold-start grid heater, or the glow plugs in other automotive diesels, plus the increasingly popular factory-installed inverters that convert the DC current to 120-volt AC to power tools or other plug-in devices. But what about additional intermittent or constant 12-volt DC electrical loads? 

Remote National Forest camping in Colorado. One only has what they bring with them.

RV Amps  

The TDR readership has always included a large percentage of RVers, and because we love our pickups so much, that means mostly travel trailers, big fifth-wheels, or truck campers instead of motorhomes. Solar panels atop an RV to charge coach batteries have been common for several years, as are backup generators to energize power-hungry AC appliances like microwaves and air-conditioners when shore power isn’t available. The solar panels require sunshine, and internal-combustion generators require fuel, so additional free amperage sources are welcomed. 

When an RV is connected to a truck via the 7-way trailer-towing outlet, typically a small amount of juice is delivered to the RV to help charge the coach batteries, often somewhere around 10-amps. The limitation is not alternator capability, but the size of the factory wiring. This small amount of amperage can help keep charged batteries topped if there are minimal loads; however running high-draw devices can lead to deficits. 

Modern Electric-Only Refrigerators

Like modern trucks full of gadgetry, newer RVs can have unprecedented amperage draws as well. The easiest example comes from the overlanding culture where electric refrigerators pioneered the replacement of traditional RV refrigerators, which principally ran on propane or 120 volts AC when plugged-in. Some older RV refers were theoretically capable of running on 12 V-volts, but they were terribly inefficient and would drain batteries fast.

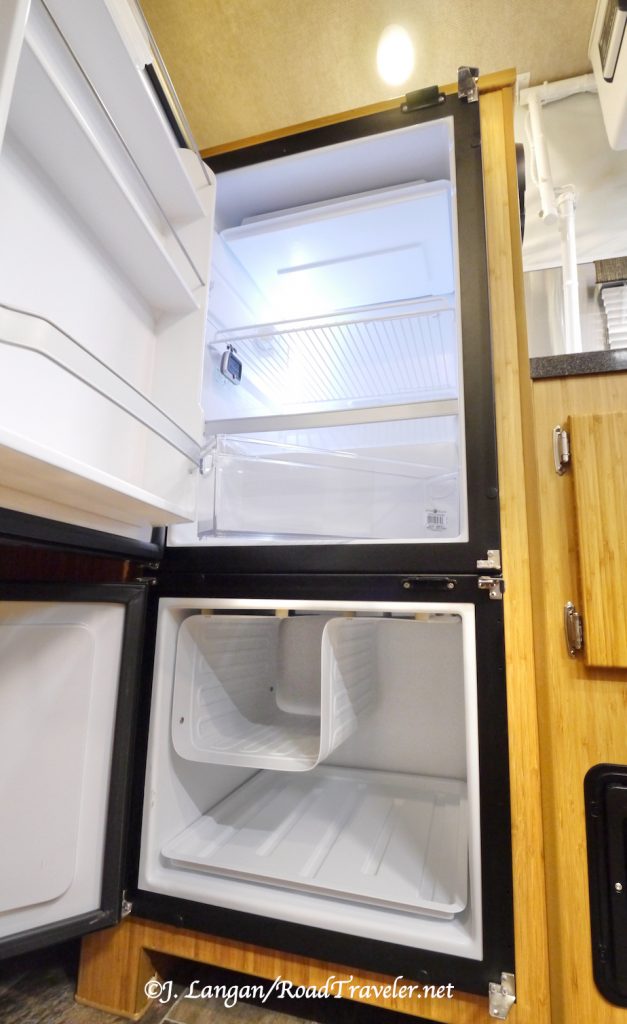
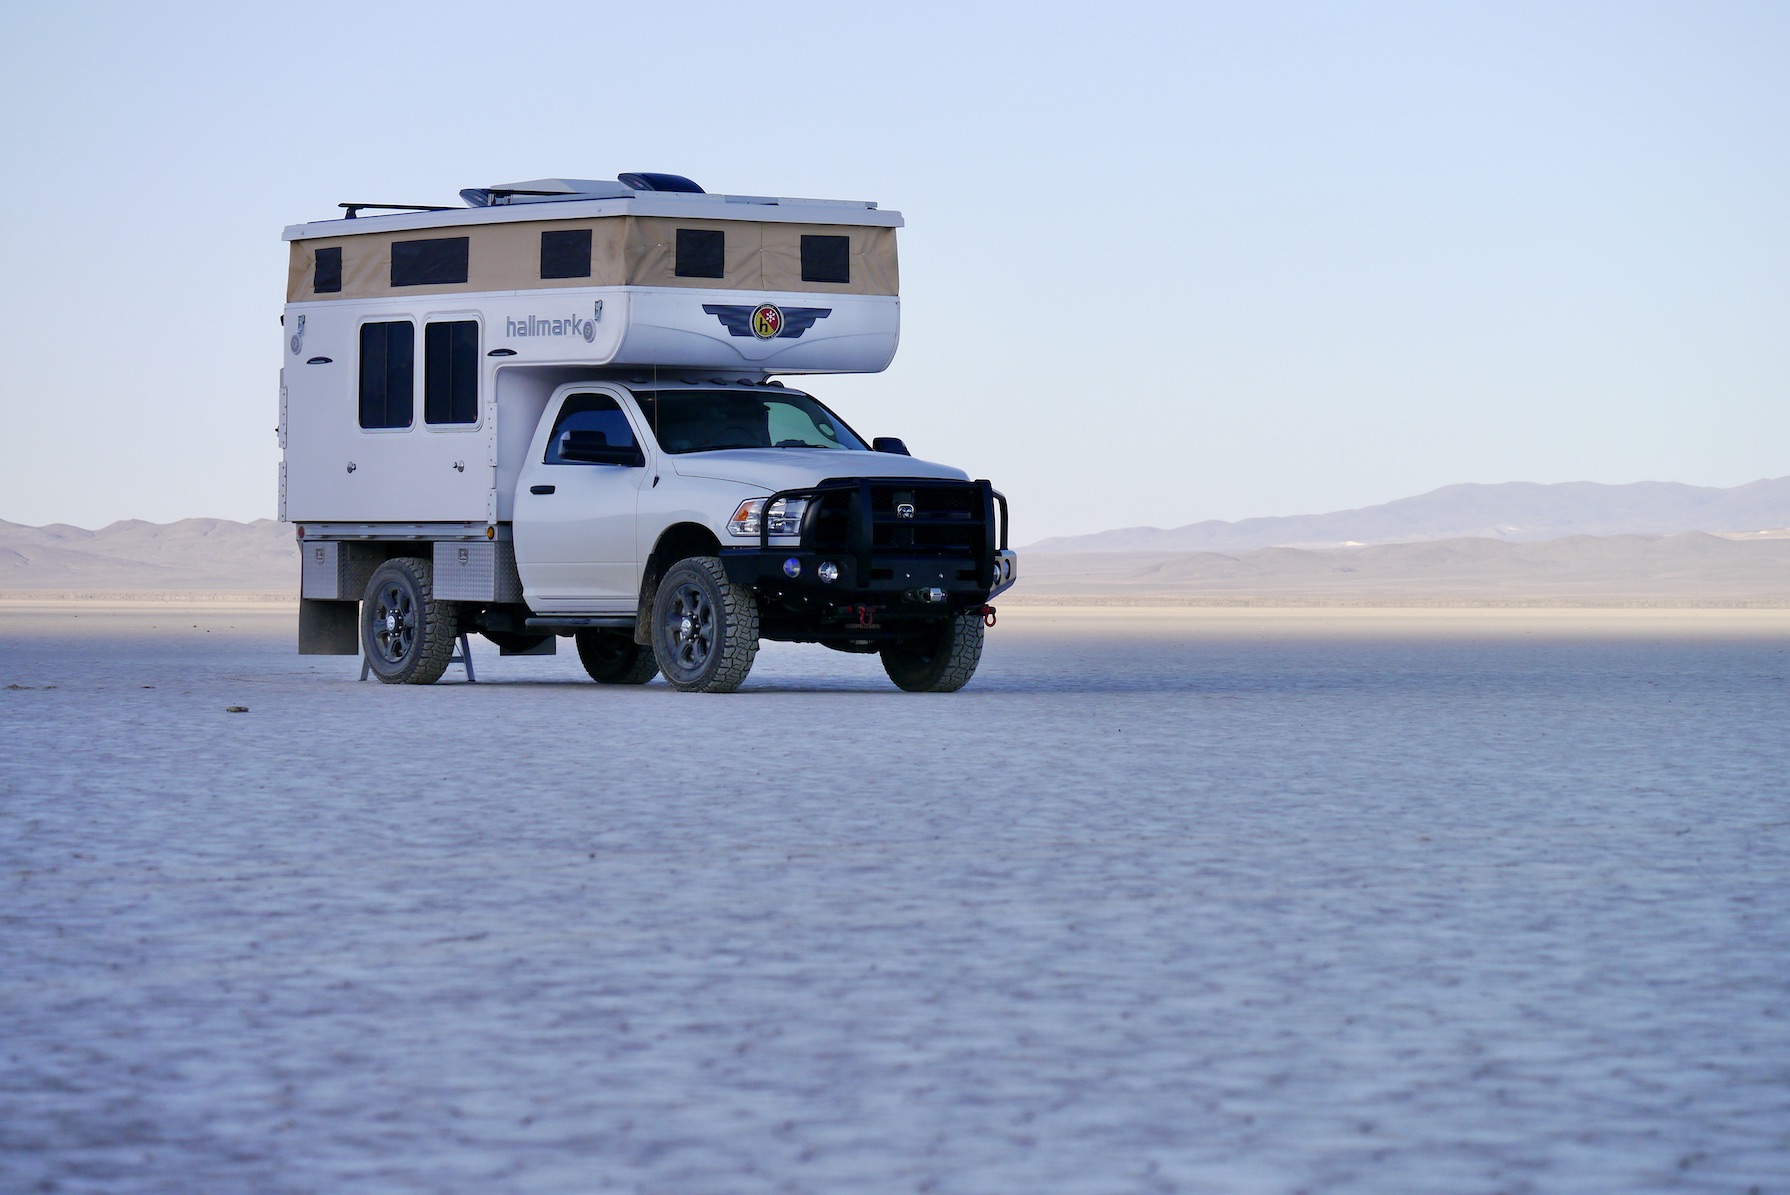
Instead of using the gas absorption method of cooling with propane, modern 12-volt refrigerators have a compressor, similar to the refrigerators in our homes. These can be built-in units, as in my Hallmark Camper, or a portable chest type refrigerator/freezer. These electric refrigerators are generally more efficient and effective, particularly in hot weather, and do not have to be leveled like a traditional RV refrigerator. 

The benefits are being appreciated by more folks all the time, and in the off-grid and overland camping crowd electric fridge/freezers are seen as more rugged and vastly superior. Even the traditional RV market has noticed. My cousin recently purchased a new fifth-wheel trailer to live in (temporarily) after selling his house, and the refrigerator is 12-volt and 120-volt only, it doesn’t run on propane. There is at least one drawback and that is amperage consumption. 

Large refrigerator and freezer for an 8.5-foot truck camper. Consumes up to 5-amps 12-volt DC when running.

Additional Electrical Loads

The large-for-a-truck-camper NovaKool refrigerator with a separate freezer door in my Hallmark Flatbed consumes up to 5-amps when running, and it runs a lot during the summer months. Five amps per hour adds up quickly, pulling a chunk of the total 200 amp-hour capacity we have from two, 100-amp Battle Born lithium batteries. 

My Hallmark is well sealed, but no RV is or can be impervious to dust, they need to breath like a house. With this in mind, and because I spend much time traveling off-pavement and nearly always camp in the dirt, I run one of my roof vent fans while driving to pressurize the living space. This works impressively well to minimize dust intrusion. There is one more big electrical draw inside my camper every 24 hours. 

Although I do not fit the physical stereotype (I’m tall and slim), I use a CPAP machine to help me breathe and sleep every night. This is another substantial electrical draw, a minimum of 4-amps, even with a dedicated 12-volt cord to avoiding the inefficiencies of an inverter. Multi-day road trips with lots of driving still result in a battery charging deficit because the factory RV 7-way provides minimal amperage. The 340-Watts of solar panels help, but they are insufficient to keep the camper batteries charged due to my consumption. A small 700-Watt 2-stroke generator travels in one of the under-bed toolboxes as an emergency back up. I prefer not to use it, and it produces a mere seven amps. So how can one easily generate more electricity? 

Dead camper batteries should be old news after installing this DC charger from Wagan Tech.

Wagan Tech 40 Amp DC To DC Battery Charger

DC to DC battery chargers have been around a few years. They are popular in places like Australia, where the off-pavement backcountry travel market has historically been more robust and innovative. These devices are exactly what they sound like, taking DC amperage from the battery/alternator charging system under the hood and feeding it directly to auxiliary (RV) batteries through large wires. Sounds simple, and it is. But, they need to be hard-wired. Wagan Tech introduced their new DC to DC Battery Chargers in 2022, both a 25-amp model for $300, the $400 40-amp model that I installed. 

New Hole Required

If the auxiliary battery to be charged is on the same chassis, like inside the same engine bay, the installation is easier. If secondary batteries are in a separate RV, the wiring needs to go from the host chassis into the recipient. If the RV is a trailer that is attached and disconnected regularly, then something like an Anderson plug provides a robust connector (and something I intend to add in the future). 

With my Hallmark flatbed outfit, I directly connected new wires from the Cummins engine to the camper batteries, which required a new hole in my Hallmark. The process was not trouble free. 

Parts and Supplies Matter 

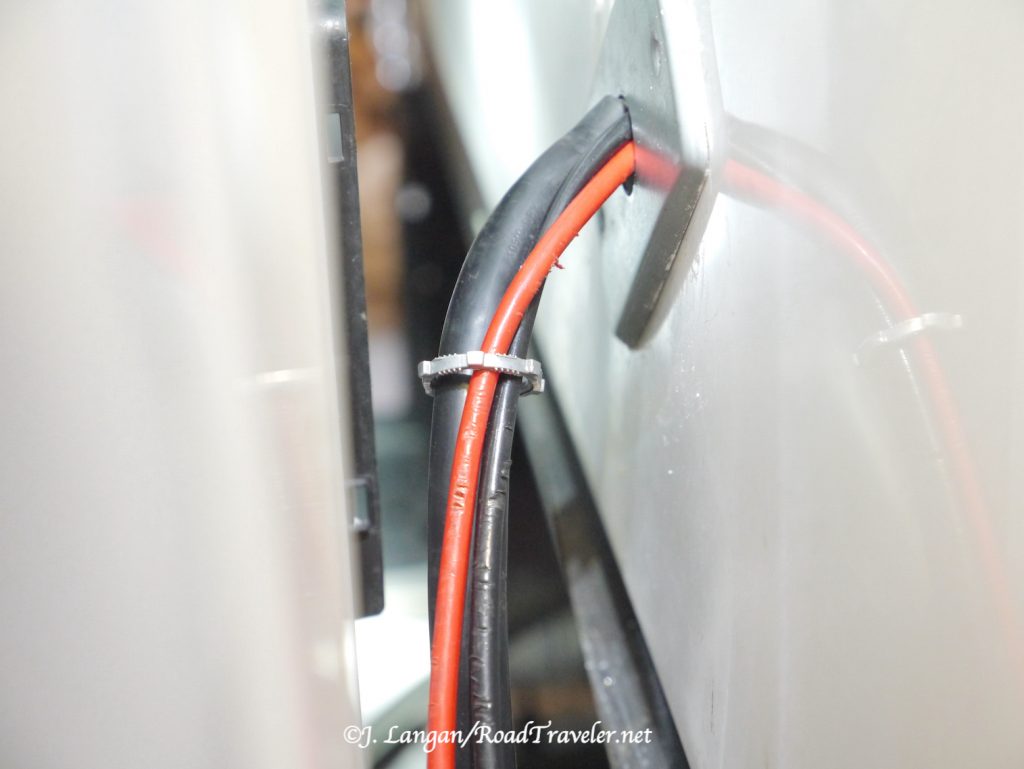
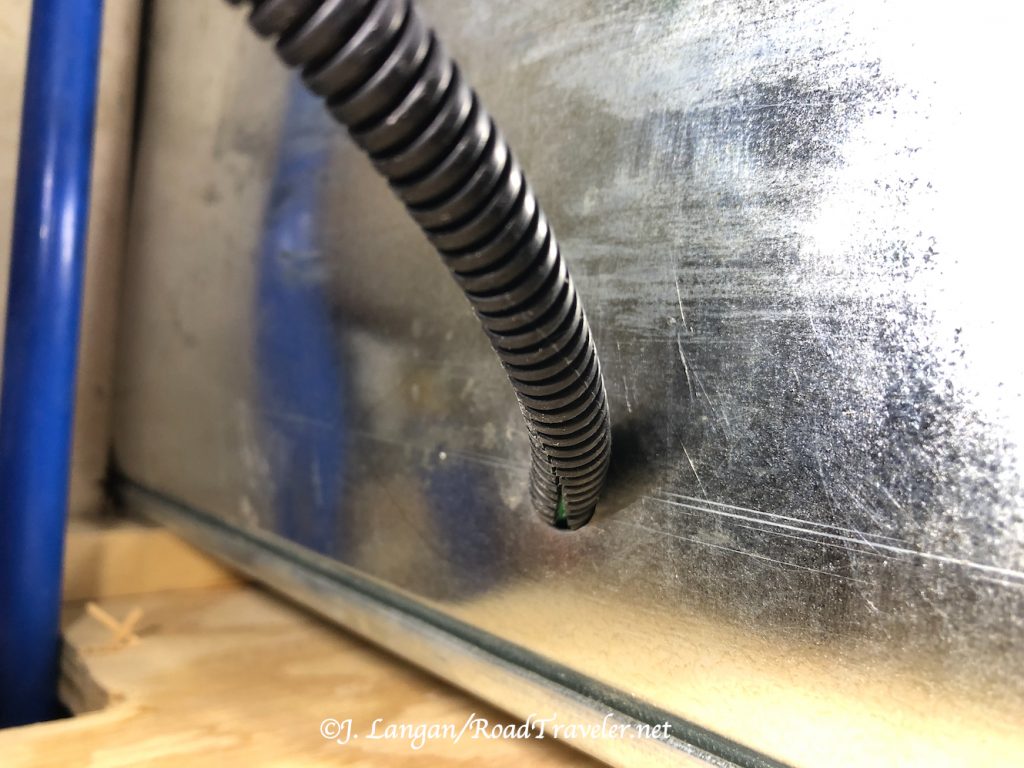
In an effort to avoid drilling a new hole, I attempted to use smaller but adequate 8-gauge gauge wires, running them alongside the existing Hallmark 7-way RV pigtail. The new positive and negative wires added too much girth to get the nut onto the knockout plate. This defeat came after hours spent running the wires from the engine bay, along the chassis, and then stuffing them next to the factory Hallamrk wiring pigtail and into the coach. 

Ran these 8-gauge wires from the engine compartment, along the camper’s 7-way plug, through the existing wiring hole, but had to start over.
There wasn’t room for additional wires, I stuffed them through the knockout plate nut anyway, but couldn’t wiggle the nut up to male end to secure the plate. See the gouged insulation? That’s how tight.

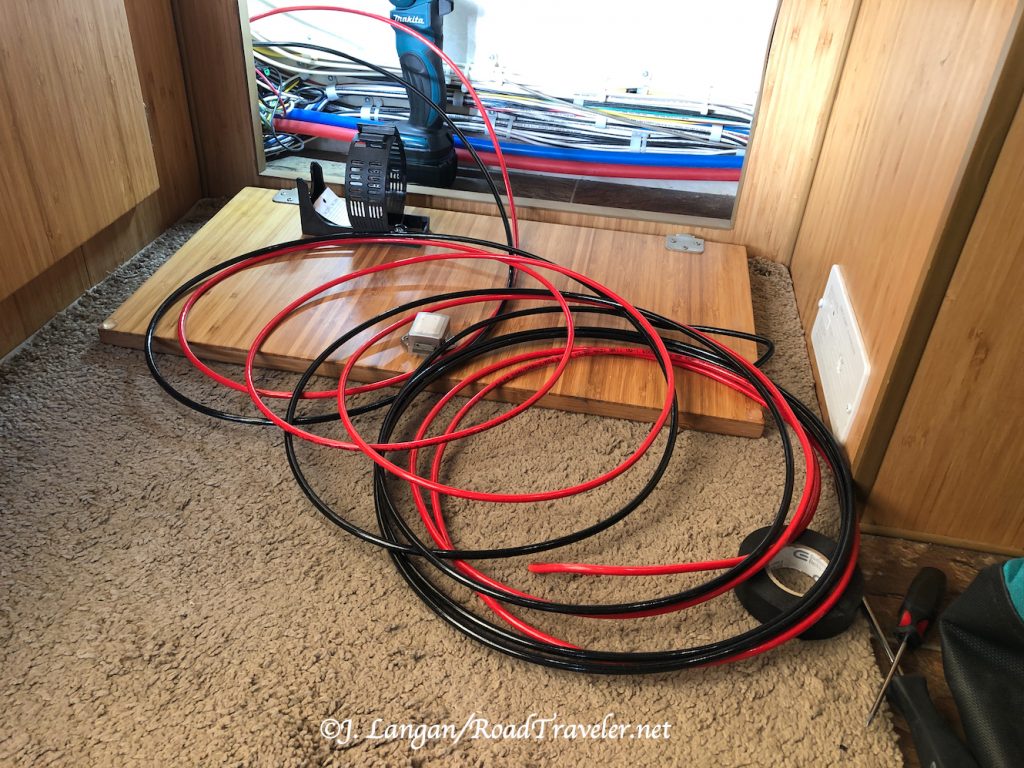
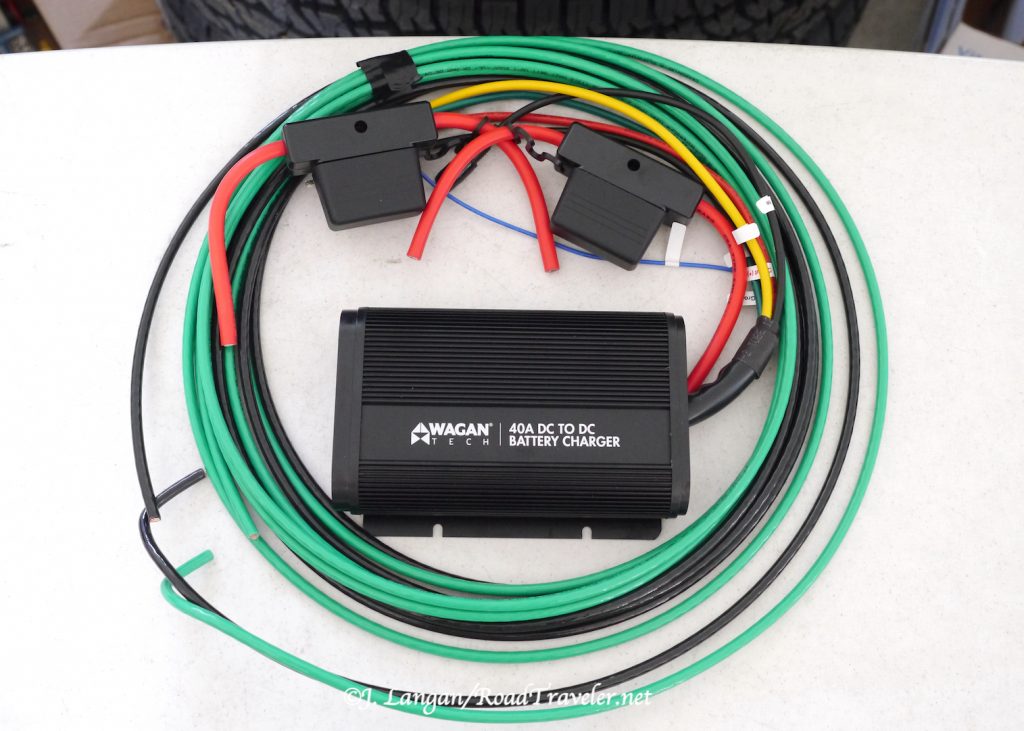
When it was obvious that drilling a new hole was required I decided to use larger 6-gauge wire, good for up to 32-feet. The finished total length was less than 20-feet so the wire will easily handle the amperage. Due to time constraints the wire was purchased from a nearby Home Depot, the trade-off being that it is not as flexible or easy to work with as ever thinker, larger welding cable. 

Home Depot didn’t have red 6-gauge so I had to take green. Shown with two 60A Maxi fuse holders.

Measure Multiple Times And Drill Once — A Nice Idea

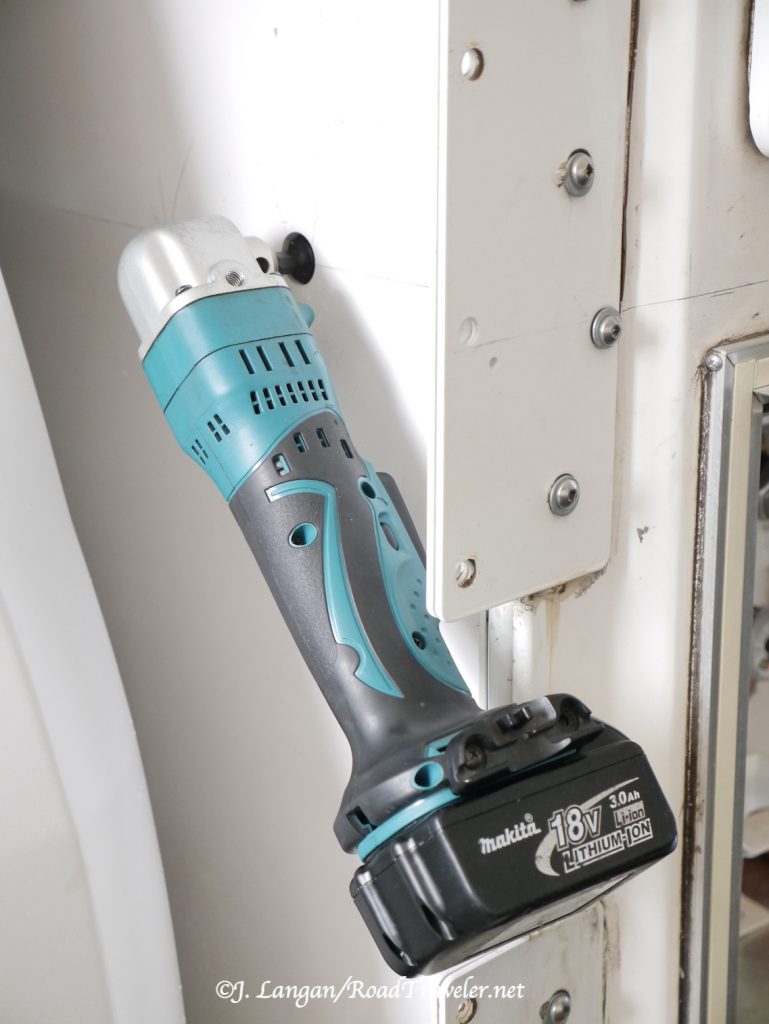
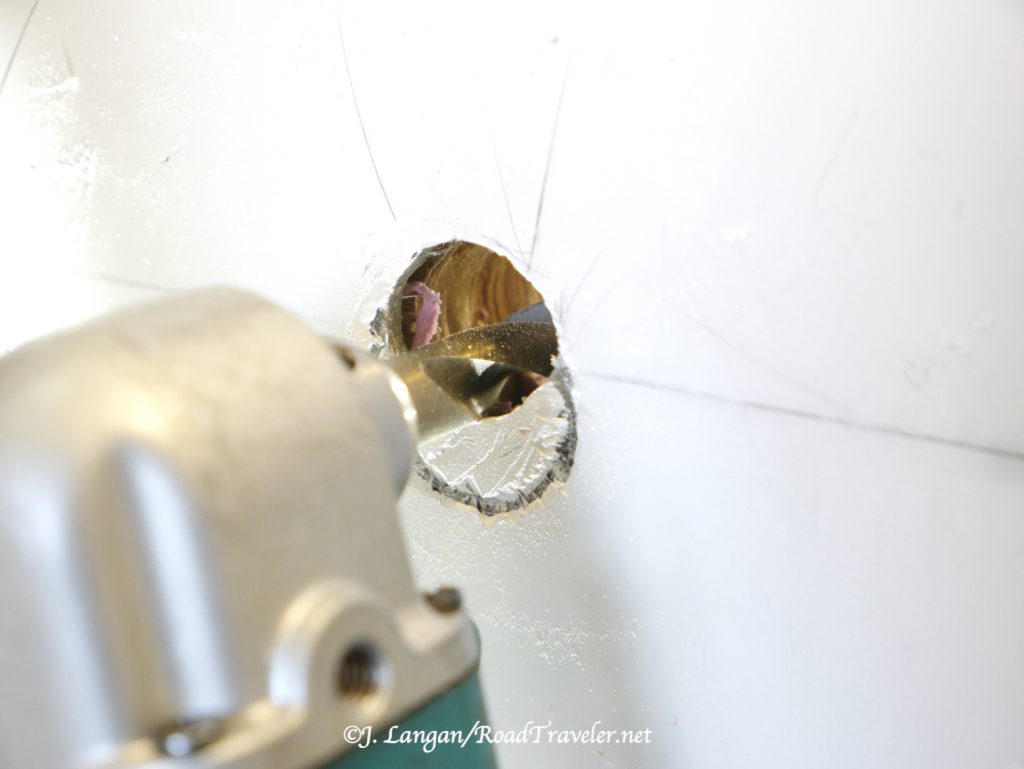
The new hole in the driver’s side front wall needed to go below the water heater and above the propane locker, and it needed to be approximately 1-inch diameter. After measuring and making countless trips from the front wall into the camper, I was confident about the placement before drilling the pilot hole. Using my cordless right angle drill, I nailed it, but I assumed the 7/8″ hole saw I had was big enough, and I made a nice, clean hole. However, it was too small for the knockout plate bolt to slide from inside the camper, clamped on the 6-gauge wires, through the wall to the exterior to reach the knockout plate nut.  

New 7/8” hole drilled into the front of my Hallmark Camper. Measuring and drilling went well up to this point.

Back to Home Depot to buy a larger hole saw, something near 1 1/4″. As many do-it-yourself folks know, it is relatively easy to new to drill a clean new hole, but difficult (almost impossible) to cleanly make a hole slightly larger. A few times I slowly and carefully tried to get the larger hole saw started, but, of course, the saw just slid on the fiberglass. When trying gently does not work, what is the typical response? Add force. 

The Neanderthal in me came out, and I leaned on the drill to make the saw bite into the fiberglass where I wanted; this was a bad idea. The saw walked on the slippery fiberglass surface, but with increasing force it eventually dug into the exoskeleton wall, making the scar you see in the photo below. I didn’t swear much, but I was slightly displeased with myself! 

Without the benefit of a centering pilot hole, I attempted to enlarge a perfectly drilled hole and made this mess instead.

Disgusted, angry, and frustrated, there was no going back, and I still needed to enlarge the hole. My solution was what I should have done after discovering the hole was just a bit too small; I ran a half-inch bit around the circumference of the hole until it was big enough. 

Running a 1/2” bit around the circumference of the hole to make it larger should have been my first solution, not the second.

Thirty years ago this would have bothered me for weeks. I like to do clean, high-quality work. It’s covered by a plate and will never be an issue to anyone but me, and I’ve put it behind me. With the challenging part completed, it was time to finish the installation and get the Wagan Tech DC to DC Charger working. 

Pulling And Connecting 

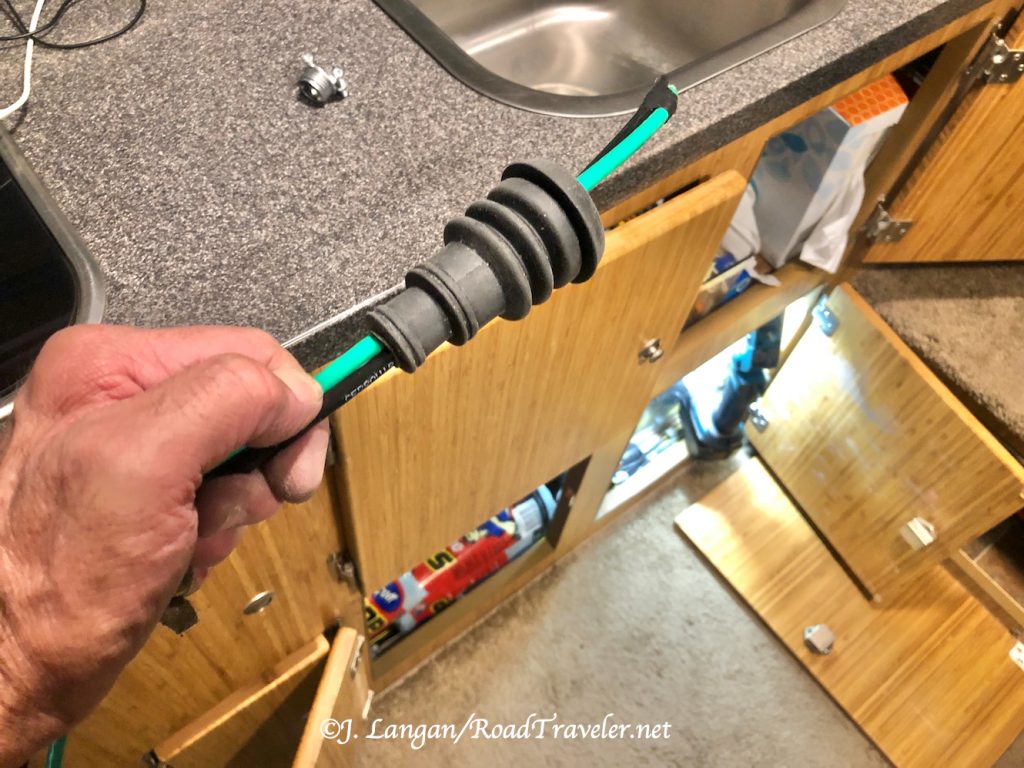
The rest of the installation was straightforward and easy, and there were no more hiccups. I fed  the 6-gauge wire through two rubber firewall boots to provide a weather barrier, one from the camper front and one from the inside, then along the frame and into the engine compartment to the driver’s side battery. 

Had two of these stepped, rubber firewall boots leftover from a prior product (purchased after a prior drilling mistake). Stuffed the new hole with one from inside, and another from the front behind the knockout plate. Should be very weather resistant.
This knockout plate was always on the parts list, but also conceals my drilling snafu. Looks tidy and works too.

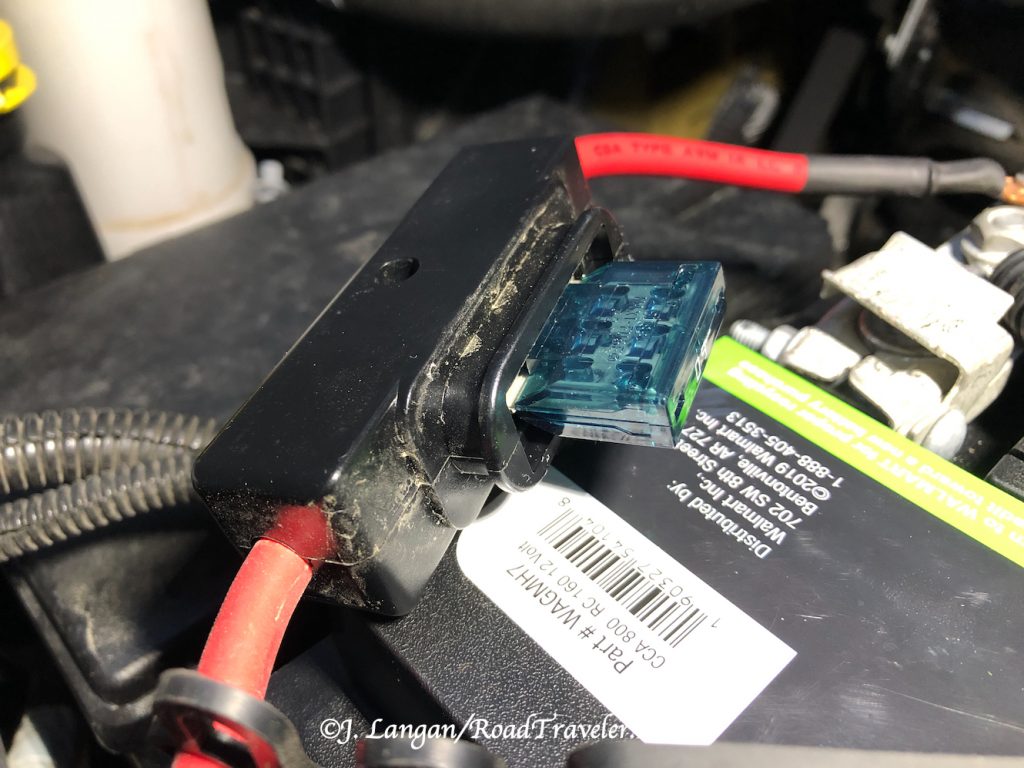
This Wagan 40-amp unit requires two 60-amp fuses, one as close to the engine bay battery as practical, and another on the Wagan charger output line near the auxiliary batteries. Bolt-down fuses are recommended because they have lower resistance than blade type, which can have higher resistance and create excessive heat. However, the blade-type Maxi fuses are what I found locally, and I’m confident they’ll be sufficient.  

Blade-style 60A fuse holders are what was available locally.

With the incoming hot and ground wires from the engine connected to the Wagan charger, another small hole was drilled in the Hallmark’s battery box to run a hot lead from the charger to my two 100-amp lithium RV batteries. 

New small hole drilled into the camper’s battery box, with the hot, output line from the Wagan 40A DC to DC Charger to a positive terminal.

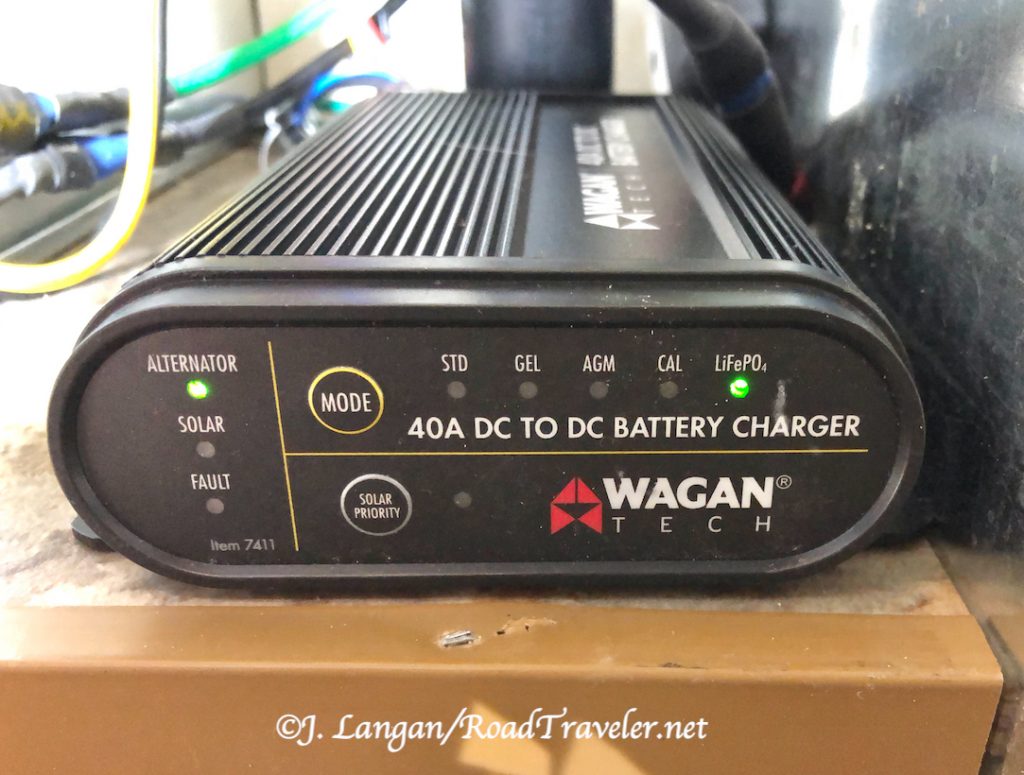
With the fuses inserted I had the appropriate blinking lights on the front of the Wagan DC to DC Battery Charger; one light showing it was connected to the alternator, and after changing the battery type to LifePO4, that light was on as well. The unit is capable of working with standard, gel, AGM, and lithium batteries. 

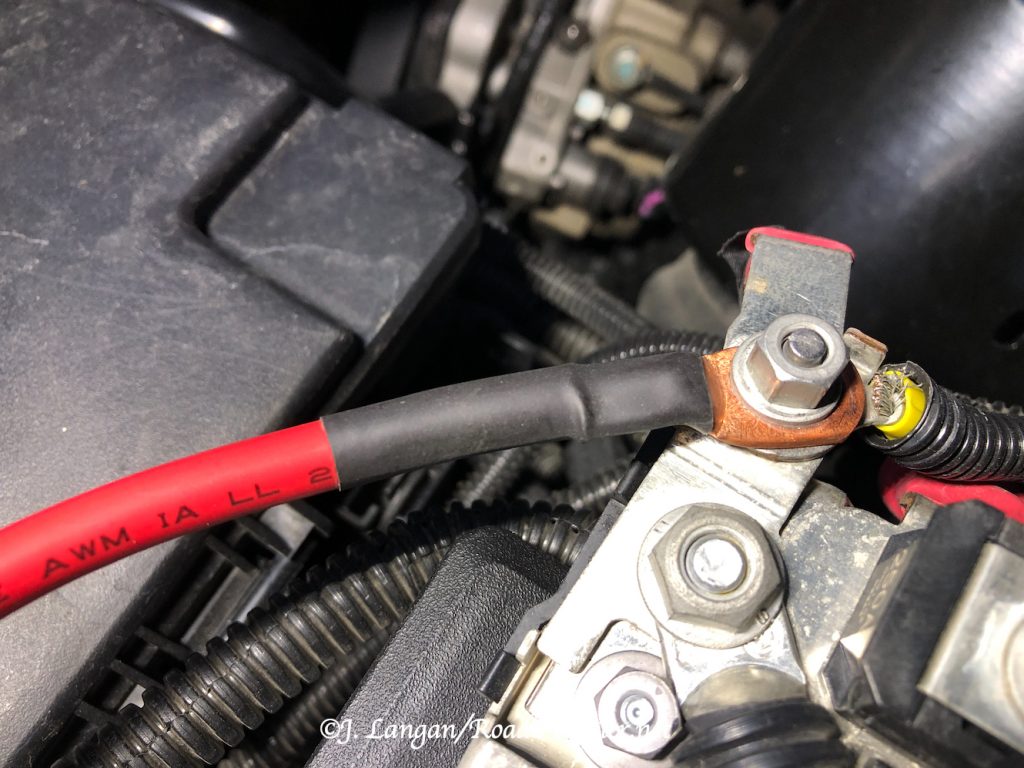
Wagan Tech’s instructions are short, simple, and easy to follow, and folks capable of doing basic wiring will likely have no problems doing this themselves. Because of the largish 6-gauge wire and connectors I used a hydraulic crimping tool, and I covered the ends with heat shrink, routed the wires as cleanly as possible, and protected them with split-loom. 

60A fuse lead connected directly to the driver’s side positive post with copper ring. Heat shrink looks good and adds protection.

Mounting Options 

The Wagan charger is designed for a variety of installation environments, including chassis rail, engine bay, interior cabin, etc. The unit has been designed to work in vibrating, wet, dusty and muddy environments, and can withstand temperatures of up to 176°F, so it can be installed in the engine bay. However, to get better charging efficiency, mounting the charger away from high-temperature parts is preferred. 

I simply stuck it to the bottom galley shelf with mounting tape, between the propane locker and battery box. I may add screws later if this is the charger’s permanent home, but it’s not going anywhere on this flat surface. 

Flashing green lights indicate the Wagan Tech DC Charger is connected to the alternator and is feeding LiFePO4 batteries. Simply stuck to a shelf inside a galley cabinet with mounting tape.

Wagan Tech DC Charger Works  

Using more amperage than is being generated during long road trips should be a thing of the past. We’re unlikely to need a generator unless we want to run our air conditioner, in which case we would tote our larger Honda 2000. 

Pumping a massive 40 amps per hour into the Hallmark’s lithium batteries means it takes little driving to fill them; every time we make camp the batteries will probably be full. Even if the lithiums were completely drained we could replenish all 200 amps in five hours! 

Our initial adventures with Wagan DC to DC 40-amp Charger installed were extremely encouraging, the camper batteries were full whenever we stopped, and the voltage was high, as if we’d been connected to shore-power.

The Cummins is a large and expensive generator, but because we are already traveling, delivering essentially free electricity from our alternator to the camper batteries is a game-changer. Why did we wait so long to add something like Wagan’s 40A DC to DC Battery Charger? 

Drive diesel and tell ‘em you saw it in the TDR! (A version of this article was previously published in the Turbo Diesel Register magazine.) 

Tell ’em you saw it on RoadTraveler.net

Copyright J. Langan/RoadTraveler. All Rights Reserved

www.RoadTraveler.net 

Instagram: @RoadTraveler 

YouTube: RoadTravelerNet

Resource: 

Wagan Tech: wagan.com 


Tuffy Security Lids and Safes


Tuffy Security Products

Tuffy Security Products’ teenaged founder Shawn Gregory parked his Jeep at a mountain bike trailhead in 1989, and when he returned he found his Jeep burglarized and all his gear stolen. Gregory replaced the plastic center console with a stout, locking wooden box, which he was soon duplicating for friends. Steel replaced wood as the construction material, and another American entrepreneurial success story began. In 2008, Tuffy’s Jeep-centric product line was expanded to include options for the broader recreational market, as well as law enforcement vehicles. 

If my trucks were not both Tradesmans, there is a center console safe I would have chosen to install, but it doesn’t fit my models. However, Tuffy does make other application-specific, and universal boxes and safes that do work with my Fourth Generation, 2500 Rams. 

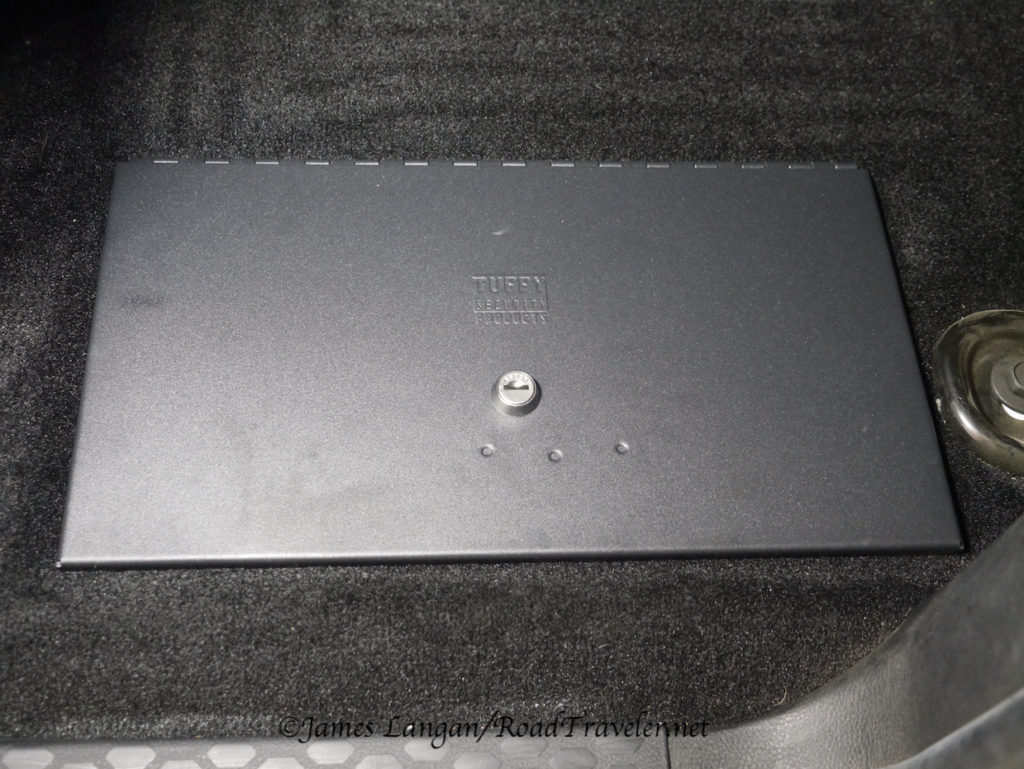
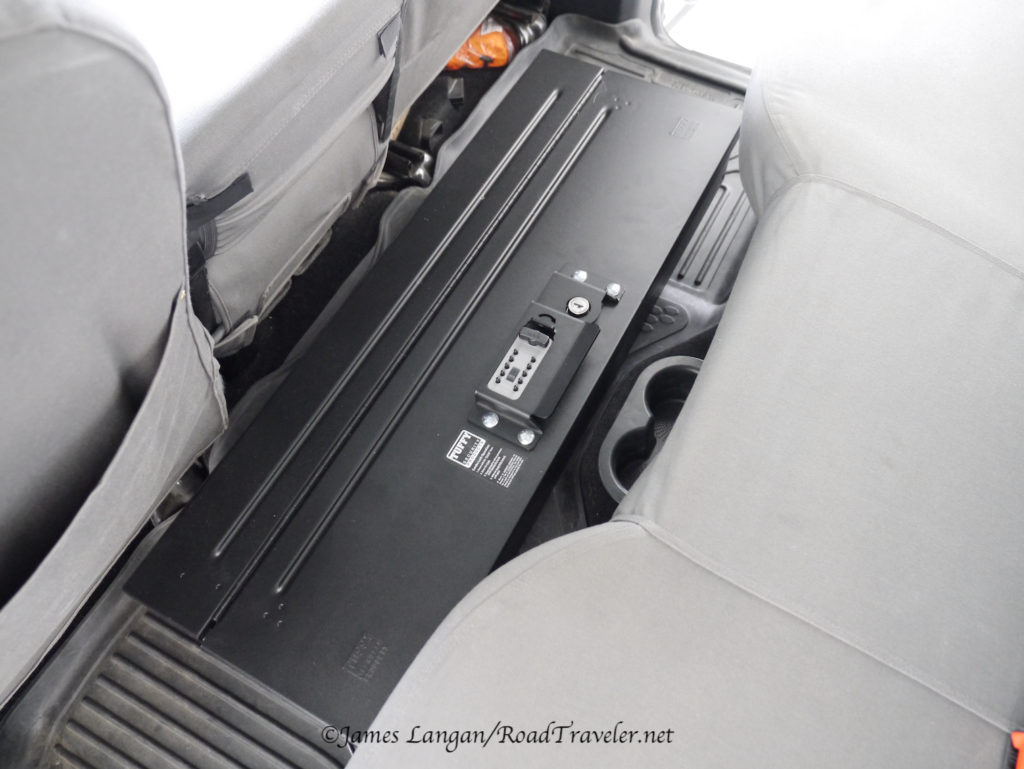
One is the heavy-duty, locking, under-floor Storage Security Lids constructed with 16 gauge and 1/8” thick welded steel ($89 each). These replace the factory plastic covers atop the backseat floor. The lids include Tuffy’s Pry-Guard locking system, a continuous steel hinge, and a 10-tumbler, double-bitted security key lock with built-in weather seals. (These do not fit the Mega Cab trucks.) The no-drill installation uses the factory holes and captive nuts, and are simple and easy to mount. However, I still have a few observations and tips on how-to do the job a bit better, with my typical attention-to-details. 

In-floor Security Lid placed before the actual installation.

Ram In-Floor Storage Security Lids Installation 

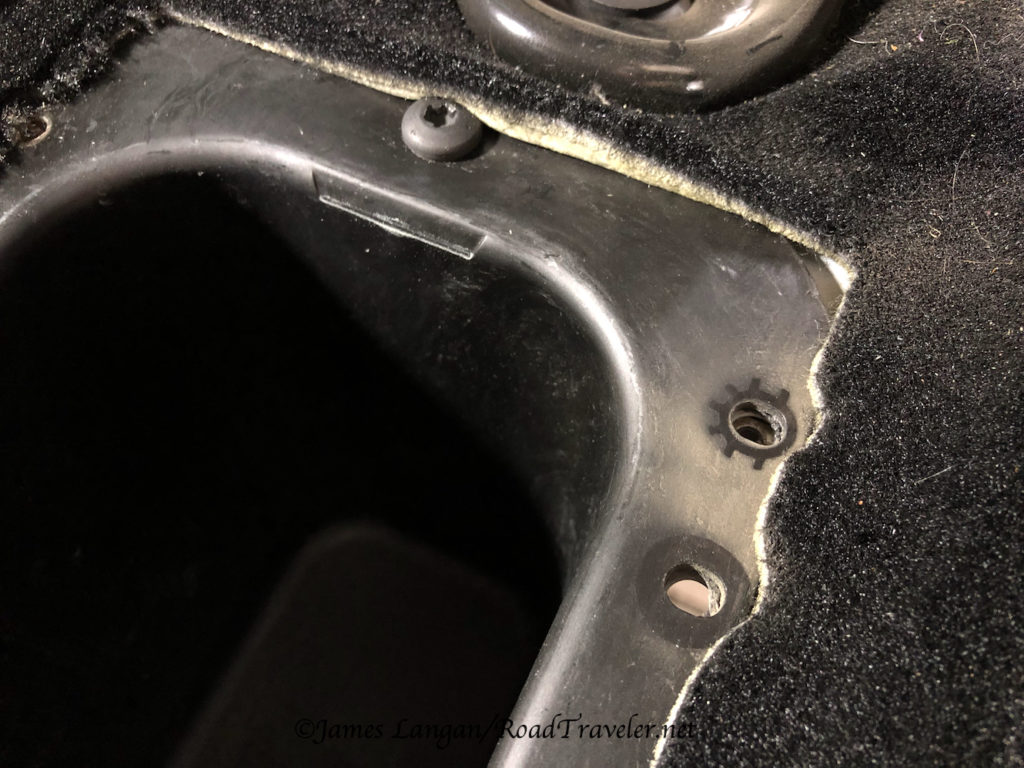
Removing my rubber floor mat, opening the factory lids, lifting out the OEM plastic liners, then pulling the four T-30 Torx screws was all that was required to prepare to mount the Security Lids. After the OE parts were removed I noticed that there were five holes through the body, not just the four from the removed screws. 

Hole near the bottom/right of image is filled by the stud on the OE plastic lid.

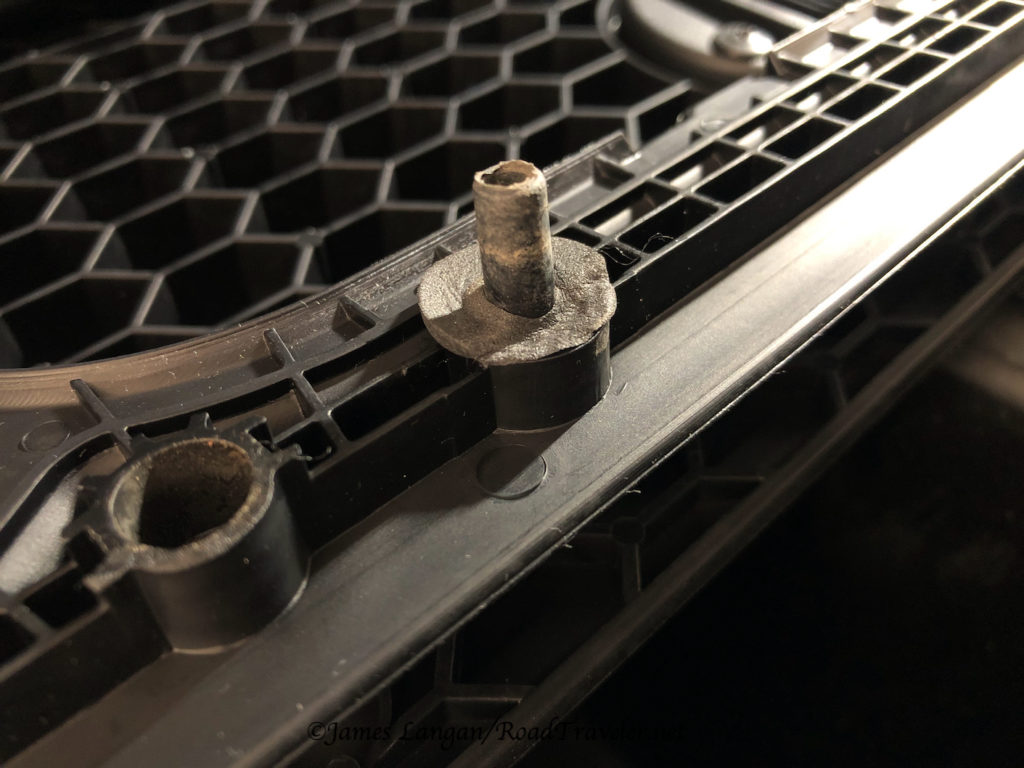
That fifth hole is for a stud on the bottom of the plastic factory lid, which has a rubber gasket at the top, obviously intended to create a seal and keep debris out, as shown in the photograph below. (This indexing hole for the factory plastic cover is at the outer/rear on the driver’s side, and at the front outer edge on the passenger side.) 

Factory indexing stud, with seal, bottom of the OE plastic cover.

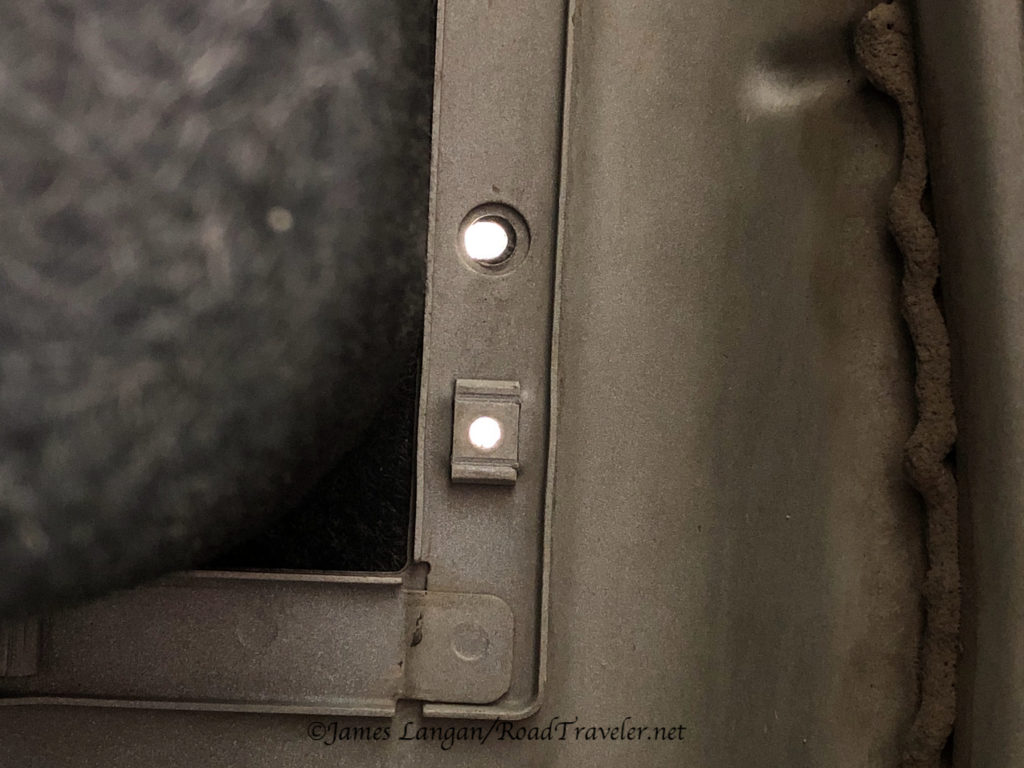
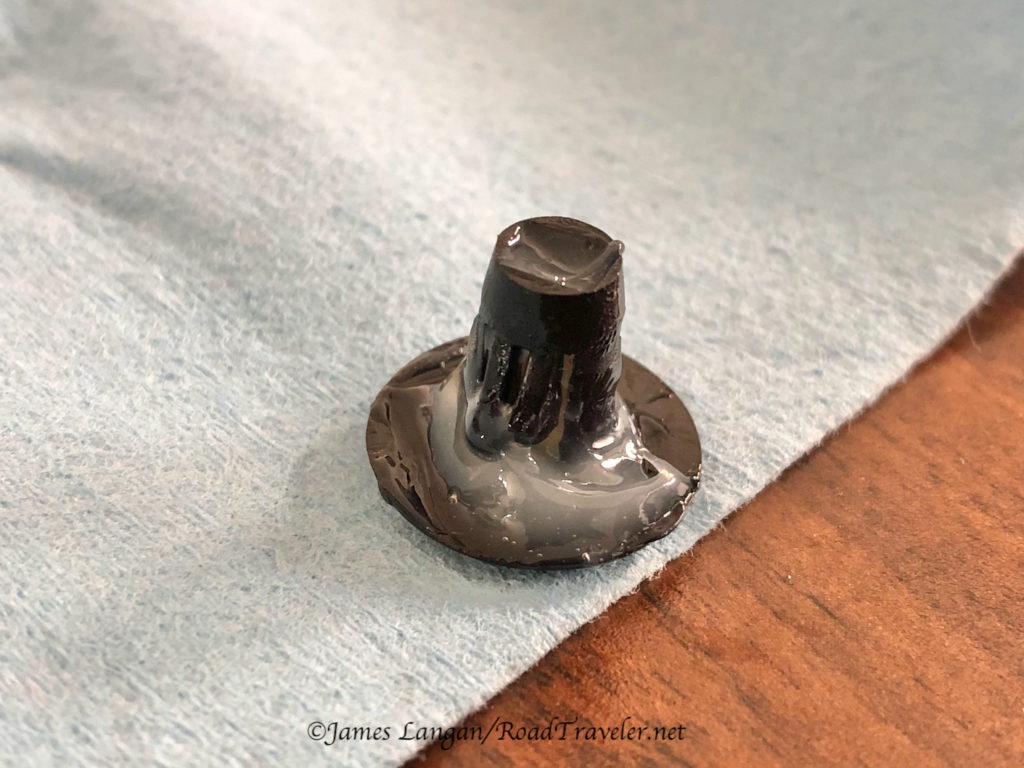
Although unlikely in the short term, grit, moisture, and debris could reach this 1/4” hole on the bottom of the body over time or in certain circumstances. If one was to drive through, or get stuck in deep water or mud, intrusion could immediate. Anybody that drives in adverse conditions, including heavy rain, snow, slush, or dust knows that grime gets flung everywhere under the chassis, and leaving holes open to the inside is a bad idea. My solution? Spare plastic clips/plugs, like those used for securing trim pieces and such, slathered with outdoor silicone and stuffed into the holes. 

Viewed from under the truck, the larger of these two holes is not filled by one of the four mounting screws.
Plastic plug slathered with silicone to prevent moisture and debris intrusion.

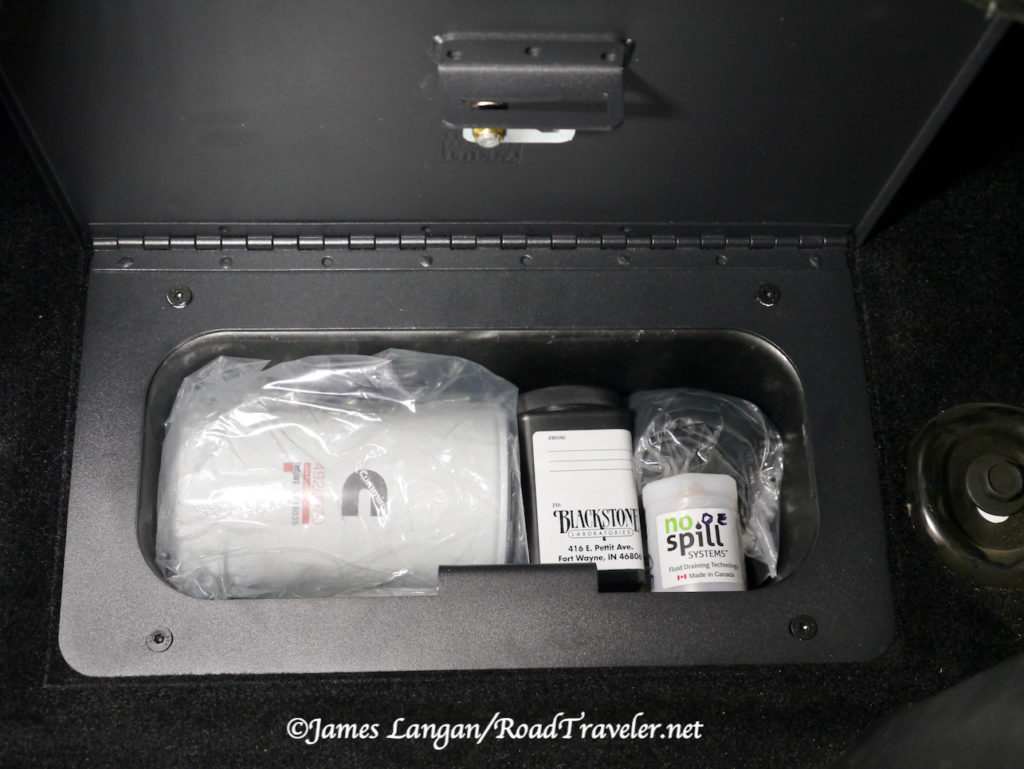
The OEM plastic liners that nest inside the below-floor storage cavity can be reused, though one won’t be able to simply pull them out for cleaning like the OE setup, because they need to go under the mounting base of the Tuffy lids. As noted in the instructions, leaving the liners out is an option, which also maximizes storage space. Choosing to eliminate the liners increased the volume so that the set of spare Mopar fuel filters from Geno’s Garage I always carry in one of these bins, which always needed to be encouraged to fit inline across the bottom, now fit easily. 

Everything I had in this bin fits just a bit better with the OEM plastic liner removed.

The factory lid screws had some type of sealant on the threads, so I added Permatex white goo Thread Sealant with PTFE to the 6 mm flat head screws provided (turned with a 4 mm hex bit). The Security Lids look great and fit impressively flush with the baseline floor height, allowing my big, one-piece Husky Floor Liner to lay as it did before. These in-floor lids are slick and beefy, and I was immediately happy I installed them. 

Thread sealant on the new screws.
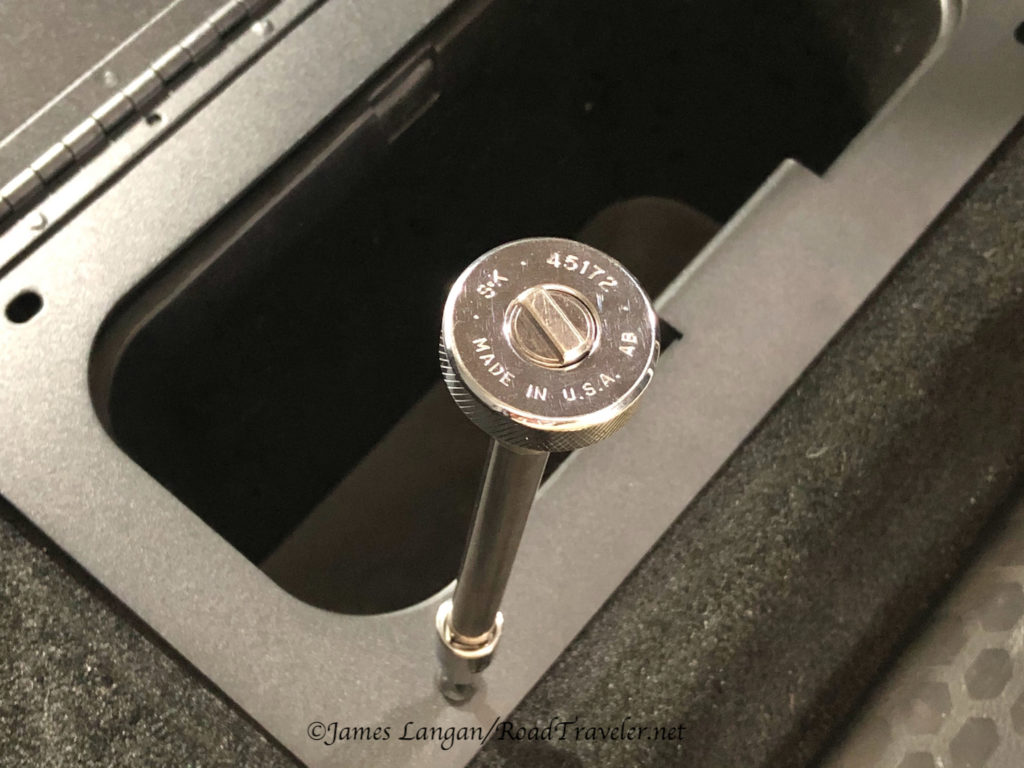
Made-In-USA Thumbwheel ratchet from SK is handy and helps prevent over-tightening.

There is a similar product that interested me, the Ram Underseat Locking Lid ($119), but I chose not to install it is because it’s only available for the driver’s side, not both sides under the rear bench seat. 

Tactical Lock-Box

In addition to the locking lids, Tuffy also provided a Tactical Lockbox, and large and small Portable Safes for my use and evaluation; I’ll detail the Lockbox first. There are several variations in Tuffy’s Tactical Lockbox lineup, the one I ordered is 35” wide, by 12” long, by 5” high, (# 327–350120050–067–100–01), and retails for $469. 

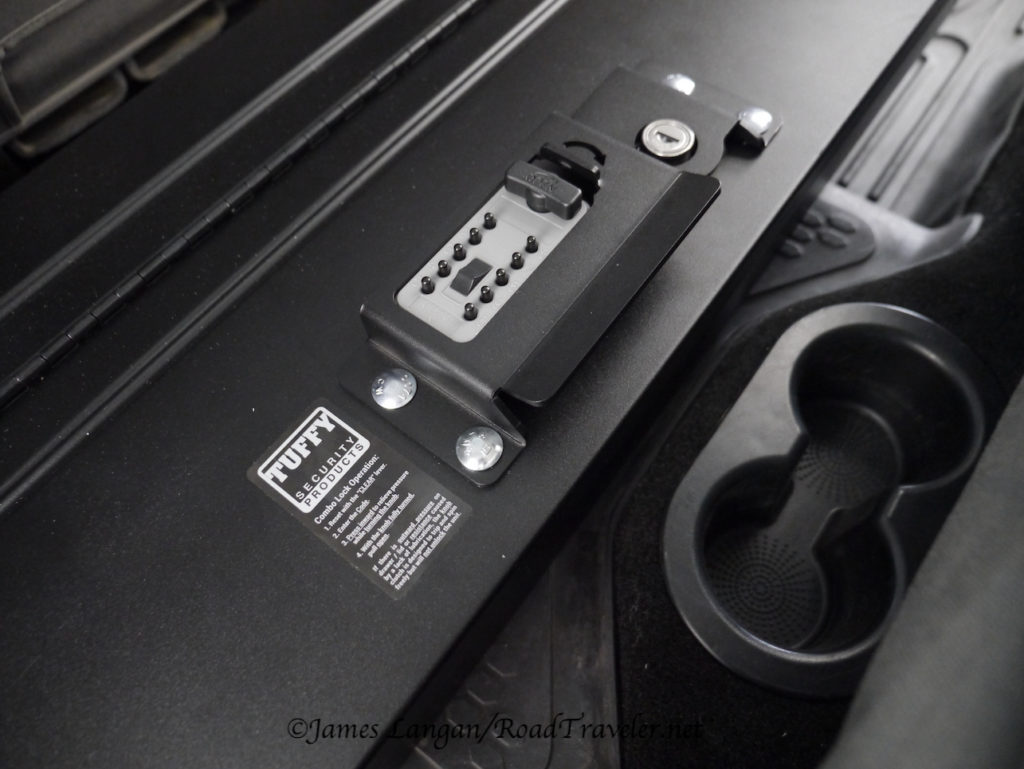
Their line of lockboxes were originally designed for the US government, for both high-security and portability of firearms and other valuable equipment. A patented, anti-twist, push button lock mechanism features a 10-tumbler, double-bitted security key with built-in weather seals. A user-changeable, combination push-button lock enables keyless entry. The box is designed to be secured with a padlock, and/or cable. 

Key and combination locks on this sturdy Tactical Lockbox.

Because I rarely carry passengers, the backseat and floor of my crew cab are used for general cargo, mostly lighter items that don’t need to be secured (UFOs—unsecured flying objects—are dangerous during collisions). The black box sitting on a black floor mat, covered by the black windbreaker I always have at hand, concealed by tinted windows, makes it essentially invisible unless someone has already made entry with evil intent, at which time they’d need to contend with the locks. 

Does this box make my seat look smaller?

 My intended use for this Tactical Lockbox is as one might expect, for larger weapons and tools while out in the field, when they’re not actively being carried. Of course the box can also prevent theft of expensive photography equipment and other valuables as needed when adventuring away from my vehicular base. 

Portable Safes

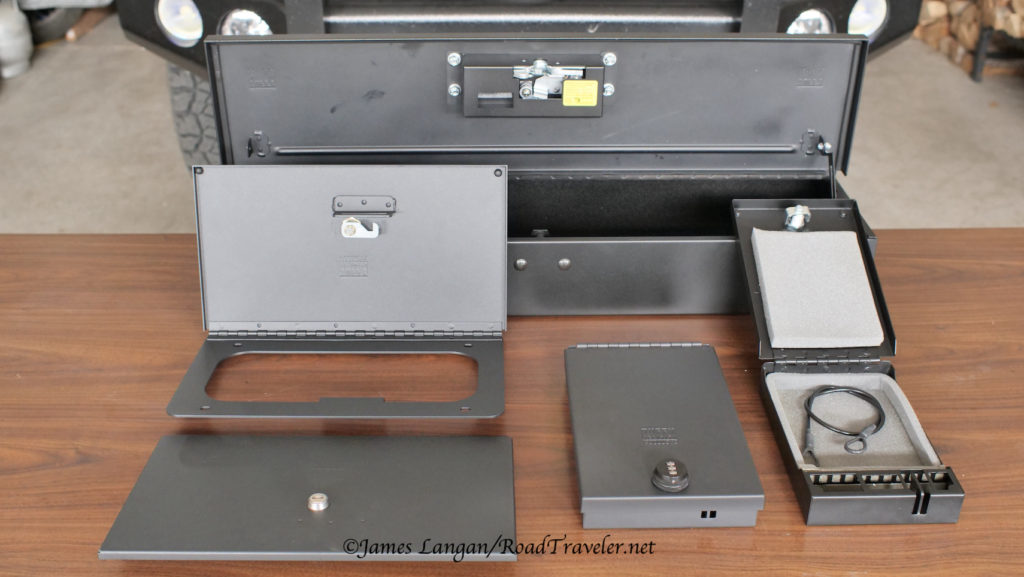
The final items are smaller and handy, two Universal Portable Safes, one that is marketed for full-size pistols ($99), and another for compact pistols ($79). Occasionally I will use these for firearms, however other small and slim valuables like wallets, passports and such can also be stowed inside. 

Keyless entry is provided by a three-digit, user-set combination lock. A 2-foot long, 2000-pound-tested (and coated) steel cable secures the safe to any sturdy mounting surface (bolted seat leg in my case). The inside is lined with low-density foam to protect the contents, while compression bumpers keep the lid vibration free when closed. 

Universal Pistol Safe for Full-Size on left, and Universal Pistol Safe for Compacts on the right.

The larger safe has been riding under my driver’s seat, completely out of sight, and rarely rattles, moves, or is irritating. These handy little boxes could be used other places too… like inside an RV, garage, or even inside a house, all one needs to do is tether the cable to something difficult to move. 

For years I’ve known about Tuffy Security Products, but failed to look closely at what they might have to fit my vehicles. Even though I’m late to the party, I’m glad I made the trip. 

Tell ‘em you read it on RoadTraveler.net! 

James Langan

Instagram/TruthSocial @RoadTraveler 

Resources: 

Tuffy Security Products: tuffyproducts.com, 800-348-8339 


Cummins Engine Plant, Columbus, Indiana

Oscar The Pack Mule, with Hallmark flatbed camper, at CMEP, the Cummins Midrange Engine Plant, during 100th Anniversary Celebrations.

I was in Columbus, Indiana, for the 100th anniversary of the Cummins Engine Company, and the Turbo Diesel Register Rallly.

It will take me a while to sort through all the content I created, but I’m sharing some iphone snaps here and on Instagram. (Heck, I still have material from Overland Expo West I have not finished sharing.)

Tell ‘em you saw it on RoadTraveler.net.

James Langan

Copyright James Langan/RoadTraveler. All Rights Reserved


Toyo Tires C/T Tracking Review

Toyo C/T 35×12.50R17 update.

The tries track straight and true on my built 2017 Ram 2500 Hallmark Camper project; even after a recent front suspension modification that yielded 2.75-inches of lift.

Excellent drivability is not just desirable, I demand it from my vehicles. If my rigs don’t drive well there may have been a change or failure during the build that needs correcting.

James Langan

Copyright James Langan/RoadTraveler All Rights Reserved

Resource: Toyo Tires


No-Spill Systems Compact oil drain plug


James Langan

Copyright James Langan/RoadTraveler All Rights Reserved

Resource: No-Spill™ Systems